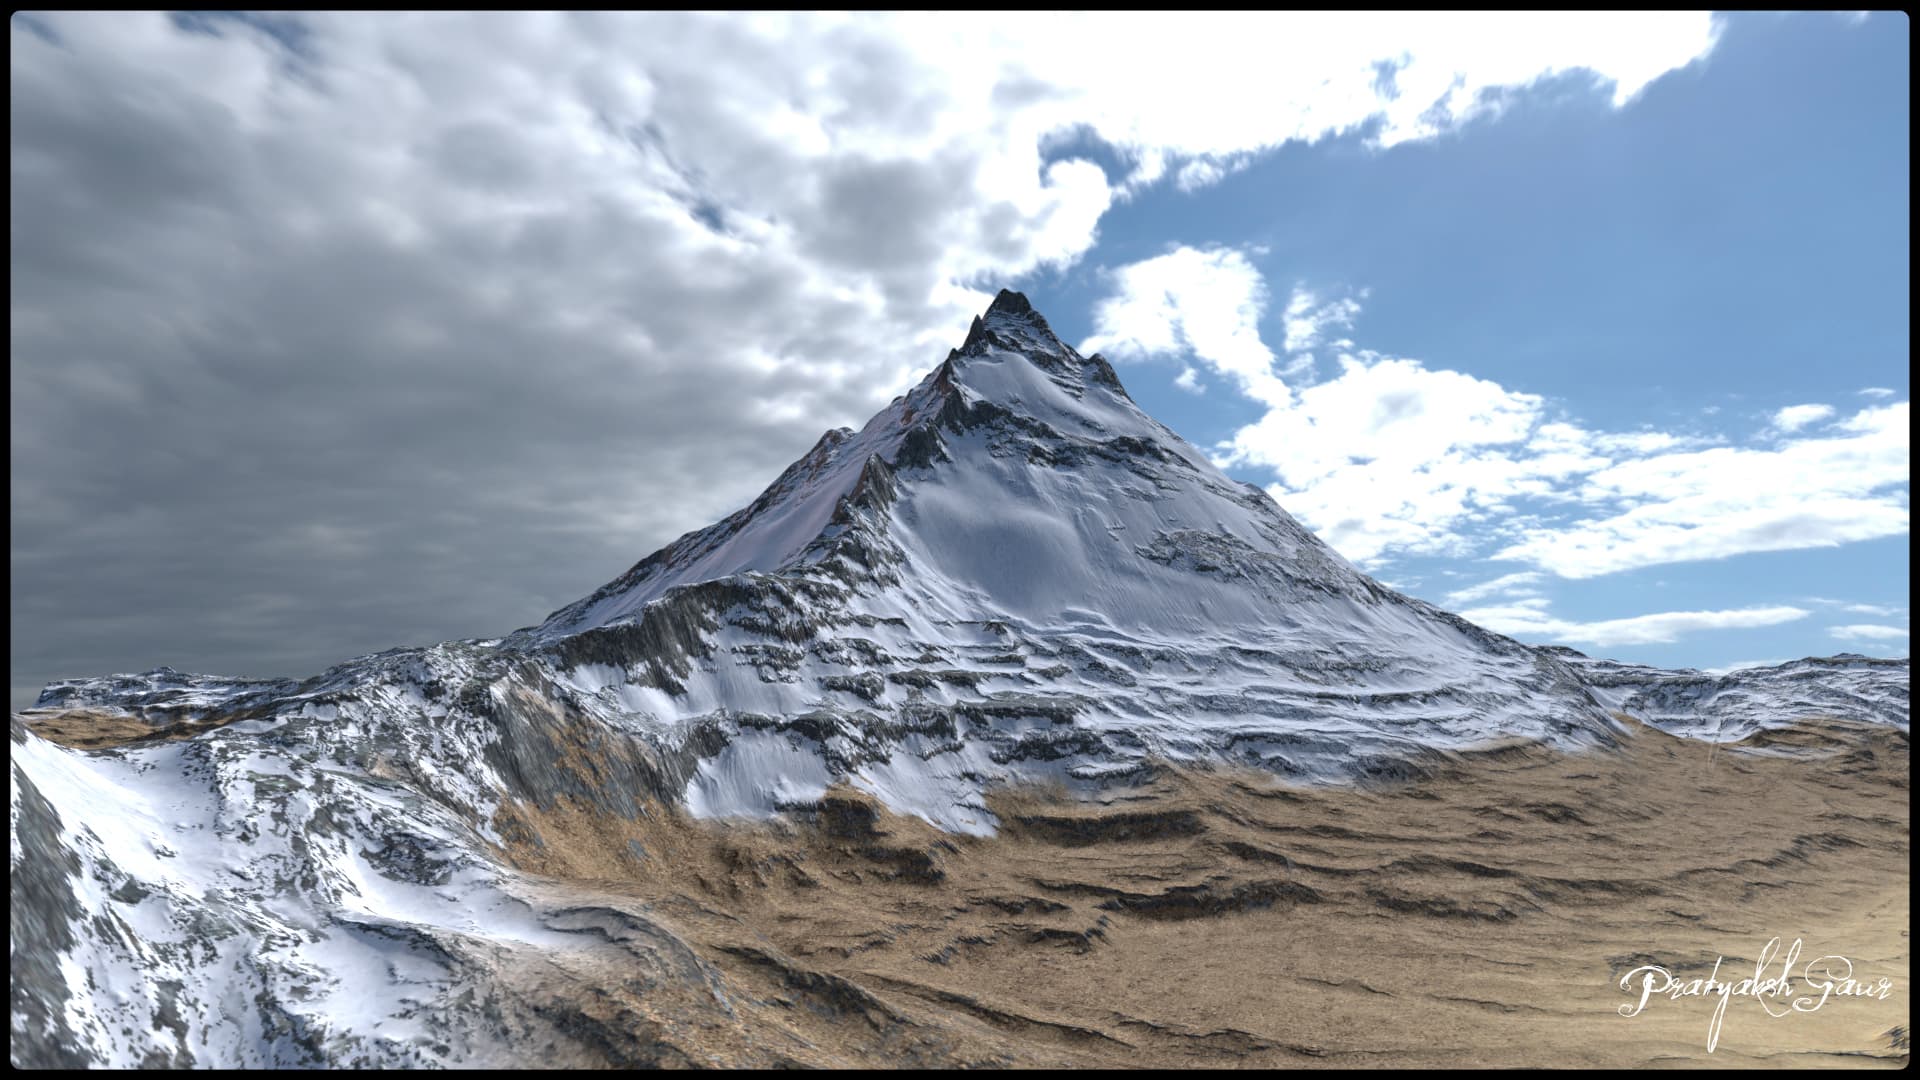
Since my last WIP post has been locked due to me abandoning the project, I have decided to make another! This time it is already finished though.
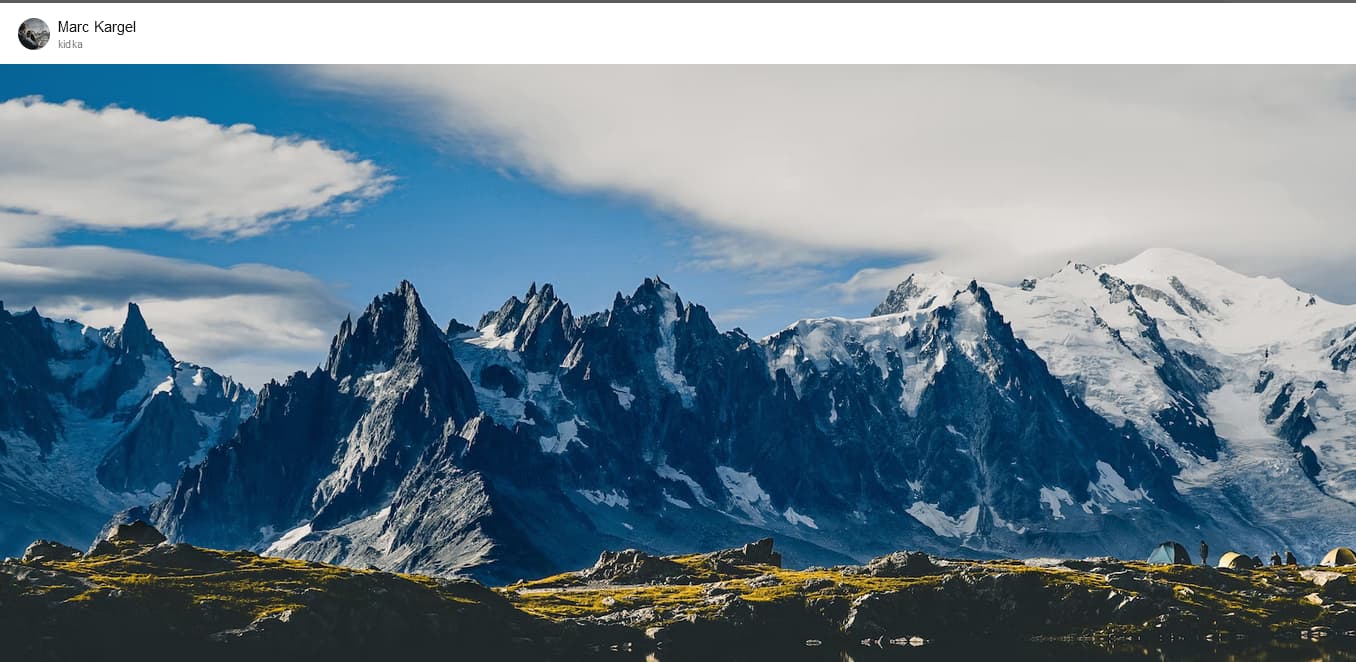
The inspiration this time was still the alps, more specificalle Mt Blanc.
I have kept the Workflow mostly the same but this time a bit more cleaner.
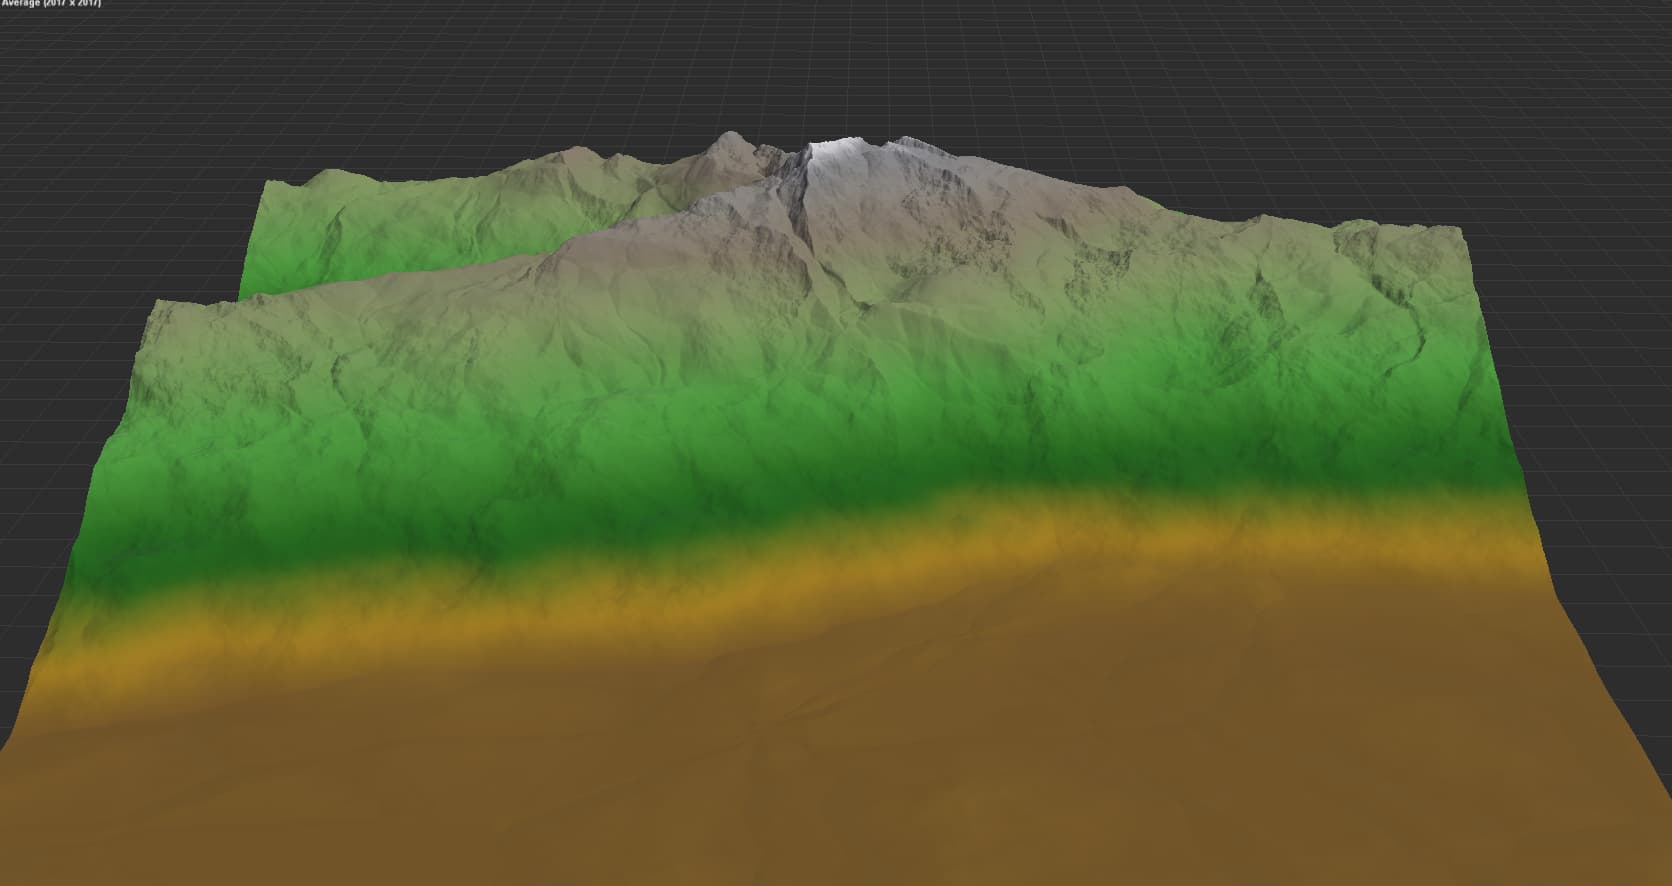
I started with creating the base shape of the mountain, roughned it up and distorted it to make it look not as perfectly roundish. After that I created some peaks with some voronoi devices and distorted them to look more natural.
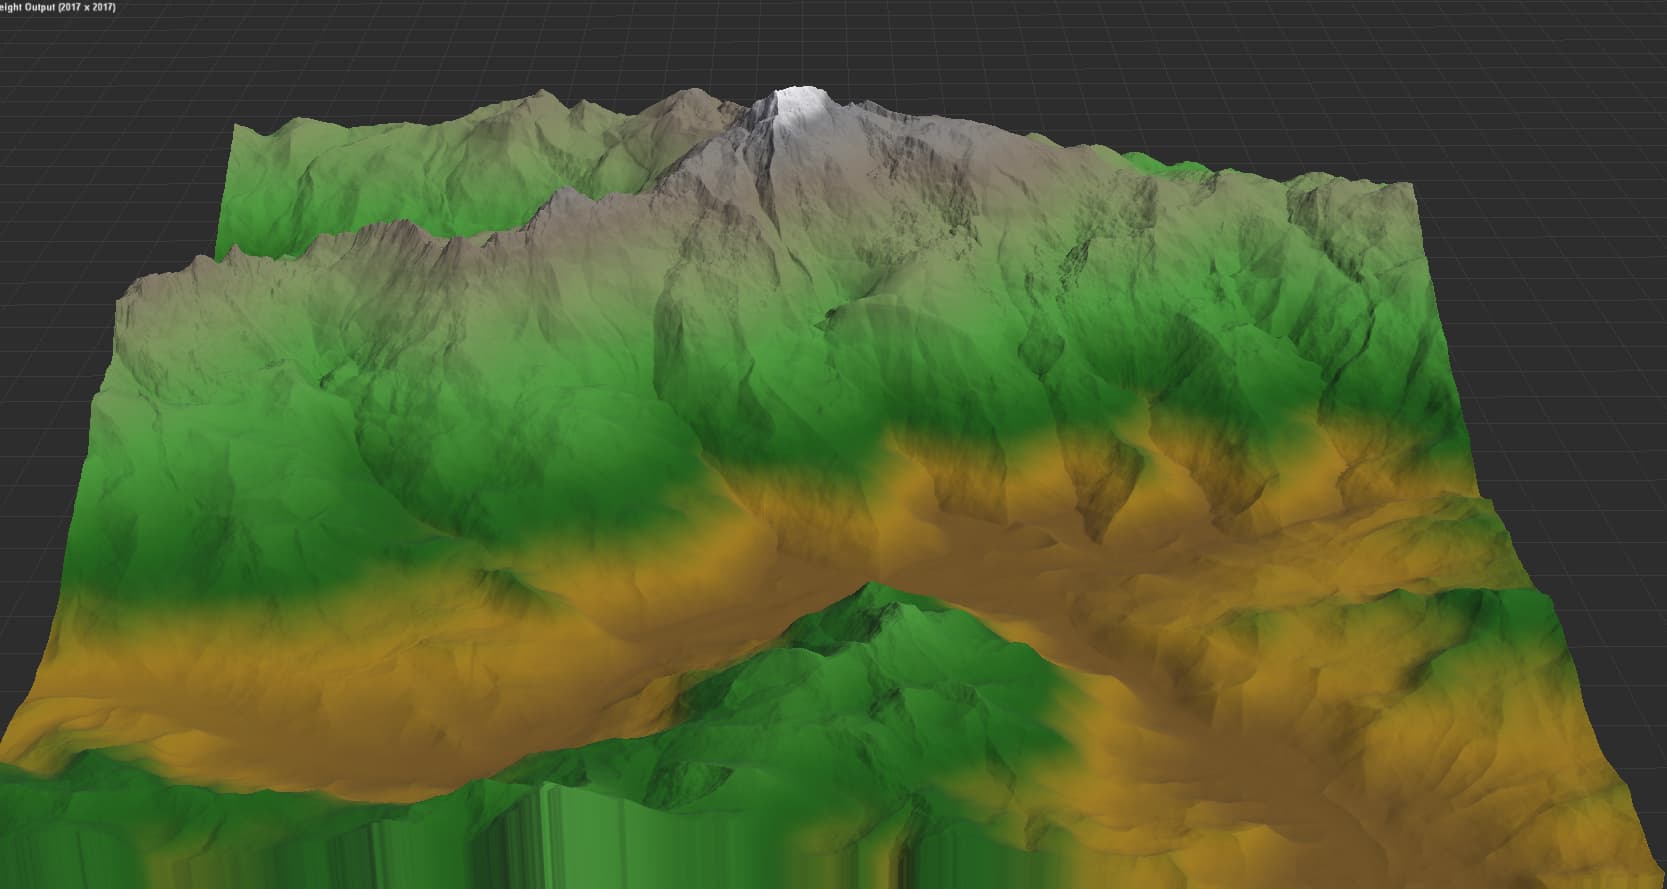
Then I used a create water device to get just a few tributaries by feeding high values from a select height into the precipitation input and used that information to carve out some very rough valley (forgot what the actual term form them is) to get that ridgey look for the mountains.
Next up was the other side of the Mountains and for that I basically used the same method as for step 1 except that I knew that this was the side of the camera in UE5 and didn´t need to be that detailed.
So, base shape → distortion → voronoi → distortion
Here, pretty much all I did was use some voronoi and distortion again, to get these spikey peaks on the left of the main mountain.
This is just a small detail, but I tried to recreate the peaks to the left of Mt Blanc.
This is the step where I tried to fix any issues caused by some flow restructure devices and other small little things here and there.
I then had to form the valley by simply elevating the lower parts of the land and subtracting a couple tributaries again and finishing it off with a river. I also added a bit of noise to the mostly flat parts of the valley just to make it a bit more interesting.
Afterwards I also ran a erosion device and some strata over the map, but its too simple to deserve a seperate step The only thing somewhat interesting is that I used a tributary mask for the erosion input.
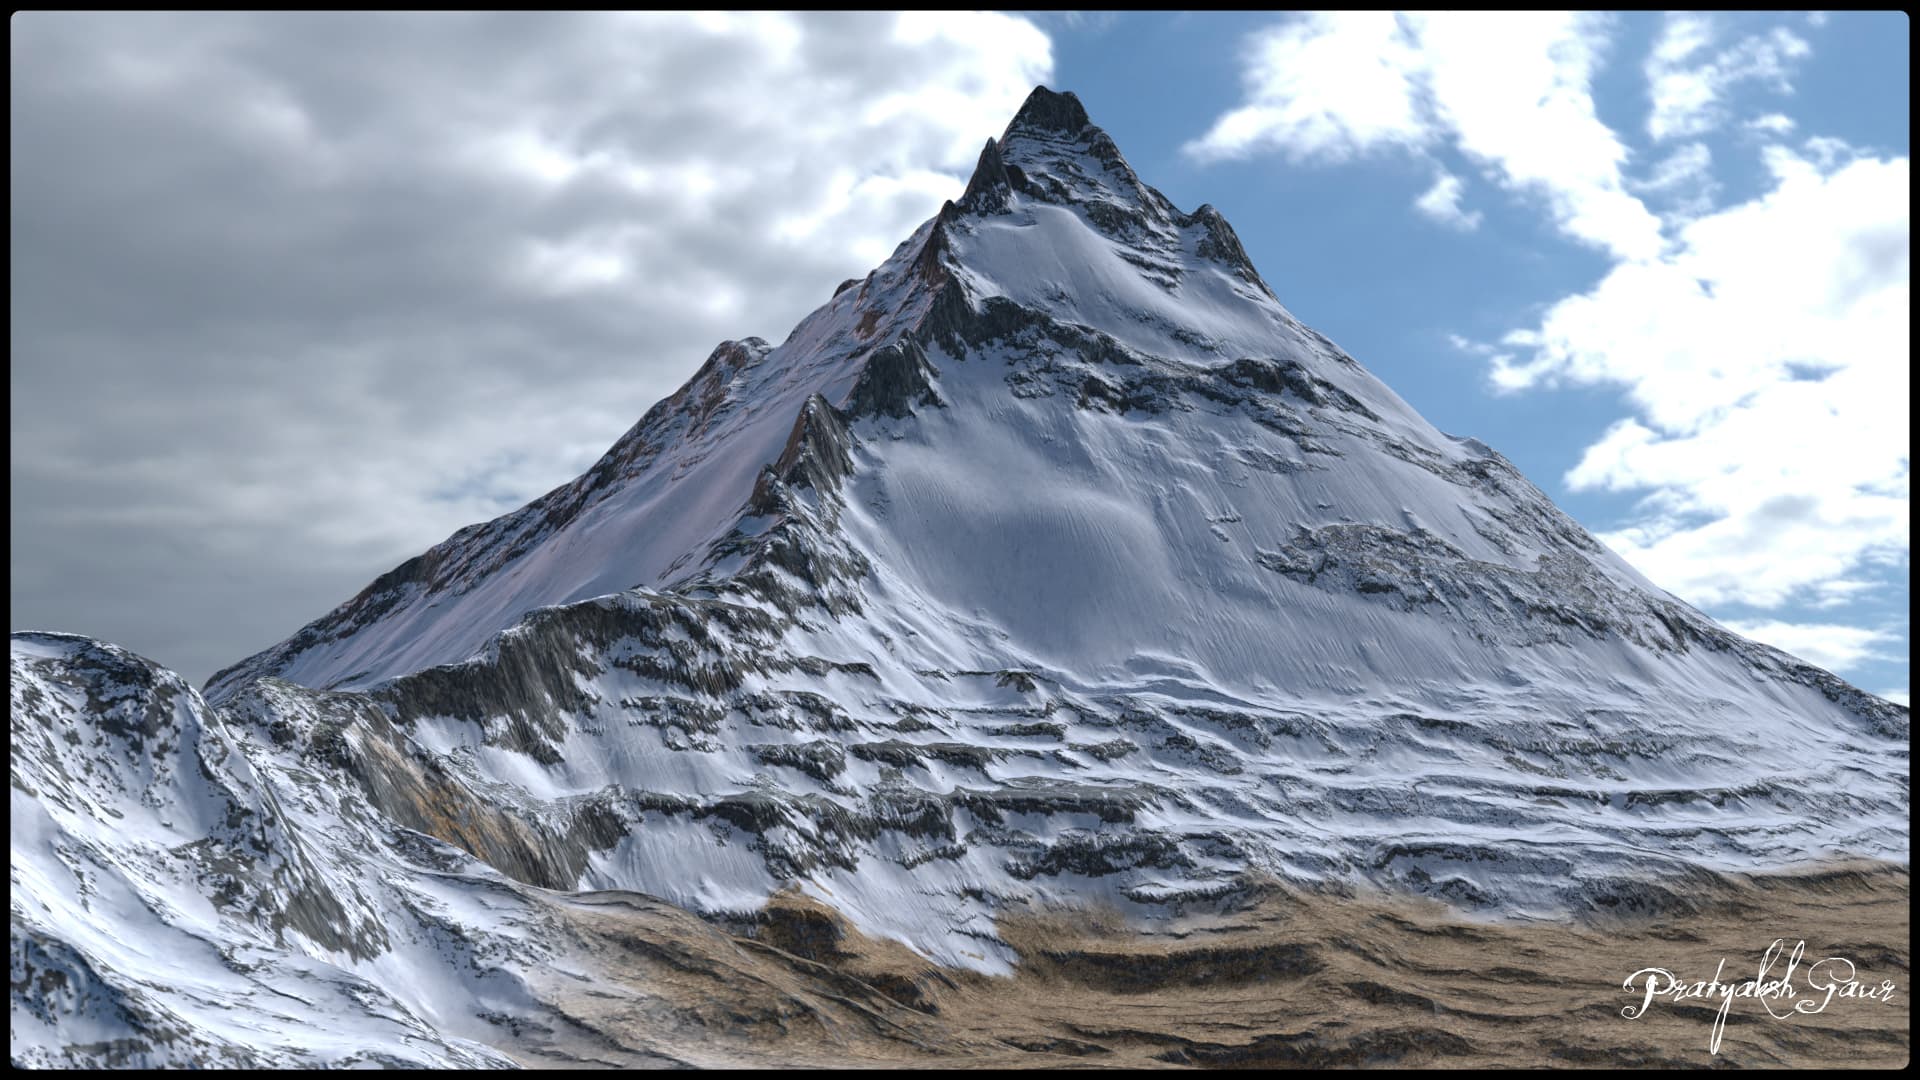
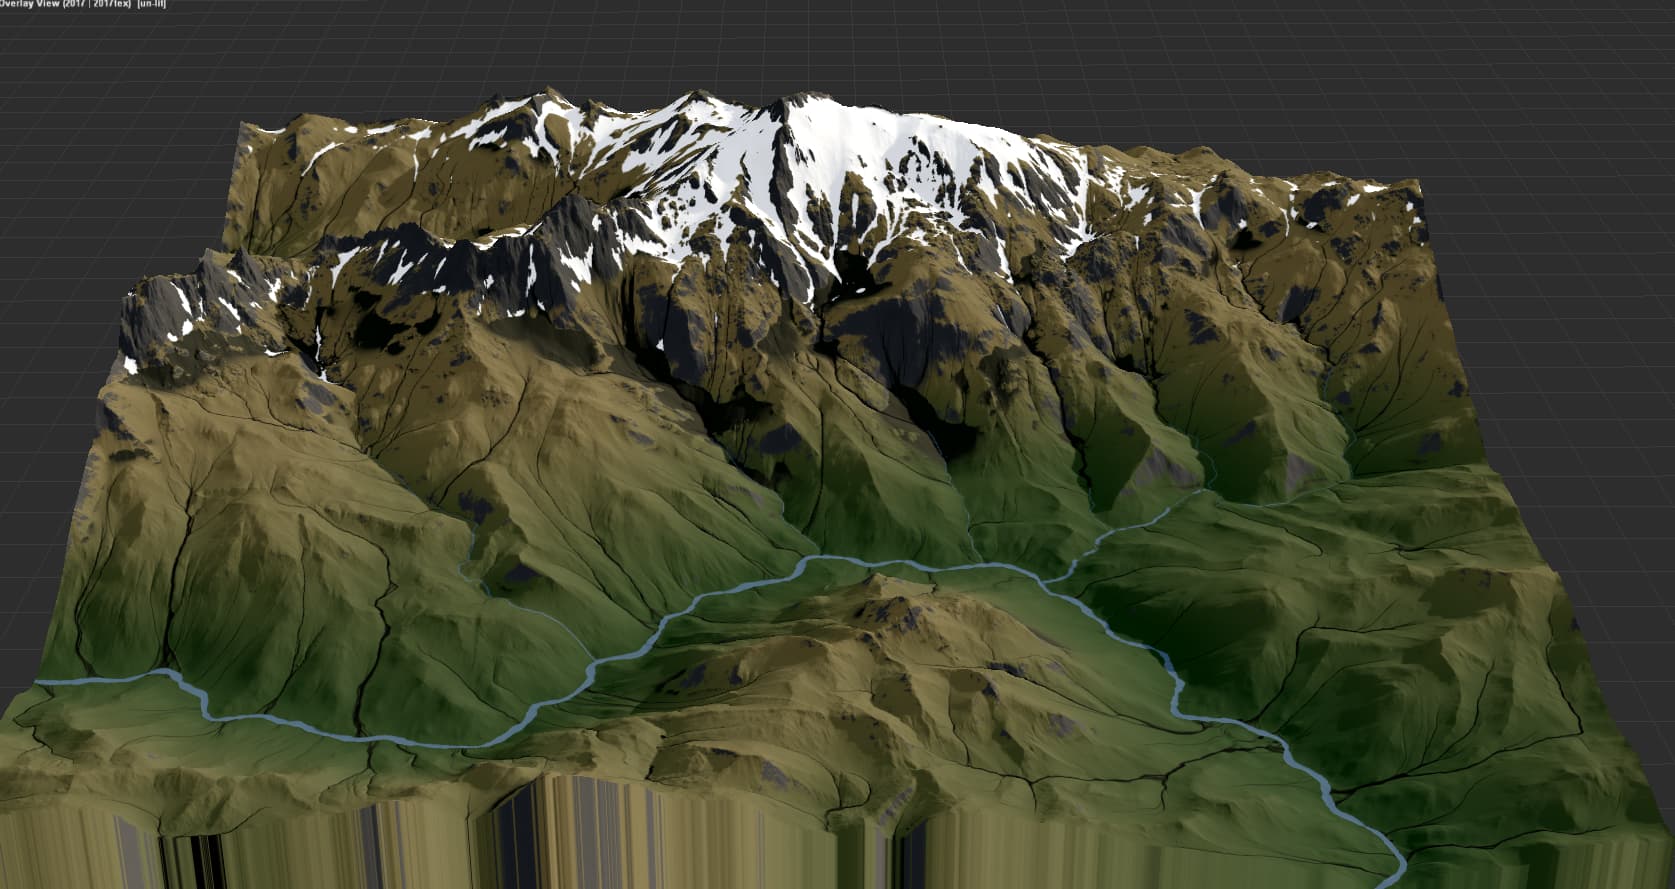
Here I began texturing the mountain to get an idea of what it will look like in the end. The process was pritty simple since it was just for an idea.
Basically I used HYLKS snowmelt device for the snow and used the previously generated masks to paint in the erosion flow and talus. I also added in the gradient for the grass.
From here on, everything is in engine and I will therefore keep it as simple as possible and without pictures.
I downloaded a couple Megascan textures and created a simple Landscape Material that blends with an angle. It also creates that gradient effect for the grass based on height. other than that, all the remaining textures were simply weight blended.
After the material, I also downloaded some Assets and imported the MAWI Coniferous Forest Pack trees.
I only used the trees because I wanted to create a biome mostly using Megascans.
For this part I used a plugin called ErrantBiomes which allows to create procedural biomes. Its inspired by the FarCry 5 GDC talk.
Since this was supposed to be a procedural Biome, it took me quite a bit to figure out how to do something like that. It also cost me a few unsaved crashes…
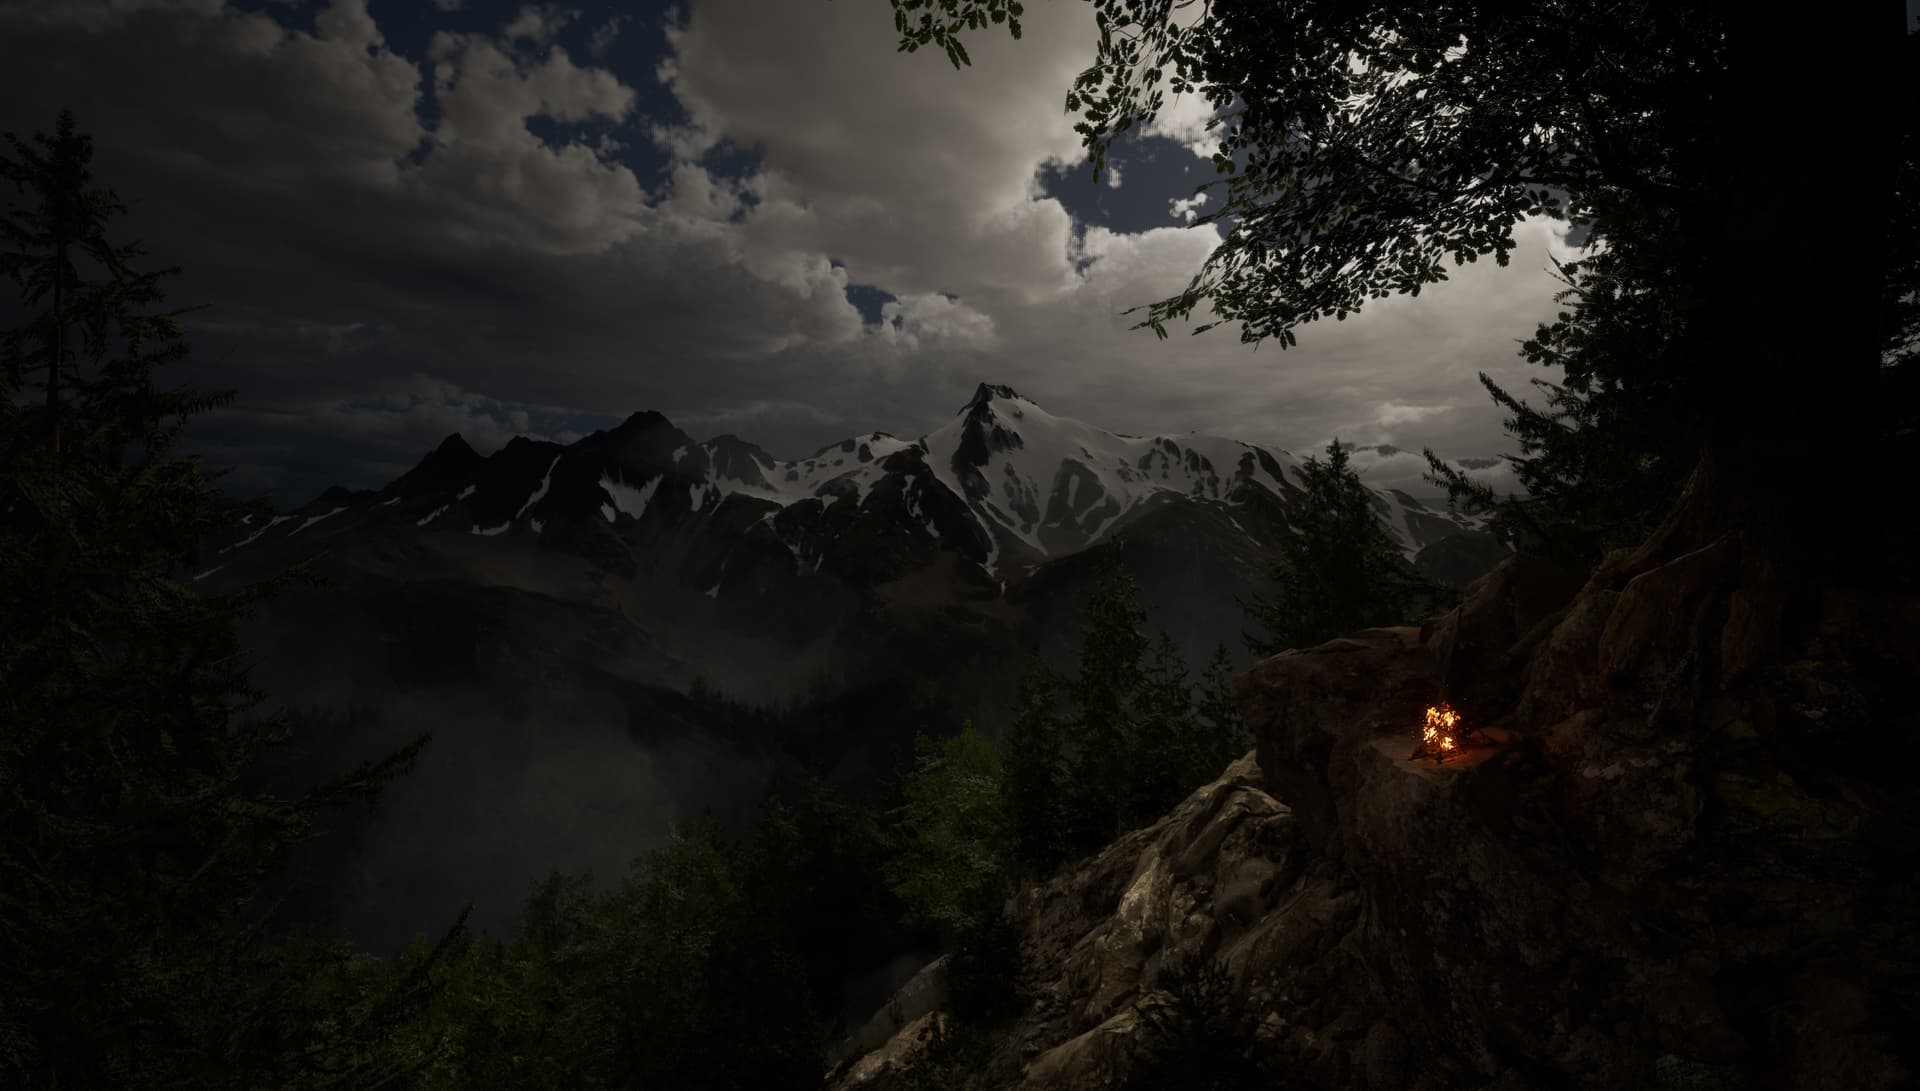
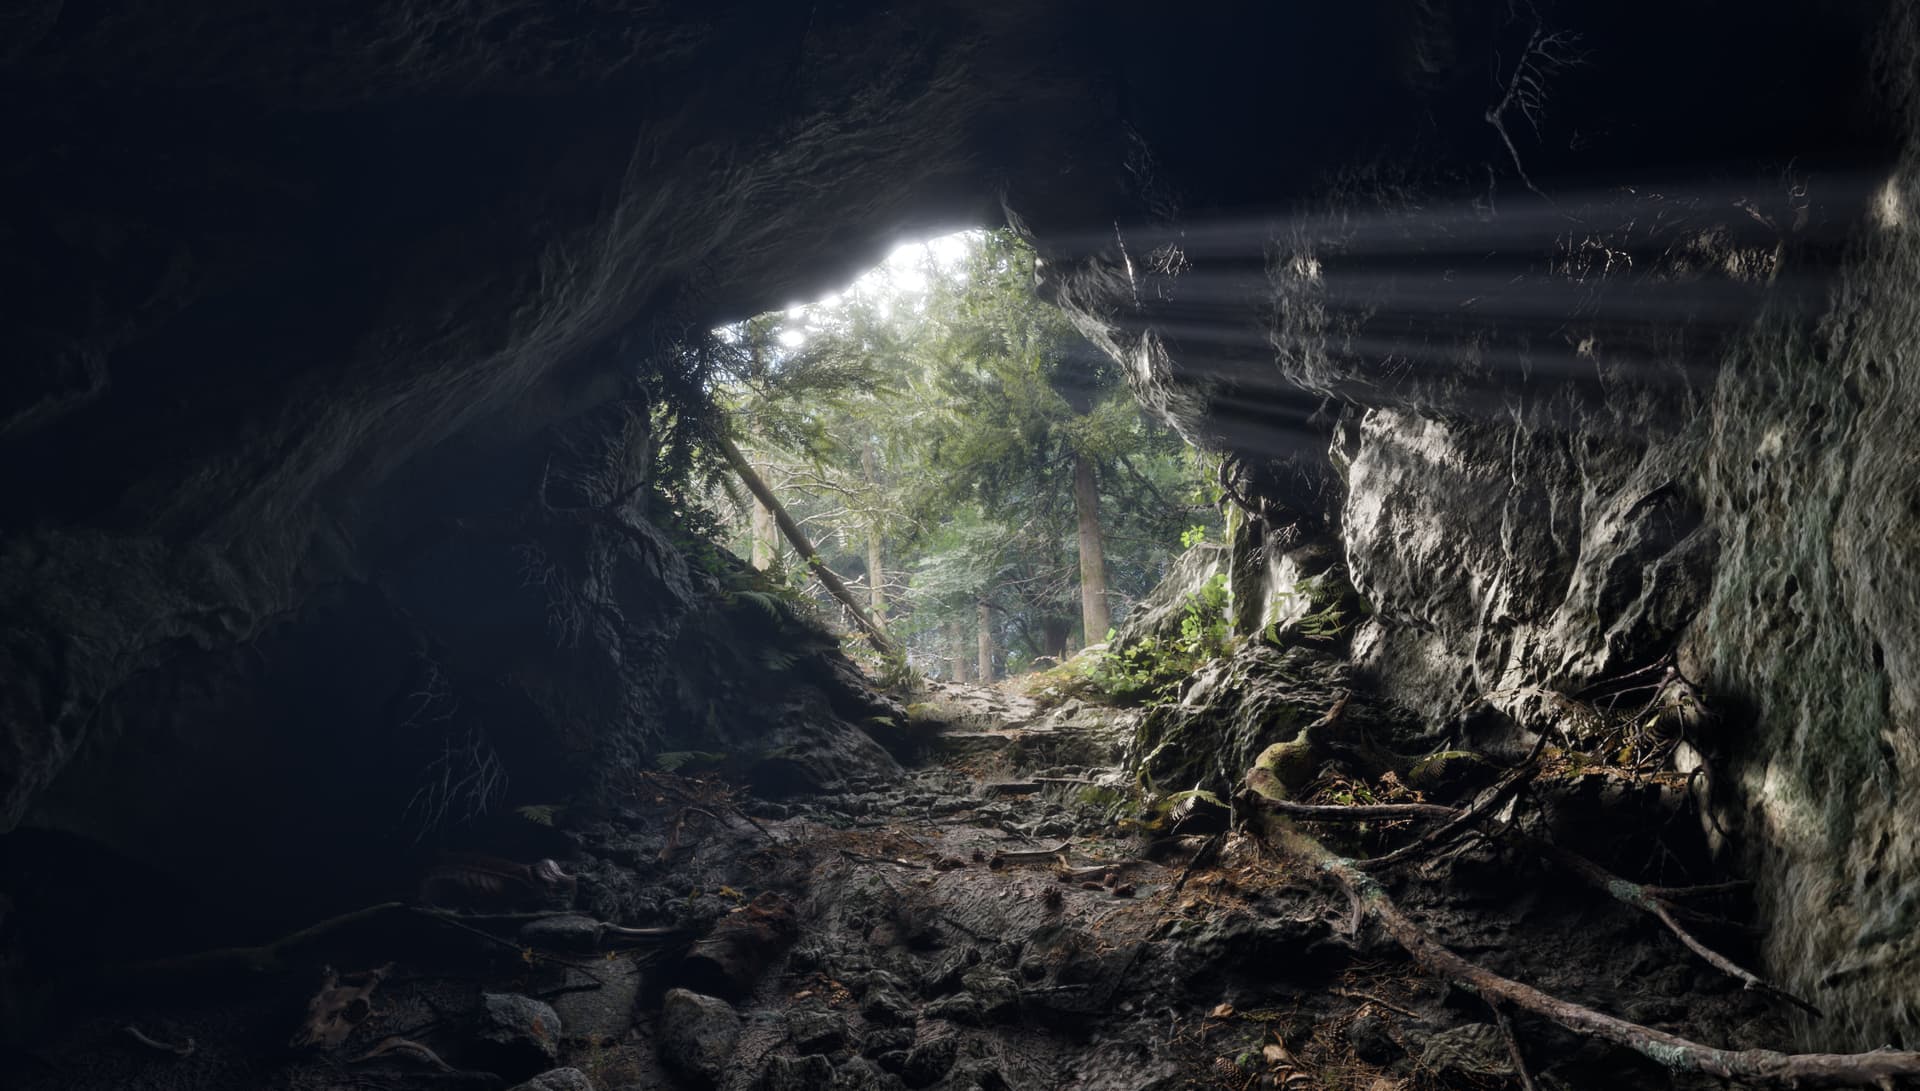
Then the only thing left were the scenes for the camera shots and the lighting.
Im definitely not a lighting artist, nor am I trying to be one (I still want to get better at it and appreciate any feedback ).
Sorry for the long post, but I hope this may be helpful to some. I would allso really appreciate a bit of feedback and some tips!
If you want me to go more into detail I can do so either in the comments or edit the post afterwards.
@Patrick Beautiful work man! I see that you have a tighter cluster of peaks at the center, I guess that’s deliberate? Looks awesome!
I’d have gone with a wider sweep between those peaks, since whatever camera you use in Unreal is going to have a wider field of view, scrunching those peaks closer. But I see that it works well for your use case.
As I said somewhere on your previous posts, really appreciate your long form documentation of your process! Keep em coming!
Yes, the peaks in the middle were intentional. You can see something like that to the left of the mt blanc. But youre also right, i should have made them a bit wider and deeper. Those peaks not only look like you said in ue but also in wm.
I like this type of documentation because i can always come back to it and have a look what i did in the past.
Btw sorry for the late reply, i completely forgot to hit send…
Those formations to the left is called an arête, and you’re somewhat on the right track! I tried doing an arete, or something similar back in 2014. They are indeed very tricky to do without breaking the natural flow of the rest of the terrain, especially if you’re going for one big monolithic range. I ended up going for an unrealistic look, to ease the texturing complexity of the final asset.
Couldn’t find the original forum thread, but here’s my attempt, from 2014 I think:
World machine screenshots used to be in the “.BMP” format back then, so I can’t upload them here. Sharper peaks are more visible in those, the renders here are all optimized to render in minutes. I’ll try uploading the wm screenshots again later when I’m awake enough to convert them lol!
@WFab Sorry for the late response, didnt see the notification.
Yes, thats exactly what i was trying to do! Thank you for the name i never knew what they were called.
I was trying my best to achieve something similar to what you did but i think the resolution was a bit too low to get these sharp peaks and they always ended up looking way too spikey.
I think i will try them again in the future, do you mind sharing what you did to get these nice spikes?
@Patrick TBH nine years is a long time to remember specifics, but I can make an educated guess.
I probably made two versions of the base shape of the mountain, one smooth rocky, and one sharp spikey. Then I combined both using “max” combination method, then did some limited terracing, additional distorted noise patches, and finally some erosion and snow. For the spikes I would have used the displacement device to do some directional distortion on the same base shape I used on the smooth mountain. This is the method I used frequently back then. Nowadays my work is more directed by water, much more coherent to iterate on.
Hi @Patrick, this is a real cool breakdown of the process! If you would be so kind I’d love to know more specifics about you used the create water node in your second step to get those cool ridge shapes in the mountain, I have been trying to do a similar thing without much success.
It’s actually pretty simple. Just take your heightmap, use a flow restructure into a create water. Then from the flow restructure, use a select height and just select the top 5-10 ish % of your heightmap and feed that into the precipitation input of the create water device. Then set the headwater location to something high, just before the tributaries start splitting again at the top.
I hope that wasnt too confusing. If you want to i can send a screenshot once i have started up wm again
Oh very cool, thank you so much for sharing this so quickly! Turns out I was doing something pretty similar, cool to know I was on the right track. That’s a really cool technique! Thanks again for your time.


 The only thing somewhat interesting is that I used a tributary mask for the erosion input.
 ).
).