I am creating a map mod for a game, Crusader Kings 3, to post on their community plaza. One of the requirements for this map is a heightmap of the area I wish to create. I already have and SVG file of the outline for the continents, as well as filled-in shapes for mountain ranges. The SVG files all use straight lines. My problem is how to put these SVG files into WM terrain generator. I am a brand new user of WM, so I would really prefer either step-by-step advice, or a link to any videos the community has made would also be appreciated! Also, should you reply with the former, be prepared for questions. A lot of them. I know I am asking for much, but hopefully after this project, working with this program will be a lot easier in the long run. Thanks for any and all help! Any specifications will also be further provided as needed.
I may be posting further questions about this project (ig. about river maps, etc.) as well.
I’m having a bit of trouble understanding your questions. Do you simply want to import the SVG file as an outline for you to work with, as an overlay so you can trace the terrain in World Machine?
If so, here is your step by step guide:
Create a shape in the SVG format and save the file somewhere on your computer:
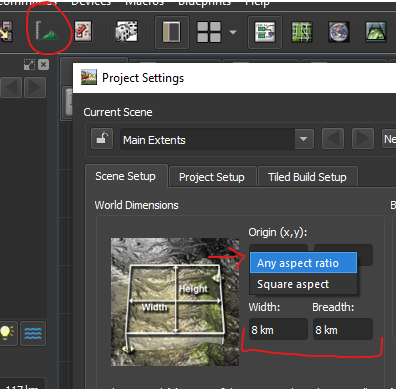
As you can see, I’ve put no stroke on the shape, that is important, because otherwise WM will interpret the stroke as another path, leaving you with multiple paths you will have to manually remove afterwards. It is helpful to get the scaling correct. So, if you are creating a 8Km by 8Km world, it is helpful to create an 80 by 80 pixel/point sized SVG, so you can easily scale it up to the 8Km by 8Km you want in WM.
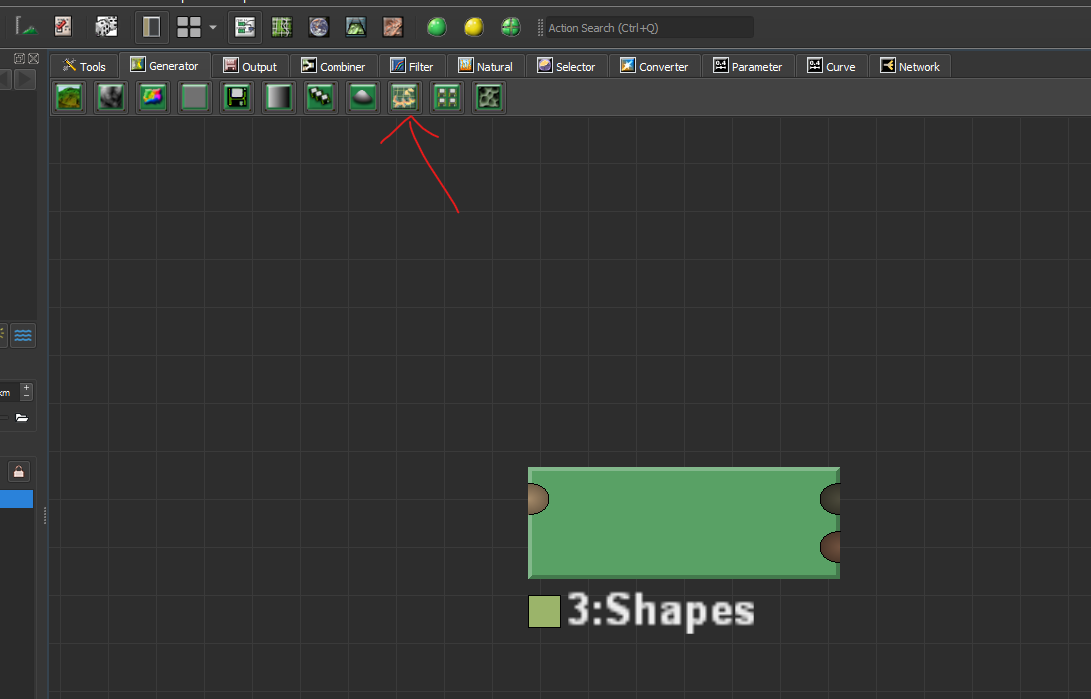
Select the Shapes device by clicking on it and then either double click on it, click on the Layout View icon or press the F6 key, to enter the Layout View:
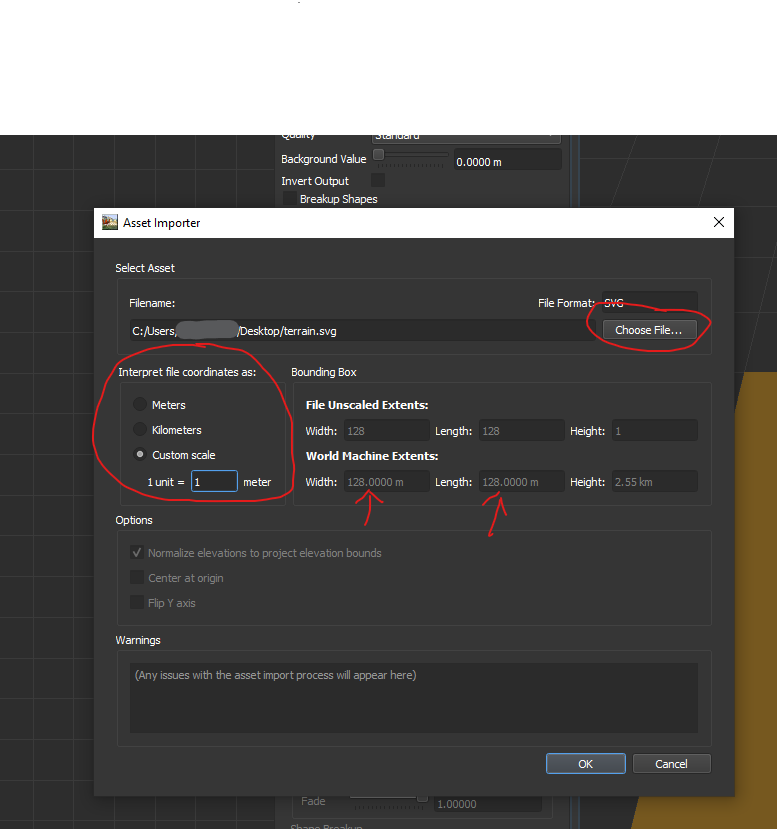
Make sure you set the scale to the appropriate size. However, if you forget to do this, don’t worry, you can always rescale the shape within the Layout View.
Click on OK and your shape will be imported. Now, it will be imported outside of your world. You must select it and drag it into the brown box (press T to change the location, press S to scale the shape, right mouse click to leave the Transform or Scale modes.). Now you can edit the shape just like any other shape created in WM itself.
I hope this helps. I’ve found an issue with the importer that it won’t really accept all paths (see image below). This could be because of my altered/custom SVG export settings I use for web development, but if your shape is imported but won’t create any terrain, be sure to tell so, then we’ll have to report the bug.
This looks like it’s just what I need! I’ll have to try it out after my lectures today. As for your last comment, about the shape not filling in terrain, I have read on these forums here and there, that the SVG file can’t have curve data, ie. it must be made entirely of straight line segments. I’m by no means an expert, but that’s my first thought.
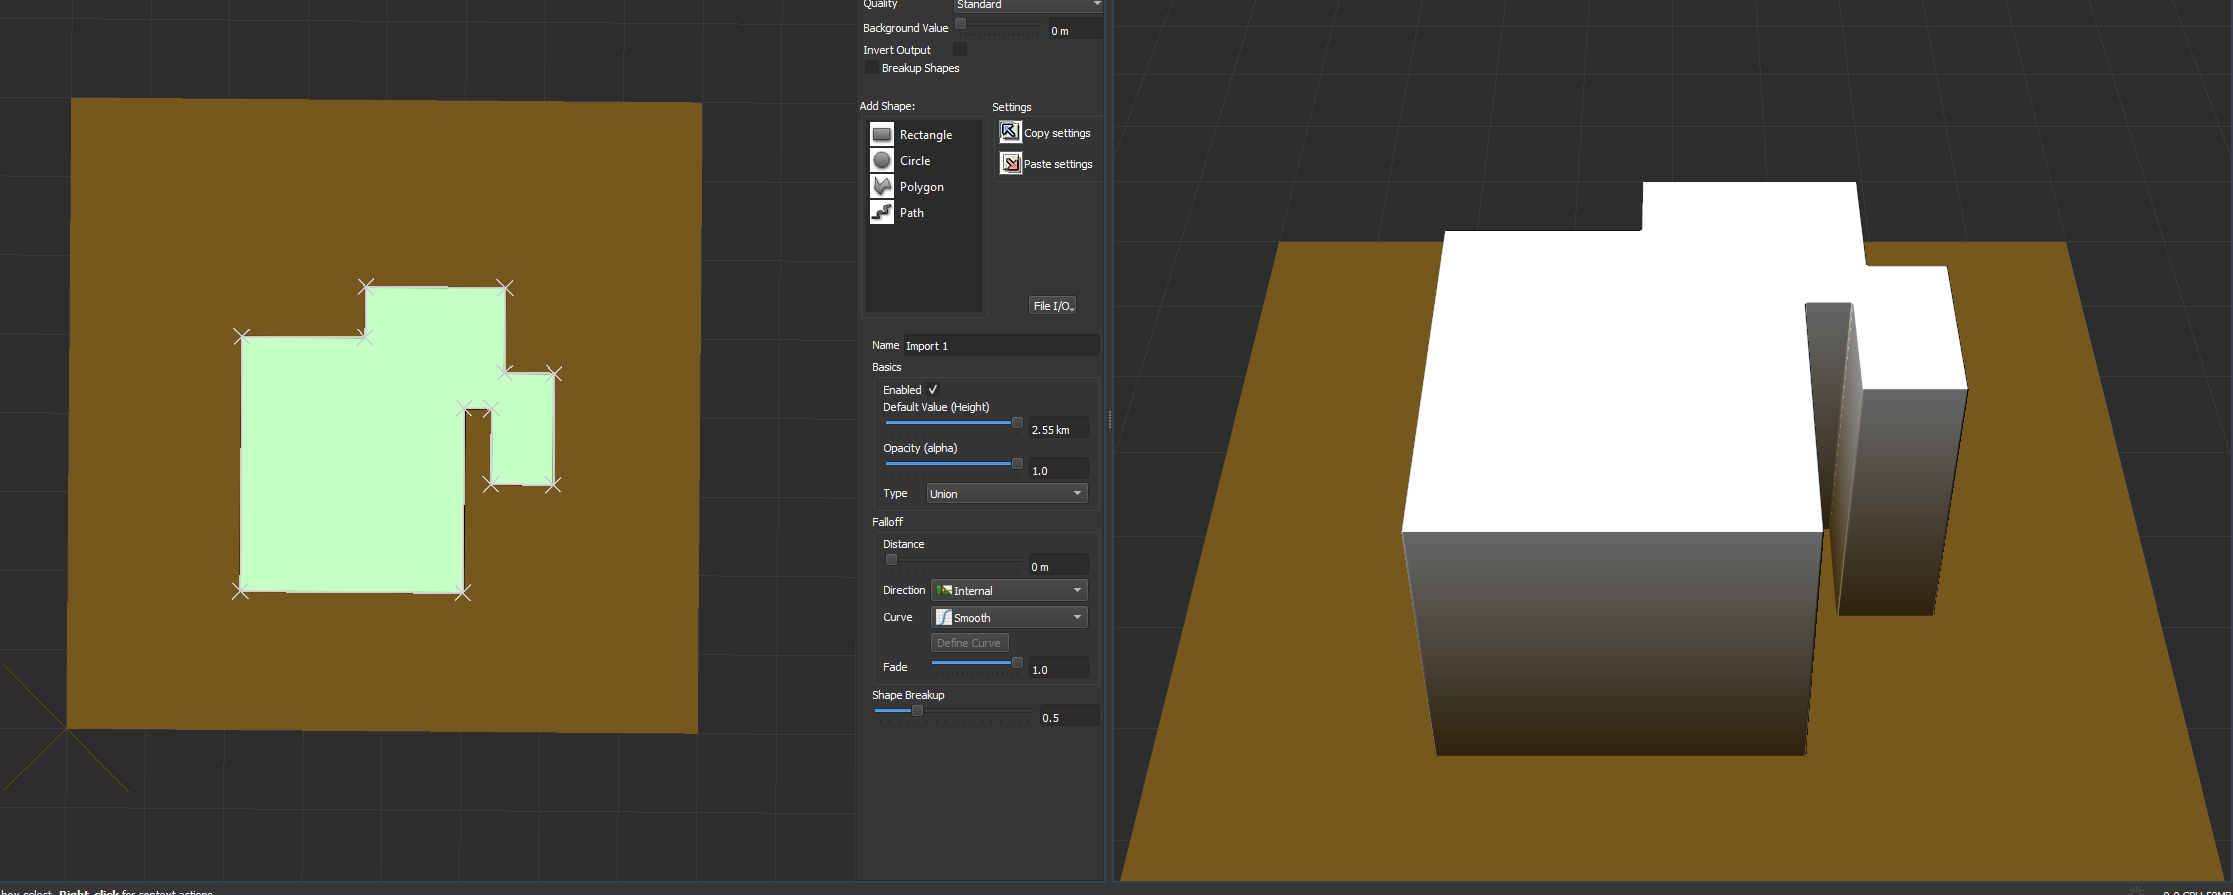
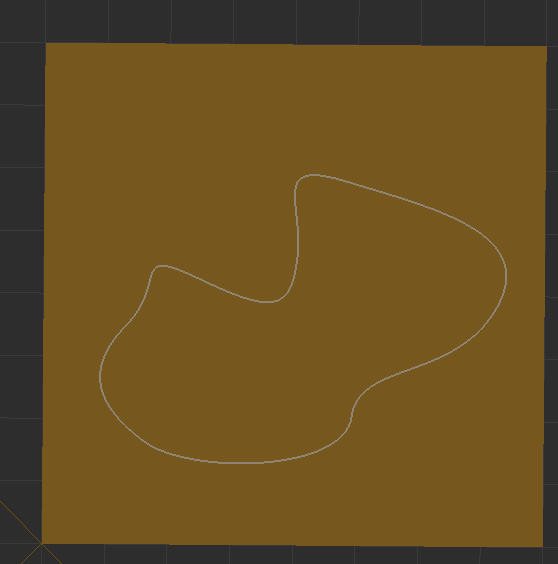
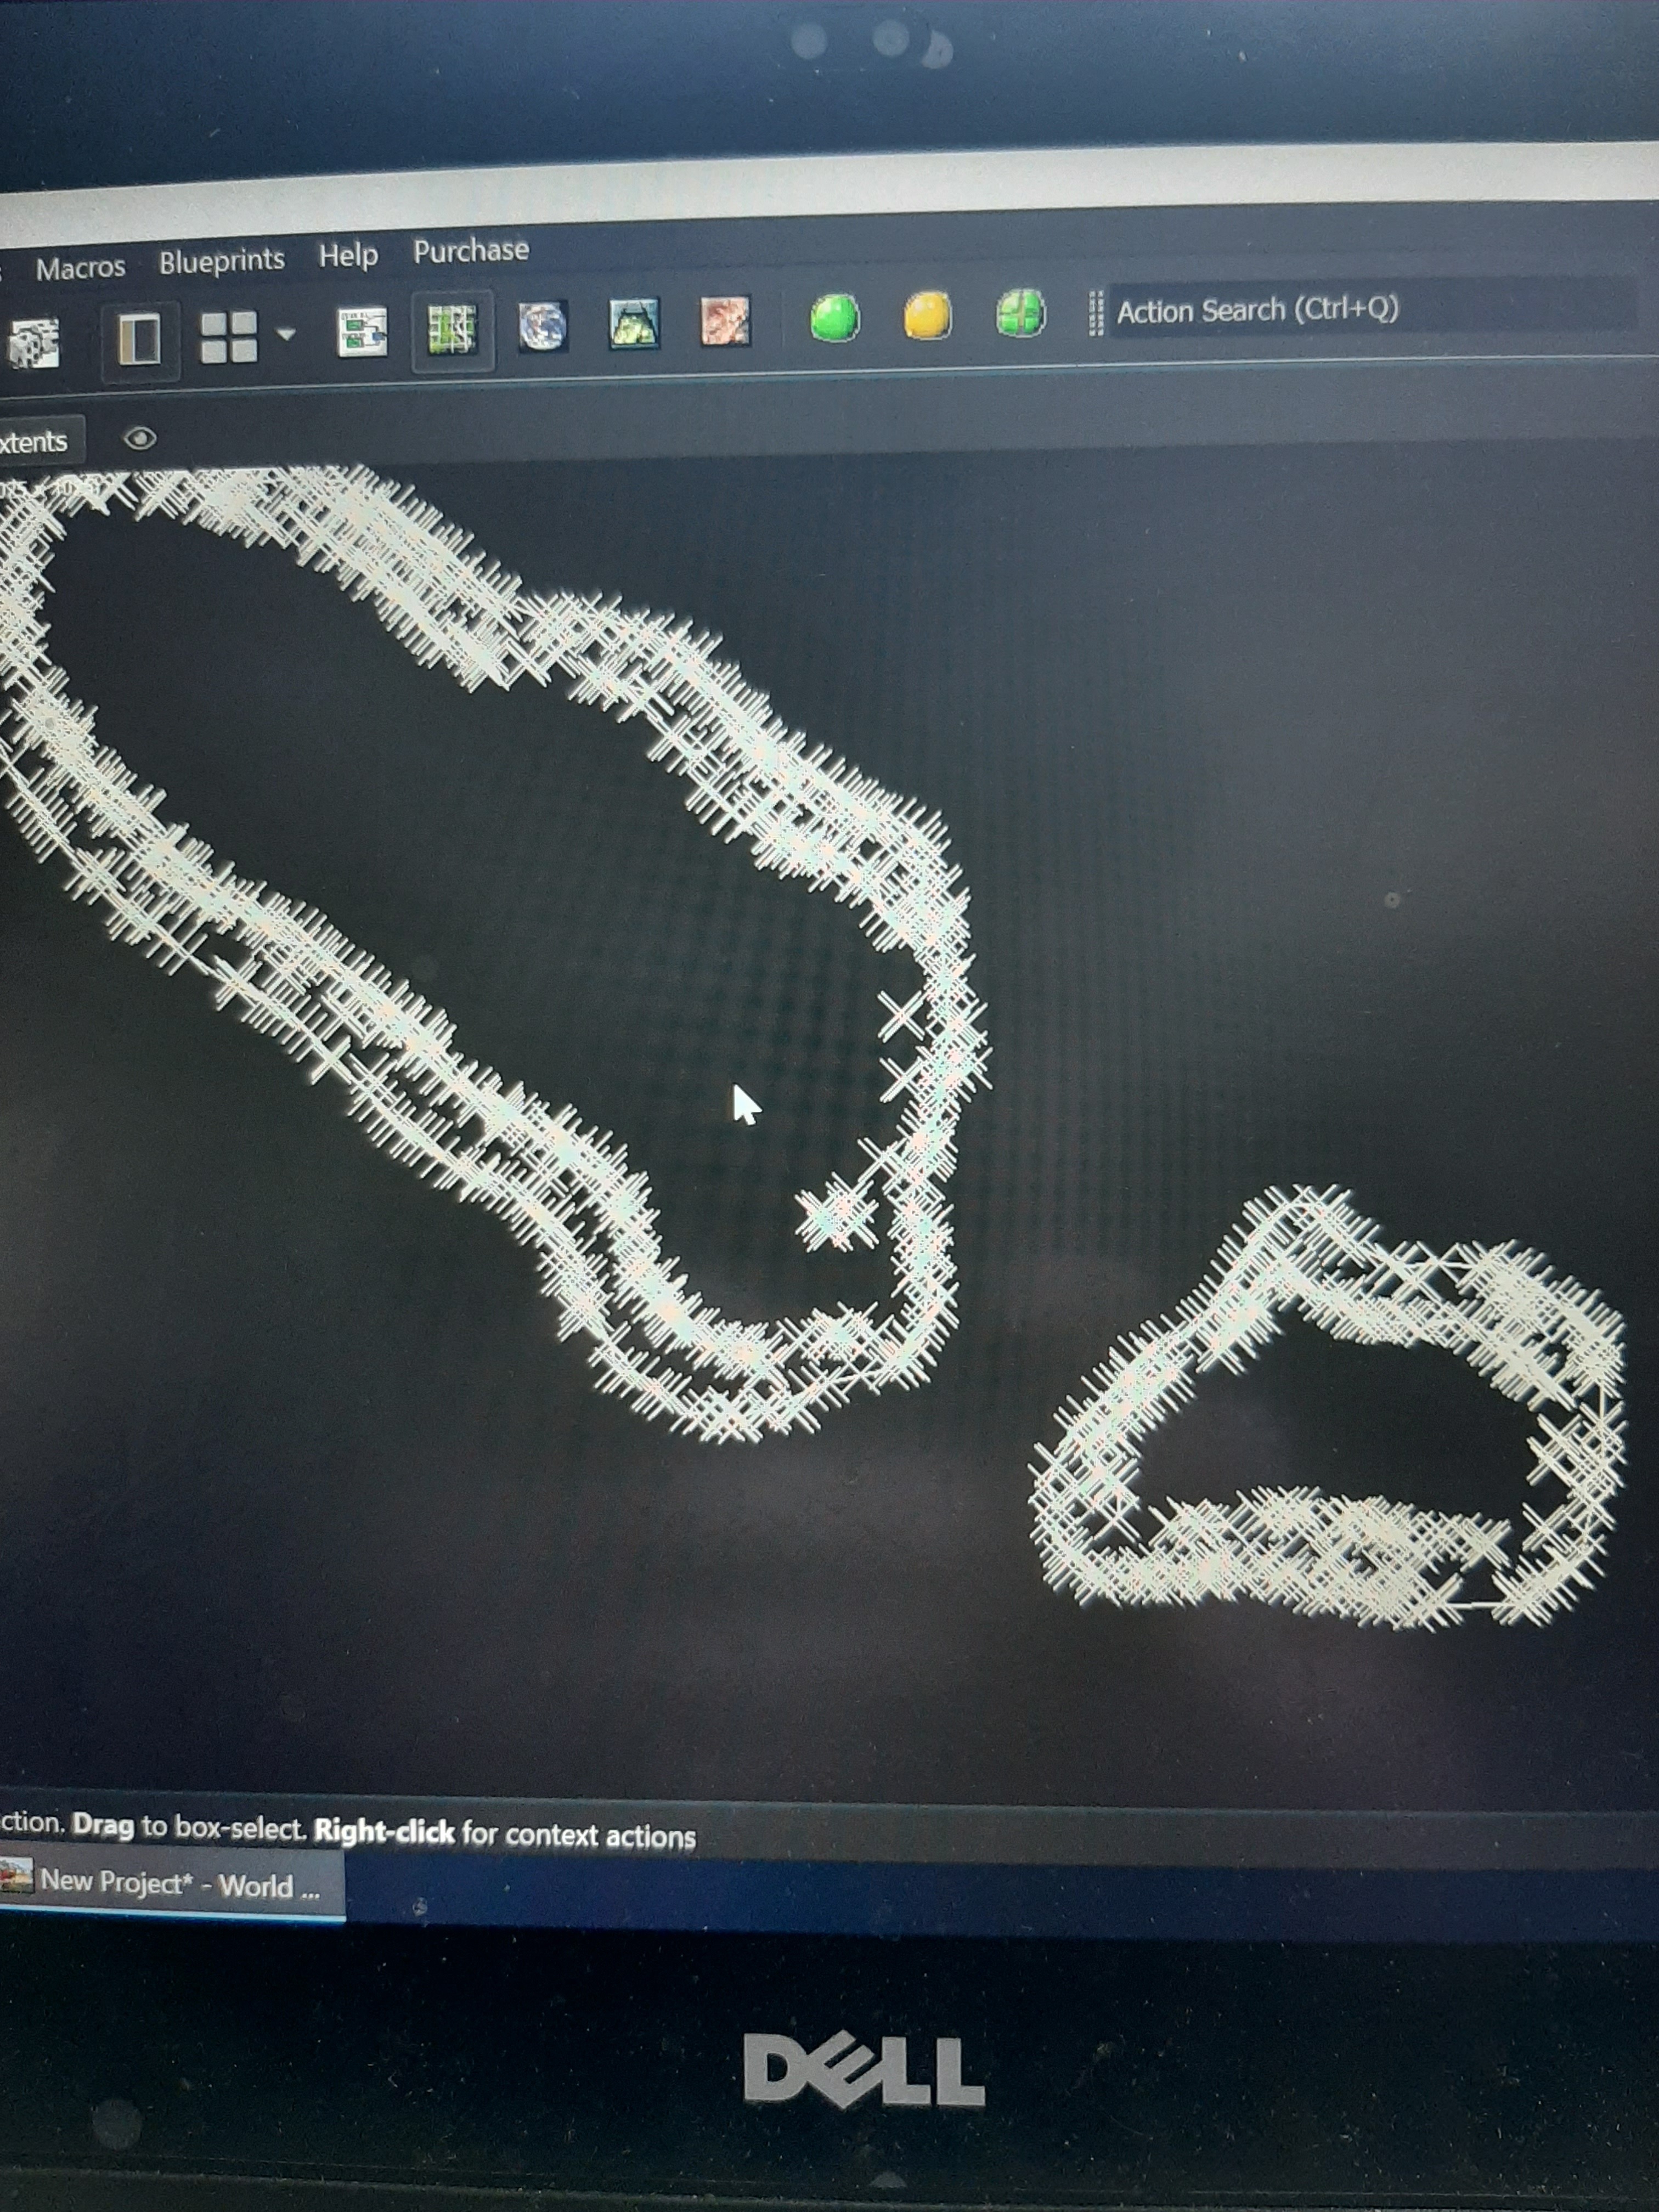
So I have tried to import the files for both my coastal outline was well as my mountain ranges. The coast had some issues in that the outlines themselves became the shapes in svg format, but that’s an easy fix. The mountains are, however, proper polylgonal shapes but still dont seem to generate terrain, nor can i even seem to select them to move properly(see below).
It looks like a lot, but these shape are all completely filled, according to the svg file. They don’t seem to translate into WM well though, as they only appear as lines and can’t be moved as shapes. Any ideas?
That explains a lot, I do not use SVG files so I’m not really experienced either
You seem to be able to select them in the image, have you tried pressing T to move them around after selecting? Because it appears the paths are not within your Extent’s boundaries (they are not in the brown square). Could you try moving them into the brown area? If this is not possible, could you maybe upload the SVG files so I can have a go at it?
So your initial diagnostic was correct, I forgot to press T. The shapes, however still doesn’t seem to form any terrain when placed in the extent boundaries.
I have fixed the file for the coast map, and the same issue arose. I’ll double check the mountains file, then send it in a new reply (only 1 imbed per post) if you want to take a look! On a slightly different note, is there a way to modify the actual exent boundary to better fit my map (ie shape it to the rectangular region I have now)?
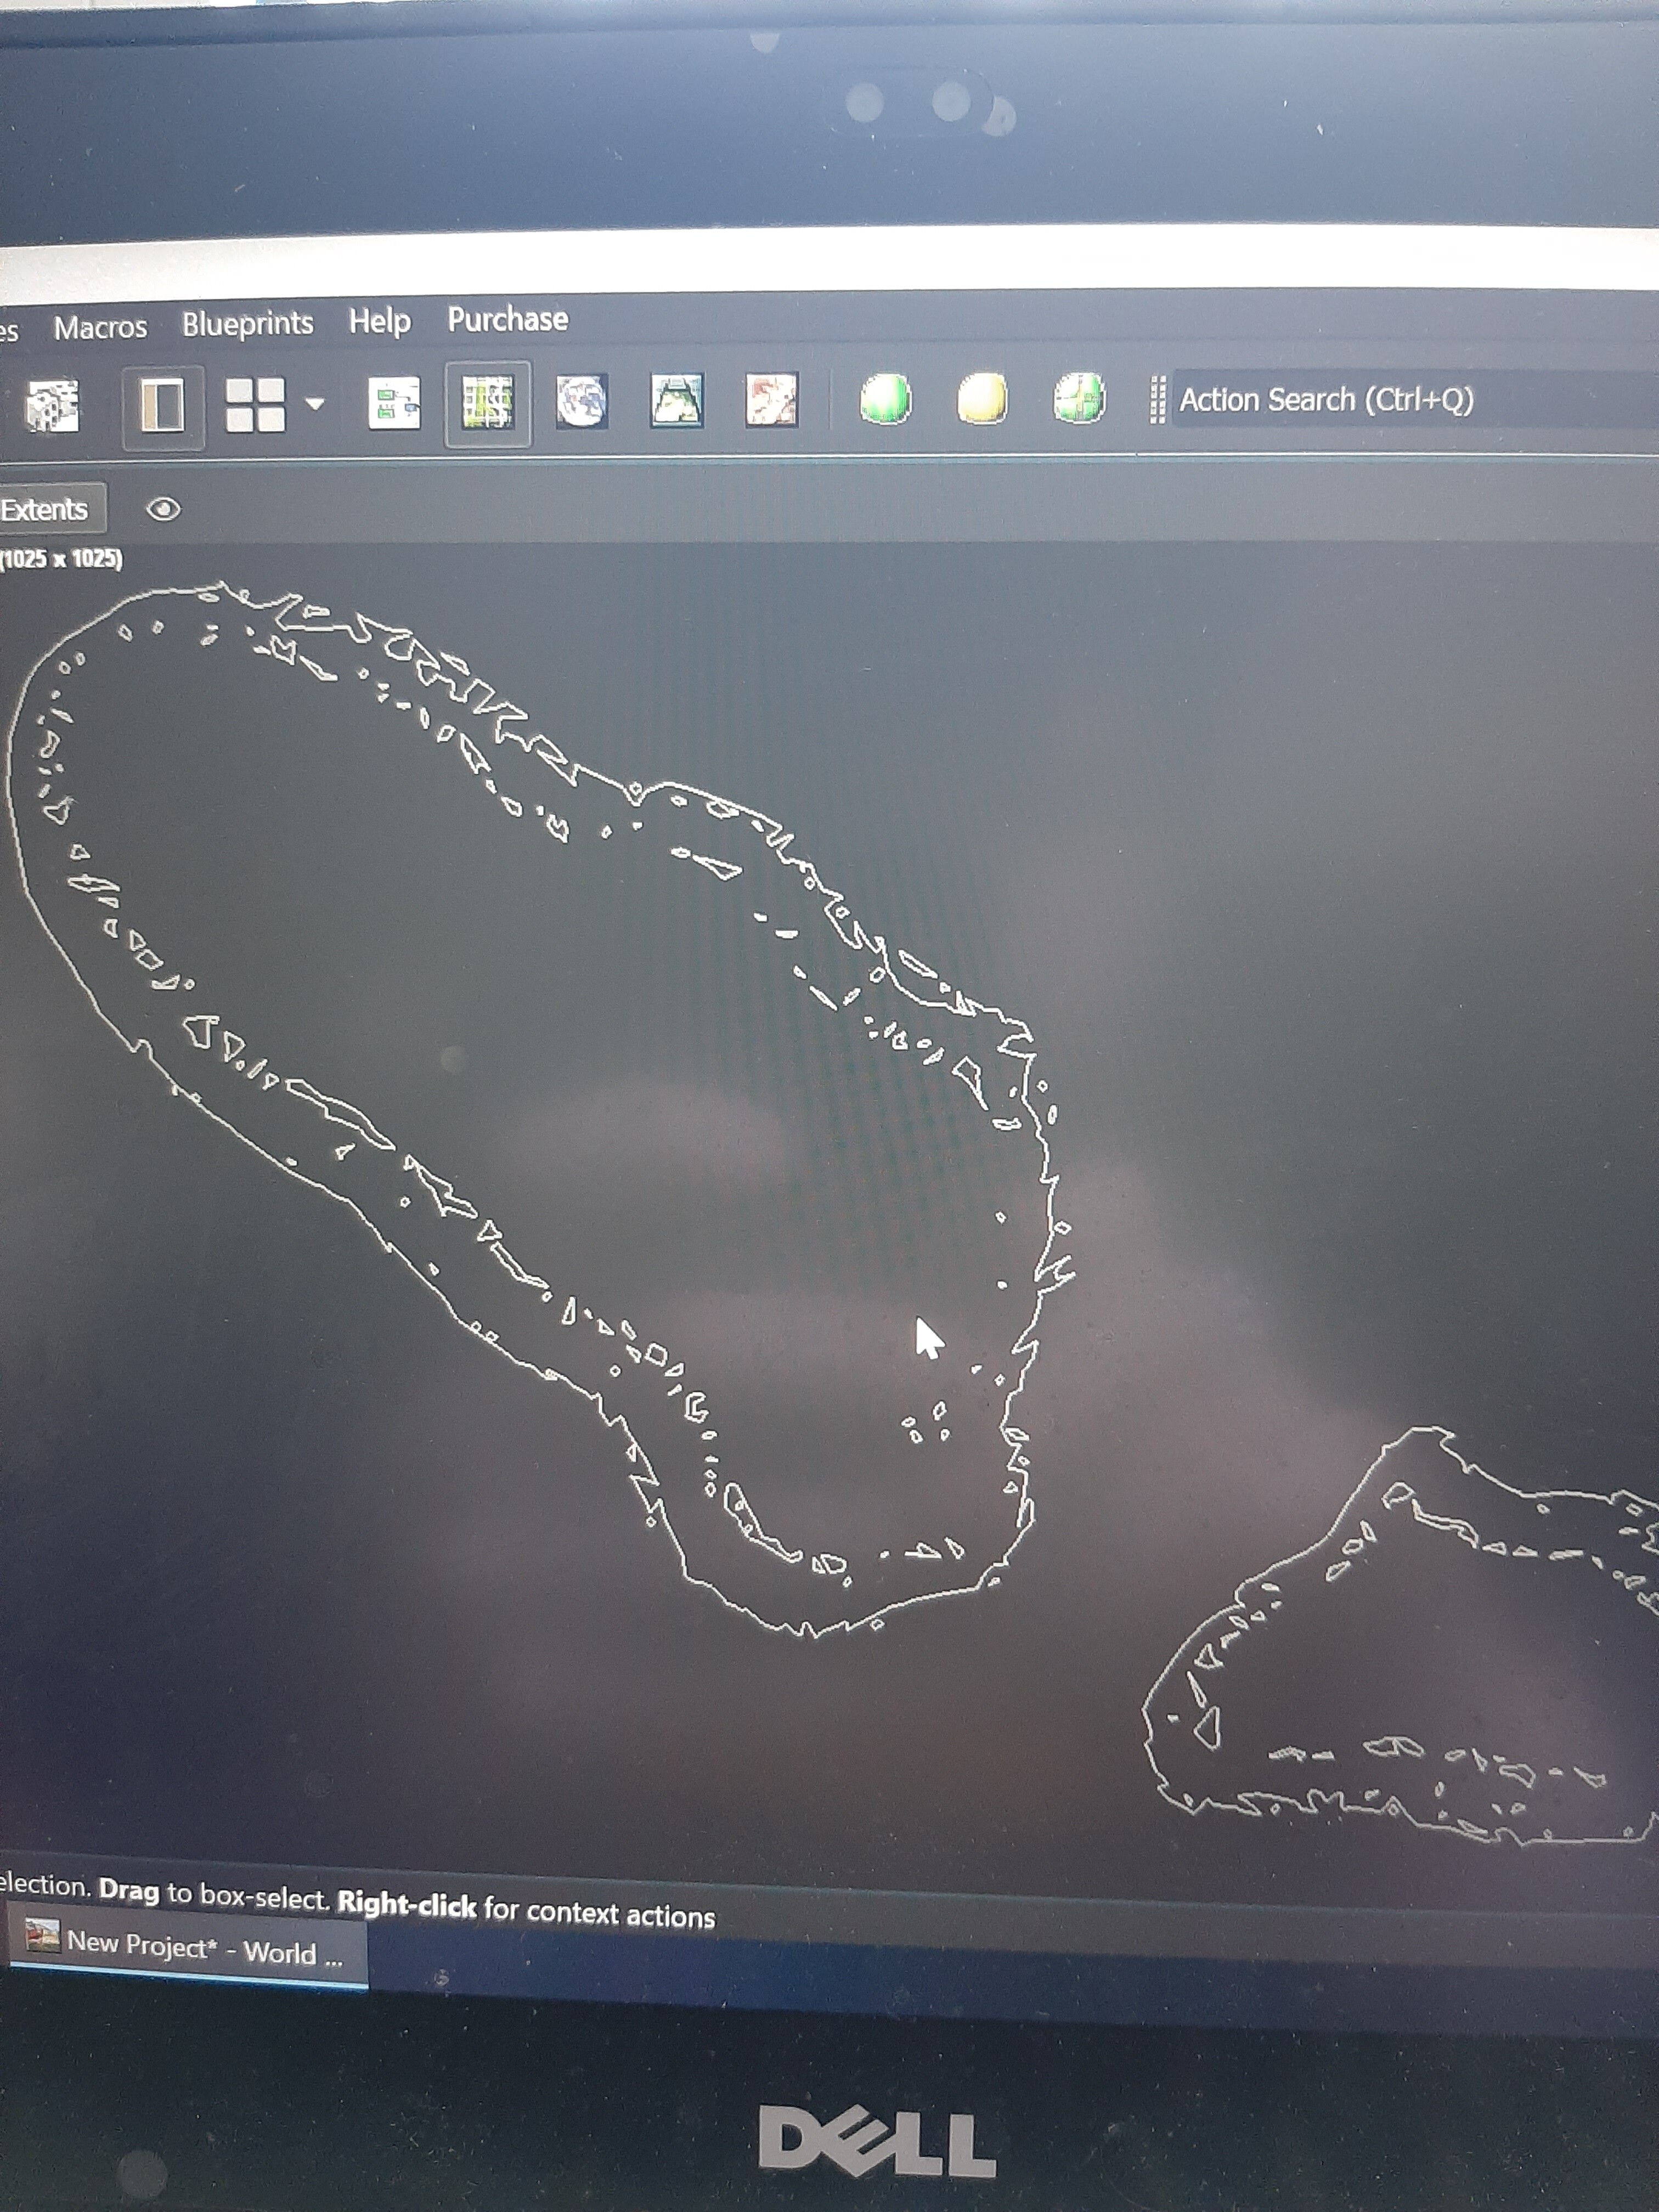
Forums wouldn’t let me upload svg files for some reason. Here is a png of the mountain range map, so hopefully you can use whatever software to convert this to an svg file. (I use Inkscape, but basically whatever path the svg uses should utilize straight lines)
I just ensured that an SVG can be uploaded - try sharing the svg here. As @HYLK mentioned, the most important thing for SVG import is knowing how WM inteprets shape files :
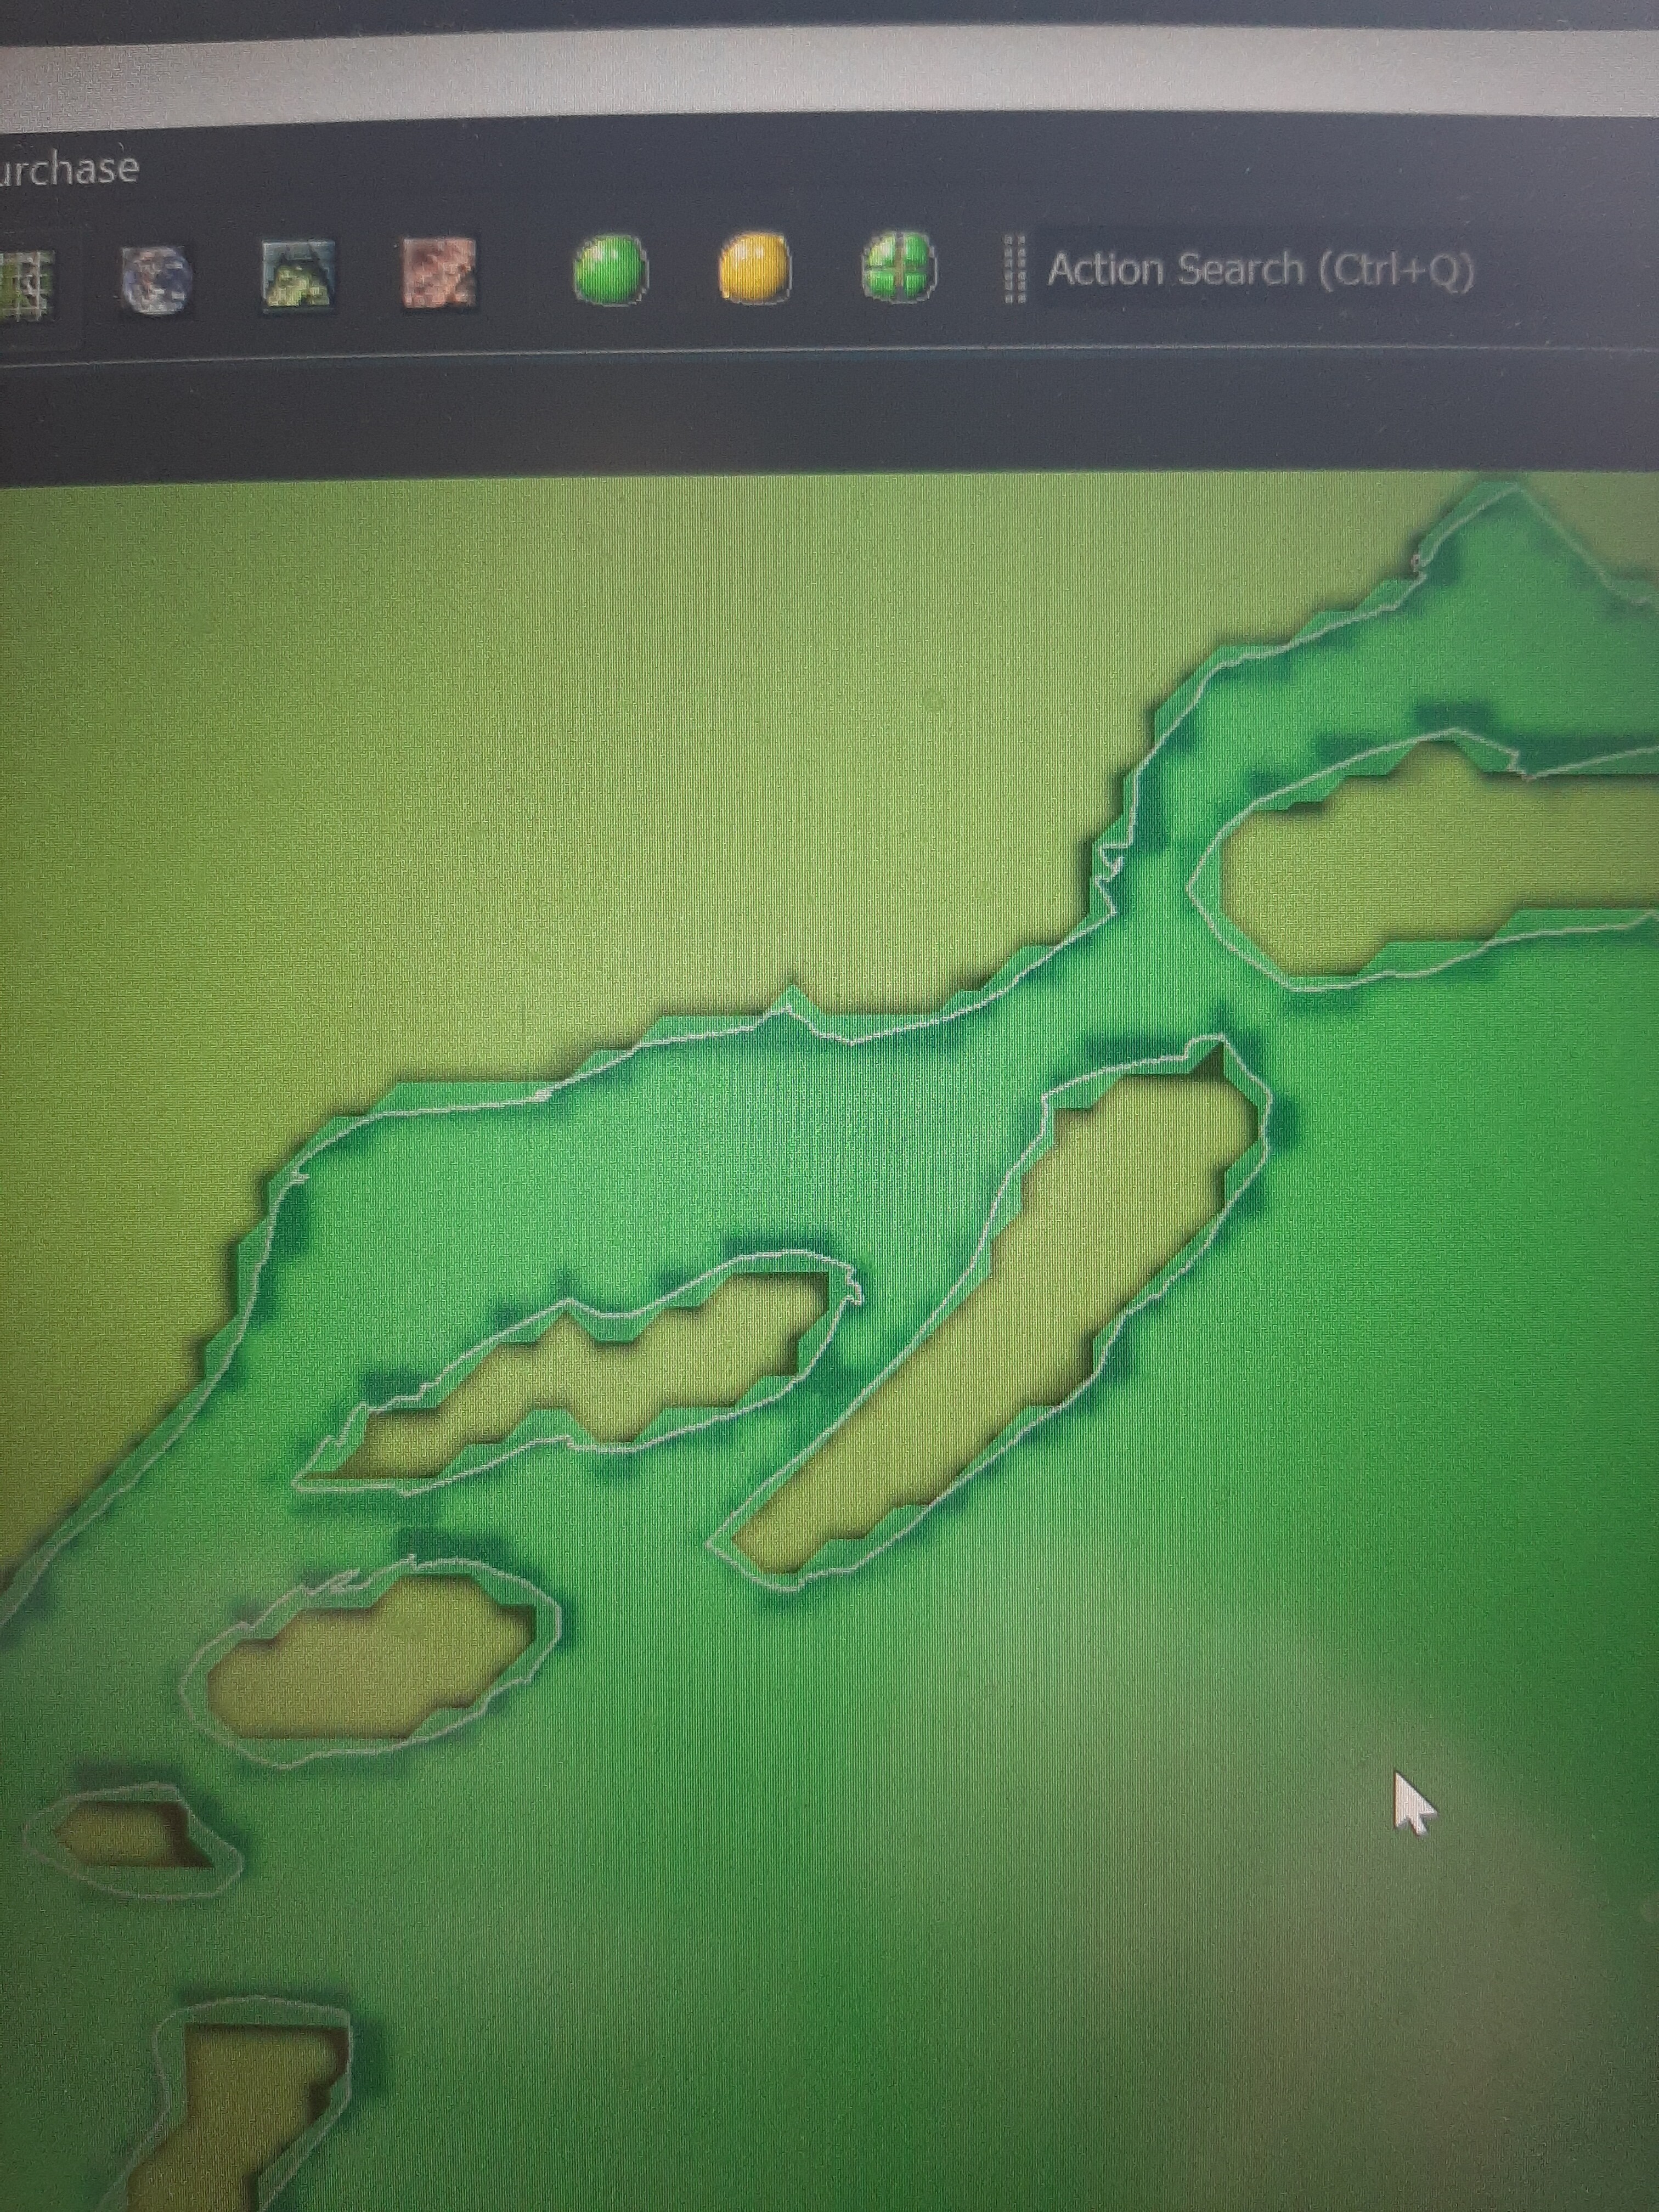
I see that I hadn’t correctly filled in my shapes. Fixed it and now the shapes translate into terrain! Now my issue(s) are to properly scale and erodes, as well as seeing if I can run these through some generator to make them more natural. I have also previously read that I will have to layer my mountains on top of my coast map, so I’ll have to figure that out as well. I’m going to look through the posts and videos I’ve seen, but I am also just as likely to report back here with my own questions. Thank you everyone for your support so far, and once I get a proper world created, I’ll share that on the forums if y’all would like to see!
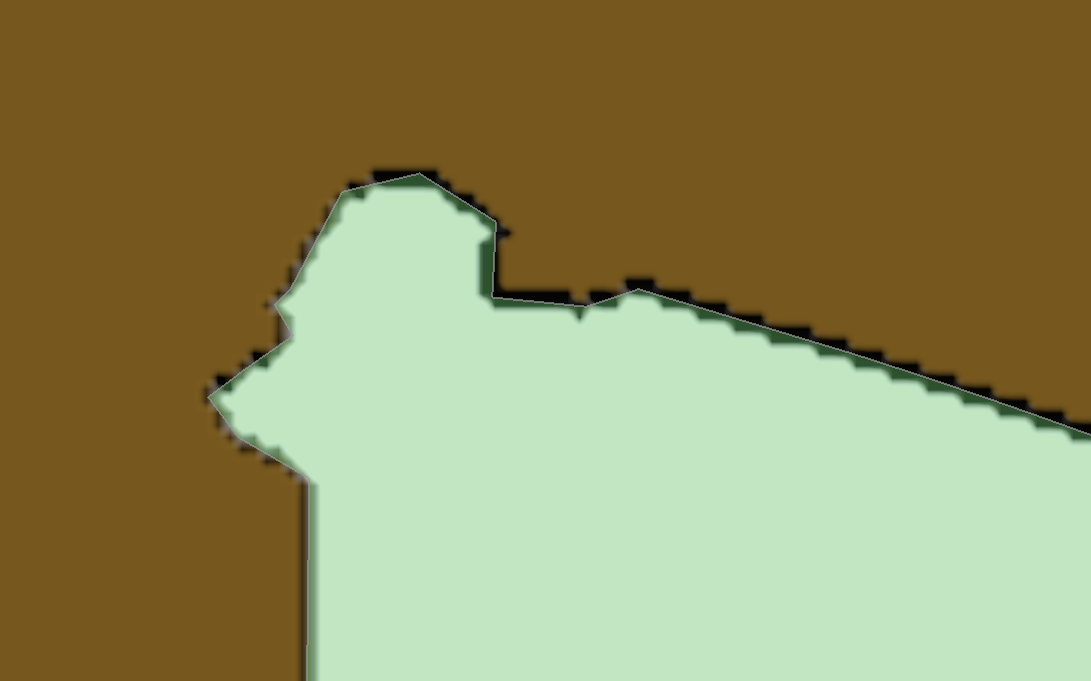
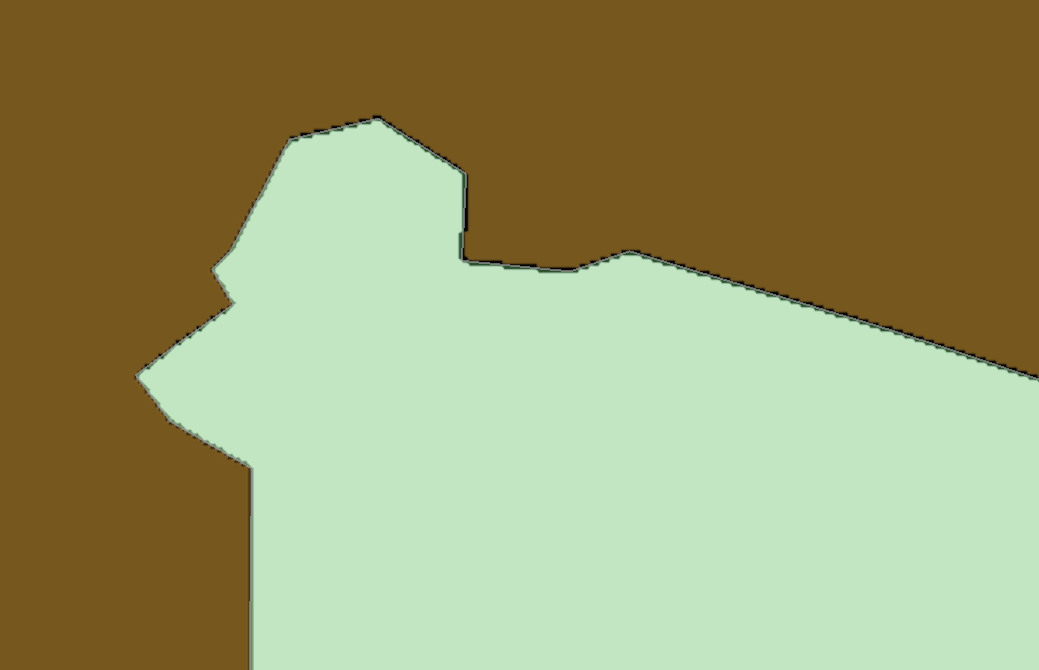
EDIT: 1) a new issue has arisen; the shapes are quite simplified from their original file (you can see the original gray borders with the new terrain) and was wondering if there was a way to make this more accurate? 2) in my coastal map there are lakes which haven’t been imported the way I had hoped, meaning that though their outlines do appear, they are still part of the general shape. Is there a way I could perhaps cut this area out in WM, or will I have to edit the SVG file itself?
You see the jagged lines are still there, but much finer. This is because, in the end, WM is a pixel editing software and especially with sharp falloffs, this because noticeable, so I suggest either increasing your Extent’s resolution, or use some falloff to smoothen out those edges.
So this is what I have so far. The mountain ranges are properly overlapped with the coast. I’d like to firstly inquire more about falloff, as they way I am using it makes it seem very artificial and clear-cut. Would I have to use an erosion tool to carve out the landscapes how I want them to? I also put on the maximum resolution for the extent boundaries, 16k x 16k, and it still doesn’t quite fit the contour, as shown in the zoom-in (though it is an improvement from the default 1k x 1k). Finally, is there a way I can “blend” the two regions together, to make it seem more cohesive?
Falloff is indeed very artificial looking, but that’s not an issue, because right now, you are creating the “base” shape of your terrain, which often looks very unnatural. I suggest feeding the terrain into a noise generator, like an Advanced Perlin, afterwards, to roughen up the smooth falloff.
There is also this featuer called Shape Breakup, which distorts your terrain and with that also makes the falloff looking less artificial, but it will have a large impact on your terrain’s shape.
Yes! So first, feed your Shapes’ output into a noise generator, and then apply stuff like Erosion.
This is because your world isn’t actually rendered at 16K×16K, and that is not a problem! You often don’t want to work at a too high of a resolution, most users use a resolution between 512×512 and 2048×2048 to work with and only use a higher resolution when rendering.
Falloff! This will blend the land an mountains as the mountain areas no longer have a steep edge.
Hey guys, I meant to post today but it’s been busier than I thought it would be. That being said, the rest of tonight I’m going to try out some more with the perlin generator and erosion tools. If any of you know any good tutorials on how to best implement these, a link would be great, or you can try and tackle the job yourself either way, anything helps as always! Again, thanks for all of your help this past week.
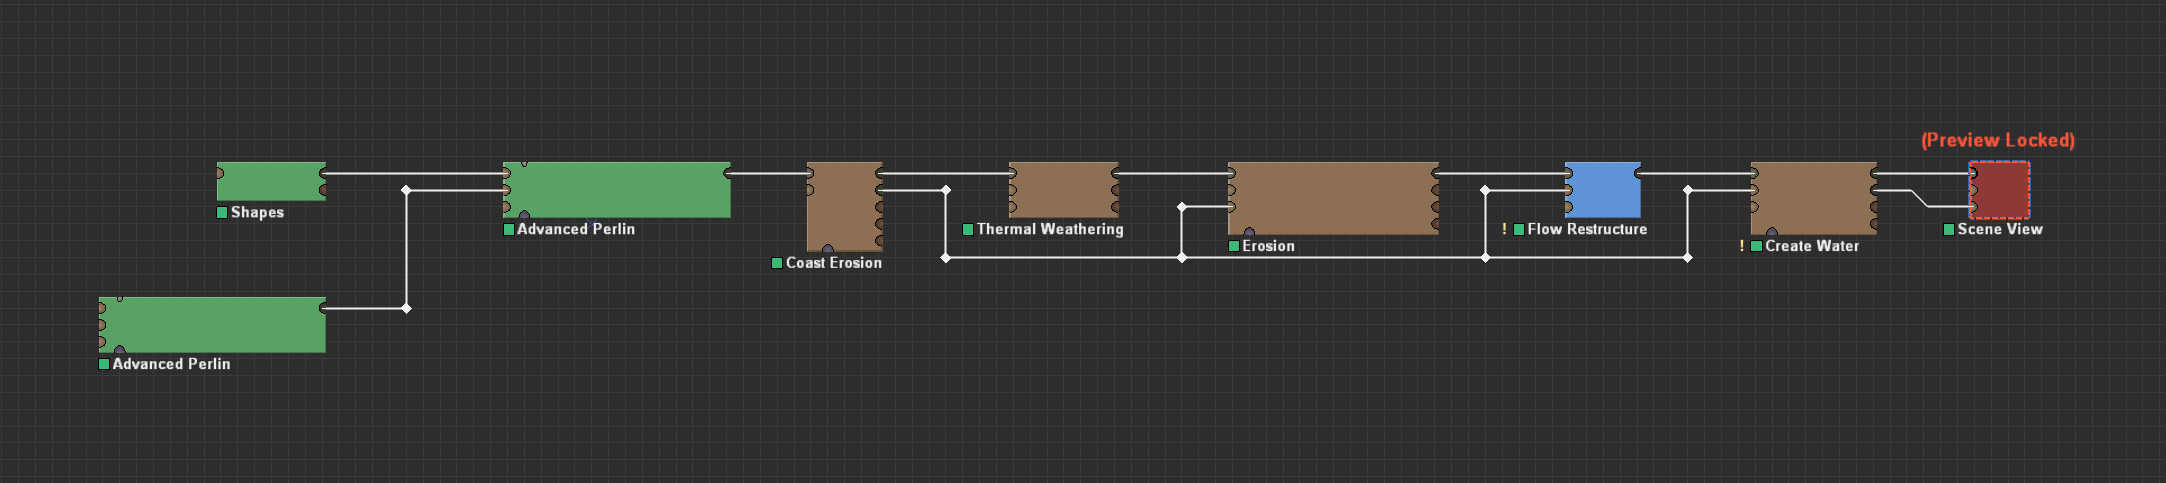
Hey, I made a quick example of a commonly used workflow. This is really simple and not good looking, so it needs a lot of more stuff going on, but hopefully it gives you some idea!
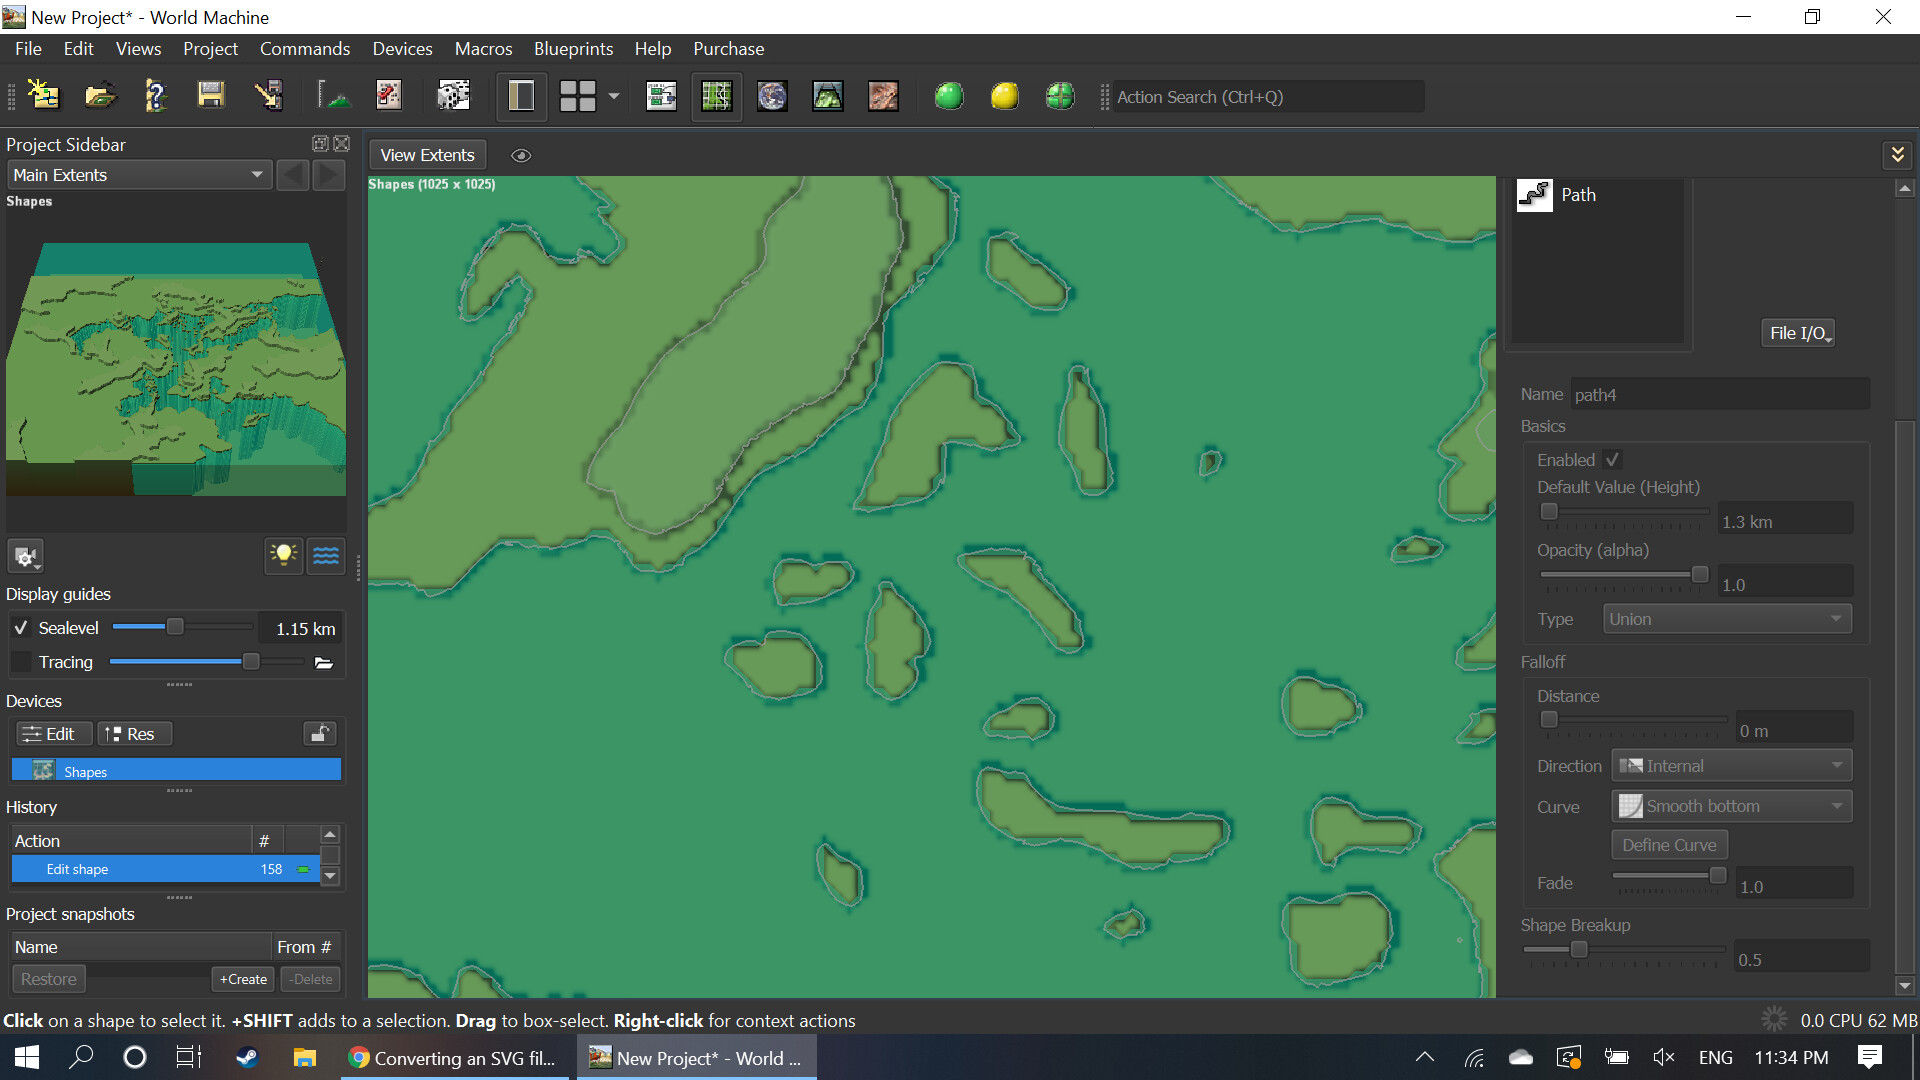
The biggest issue is working the water. The coastline is more or less accurate, until I hit the create water device. At that point, it just ignores the sealevels that I already have and replaces it with random rivers and lakes. How can I a) restore my original seas, and b) create lakes in regions that I specify? For example, there are several shapes in my mainland that are supposed to be lakes, but get filled in by the rest of the continent (see below).
I see you are using the Sealevel slider in the Display Guides section in the Project Sidebar on the left. Do note that you need to set the sea level in the Coast Erosion device instead of using the Sealevel slider mentioned before. So, when you now use the Water System created by the Coast Erosion device, it will not contain any water, because the sea level value is set too low. Then, when you import that into the Create Water device, it will not see any sea and thus not let water flow into that non-existing sea.
I hope this makes some sense. Also note, I see you have a very high “background value”, encircled with the red lines.
I didn’t know sea levels weren’t all created equal I’ll try that out today! As for the background, I have to double check but I thought I got rid of it. That does lead me to a good point however: is there a way I can remove that stretch of space north of the map? Will I even have to in order to export the heightmap once it’s done? It is empty space, as the original map was drawn on a regular sheet of paper, therefore t’s not a true square like the border extents


 I’ll try that out today! As for the background, I have to double check but I thought I got rid of it. That does lead me to a good point however: is there a way I can remove that stretch of space north of the map? Will I even have to in order to export the heightmap once it’s done? It is empty space, as the original map was drawn on a regular sheet of paper, therefore t’s not a true square like the border extents