i need to use 8k alpha masks for my terrain in unreal, but i can only preview up to 4k and even that takes awhile to load
1 Like
lol
i did have same issues brooo
just open WM Preferences
after that go to Display settings
and set first one to biggest one
and two last ones to lowest ones
play around with last two options to obtain your needs in speed/quality balance ![]()
![]()

Some questions, and then some suggestions:
- Which version are you using? “Hurricane Ridge” is much faster with 8k+ terrains than previous.
As for settings, Tomatiy has the pointer to the correct settings… but:
-
Small resolution is the resolution used for general viewports through WM. It applies to the preview window in the upper-left corner, the 3D view with the blue camera icon turned off, and a few others. Generally this should be a smallish value (~2k), as you probably don’t need high resolution here.
-
Geometry vertices determines the actual honest-to-god maximum number of vertices (triangle count) in your viewports. Setting this too high will cause your viewport terrain to perform poorly or disappear, but you want it as high as it will go before that. My old 1070 GPU worked fine at 2k, my new 4070 works great at 4k, for reference.
-
Terrain attributes should be set as high as your system supports - 16k is the common minimum for almost any GPU, and 32k is sometimes supported. This determines the maximum texture size uploaded to the GPU. Thus, if you set this to 1k, your sweet 8k colormap will be downsampled to 1k before display

To display 8k masks and colors accurately, generally you would just need to make sure the terrain attributes are set to 8k+. To display an 8k terrain fully accurately, you would need geometry vertices @ 8k, but that is impractical for almost any system - 2-4k is fine.
2 Likes
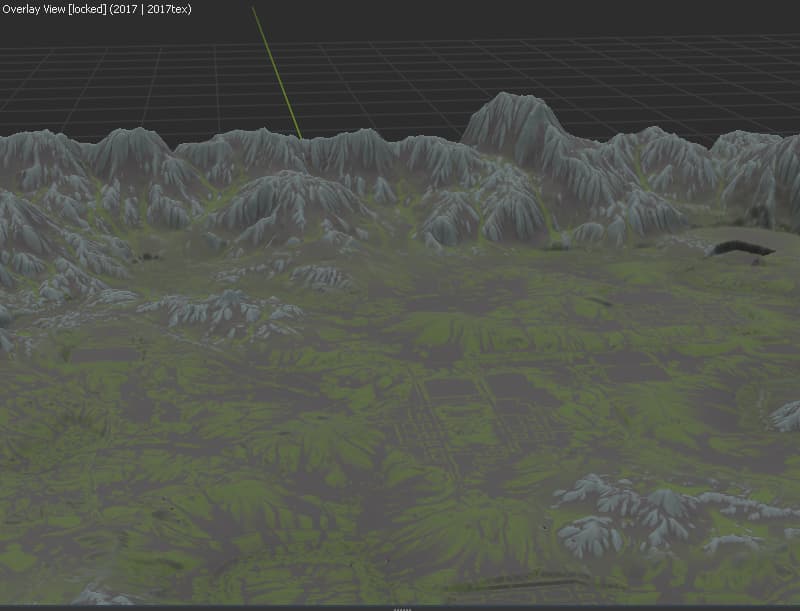
ive already done those settings, basically i need this viewport resolution to get to 8k as fast as it can so i can see what my texturing really looks like at 8k
1 Like
Is your problem the viewport performance… or just the time to build the world at 8k?
The fastest way to build a specific device at your full resolution will always be to select it, then push the yellow built-to button in the toolbar, which will build the minimum number of devices.
You didn’t reply with what version you are using. This makes a dramatic and important difference!
1 Like
im using the newest version, and it takes a long time to build and to preview
1 Like
You can quickly track down the responsible culprit in your graph by going to the Tools tab in the workview, and clicking “Build Time”. You’ll see something like this:
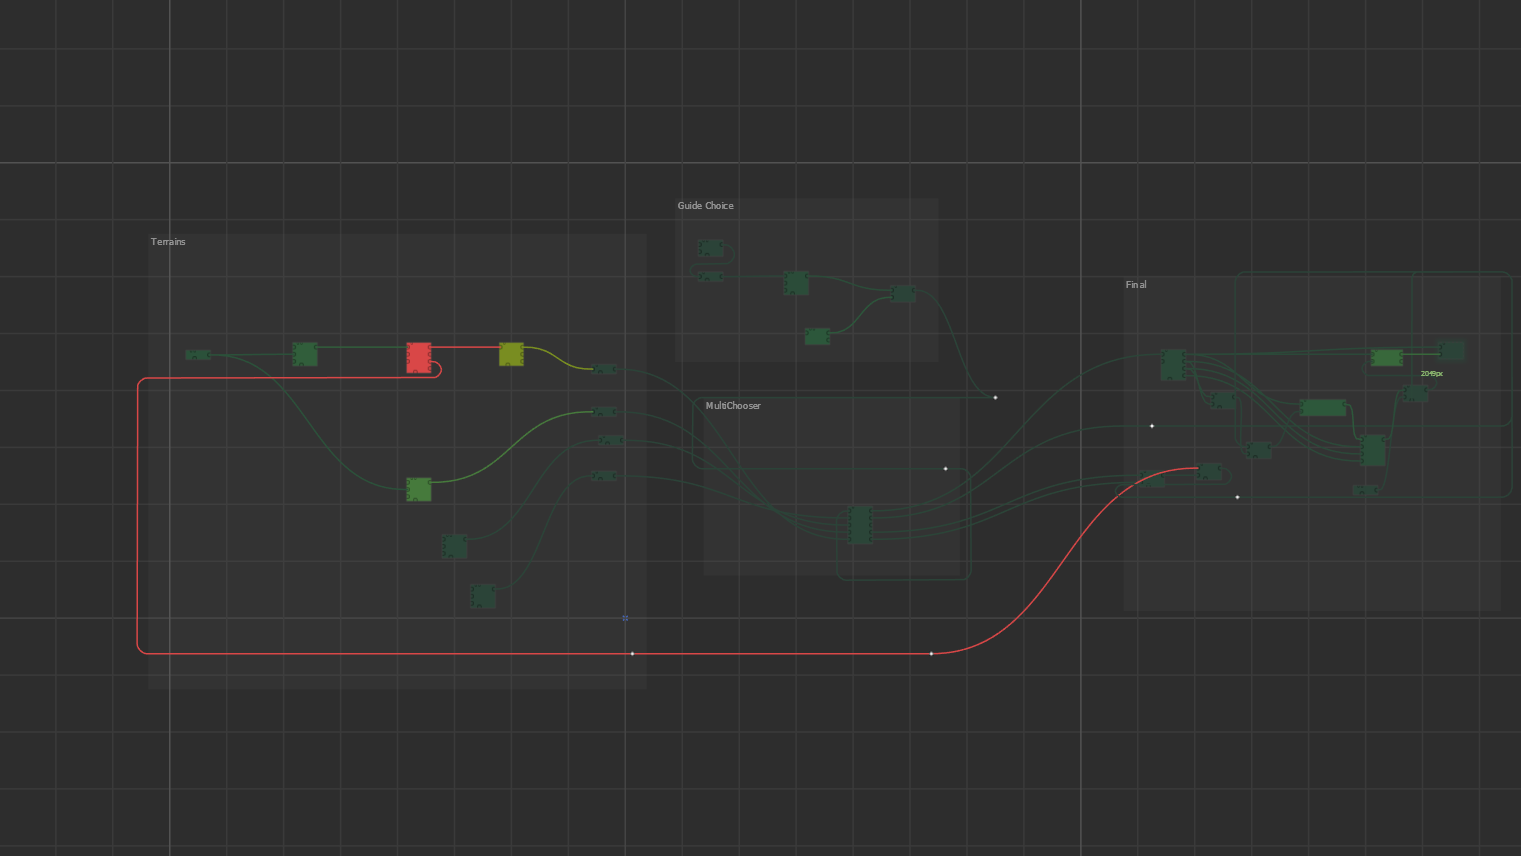
Which you can then investigate further (Green = good, Red = bad).
If you are running Hurricane Ridge, but have not upgraded your project version and devices, they won’t generally be any faster automatically, since only non-breaking changes will be applied automatically. At 8k, the new version of Erosion for example is up to 50x faster! But will produce somewhat different output.
Open up the versioning dialog (gear icon on the toolbar) see if you’re using an older project, or if any of the responsible devices are on older versions.
After you update the project version, you’ll usually see something like:
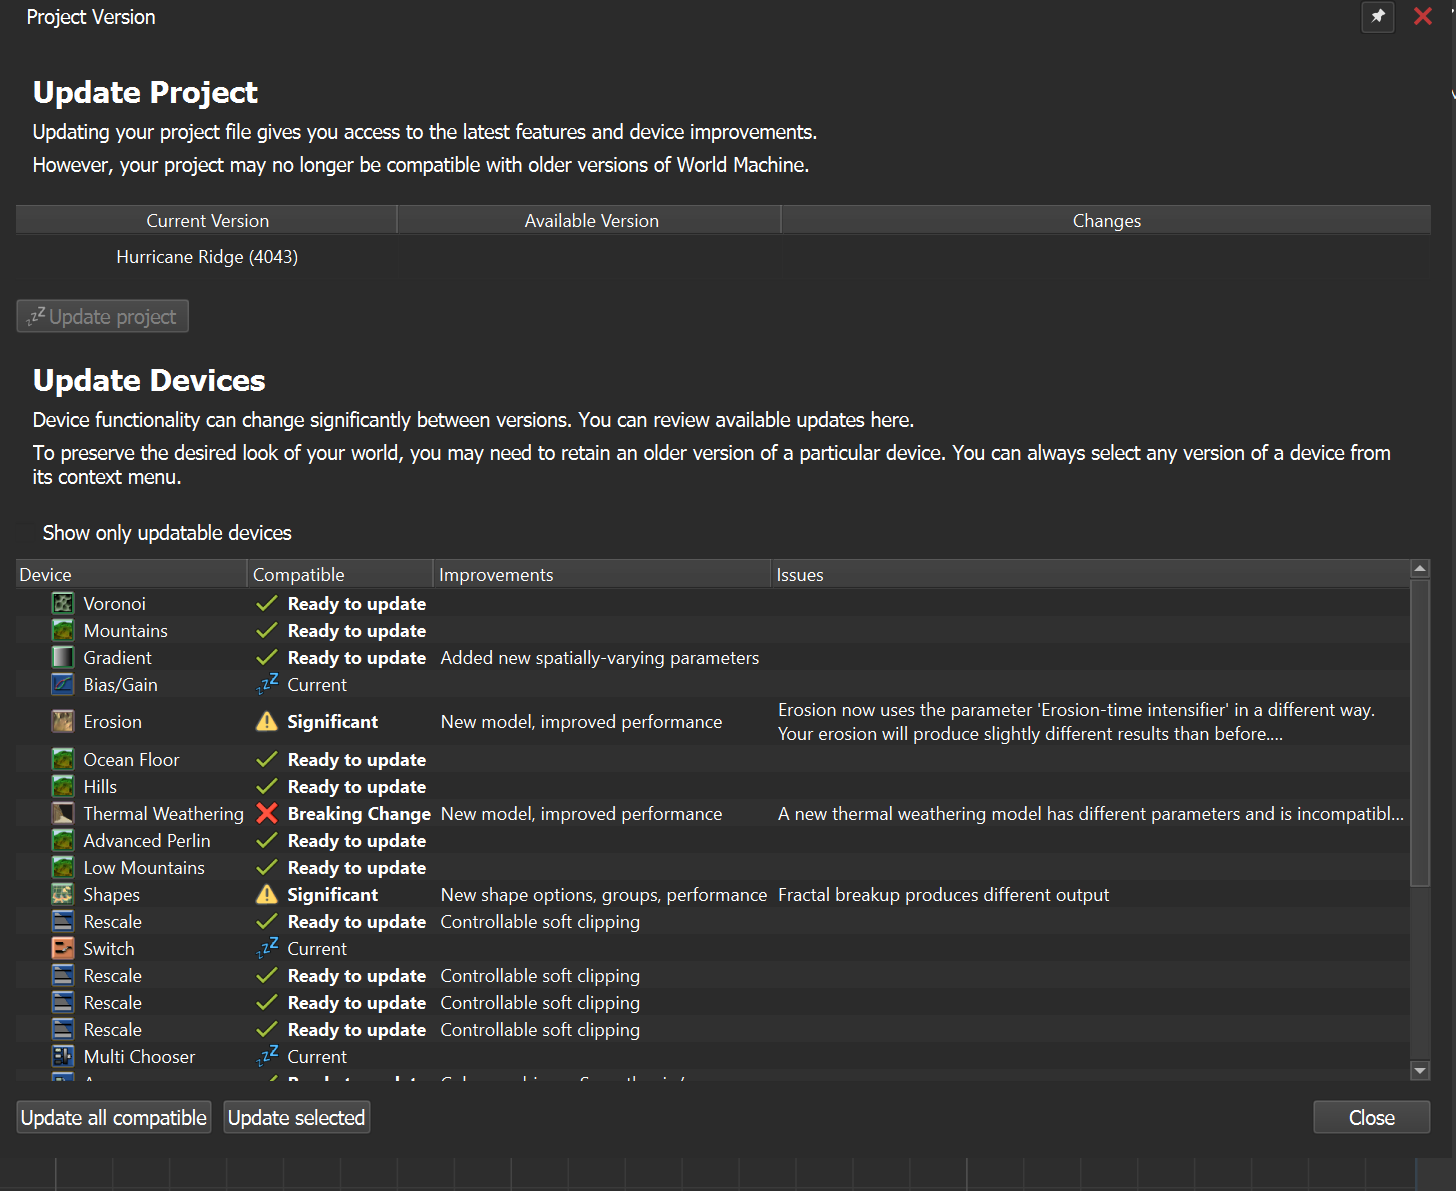
I usually click “update all compatible” to clear those out of the way, then carefully upgrade the rest one by one while looking at the result to make sure its still doing what I need.
2 Likes
@Quentin_McHale From the settings mentioned in the @Tomatiy’s screenshot above:
- Set small resolution to 1k-2k
- Geometry vertices to 2k or 4k (would still be slow, but you’ll get a pretty good idea of terrain silhouette)
- Terrain attributes to 8k. (this will show your textures accurately, the thing you need to preview before builds)
Ultimately you do need to do full scale builds frequently when you’re working on an 8k or more terrain.
2 Likes
I usually try to complete the height and mask generation, exporting them at the desired resolution in 16 bit PNG (masks) or 32 bit EXR (heights). I start a new texturing graph using the imported height and masks, do all the texture/material work at 4K or 8K until I’m happy with it. Then go up to 8K or 16K to proof and render.
2 Likes
@davidroberson So do I. I use libraries to split my projects into phases like that. It’s a great option when you work at your own pace (I do), but as soon as you want a quick turnaround on your projects you have limited options like relying on test builds and real time preview. So I see their point of view as well lol!
2 Likes
why you just not add thrid button that will update even all un-compatible? I under that it is your choice to scroll and aim on each one
but when i did this with my old projects - i really dislike that here no third button that will force even un-compatible devices to update
Since the only ones that are not auto-updated are the ones that by definition are going to take some manual fixing, you probably want to observe the changes.
But if you don’t - you don’t need to click each one. Just drag-select or shift-click a bunch of them and hit “update selected”
2 Likes
Well, I did not know that! I was stressing over that earlier today after starting with Build 4044.
See, this is why it’s good to spend time in the forums! Thanks!
1 Like
I put a lot of work into making sure the back-compatibility with old project files is seamless, and that they just continue to work no matter how many major changes happen.
What this thread has made me realize is that I probably need to add a (disable-able) notification when you first load an old project, directing you to that project version dialog and telling you to upgrade.
If you’re not familiar with how the versioning system works, you might not even realize that you aren’t getting 95% of the improvements until you upgrade your project!
Back-compatibility with old versions is super important, but right now the need to upgrade is not very prominently displayed to the user.
3 Likes
For me, the challenge lies in learning what functionality will change with upgraded devices before committing. Granted, we can revert if necessary, but some kind of blueprint cache should be stored during a global update. Sort of a before-and-after comparison.
I will try to do that manually, but some kind of guided transition would help out.
1 Like
Can you explain more what you mean by blueprint cache?
Each device says explicitly what is new and what may break in the upgrade list. Granted, for devices with all new sweeping changes this is often just “it’s different. Try it and see”
1 Like
I was thinking that when specifically doing a global update, it would be best to keep a copy of the original network, an automatic, temporary blueprint saved before executing Update project, which is then loaded immediately after. It’s really just a copy-paste, but the point is that you can set the copy down at the bottom of the graph to refer back to as needed while you click through to see how the changes render out. Yes, the relevant issues are being listed in the dialog, but you don’t really understand how they play out.
This little step makes it much easier to review and thus easier for you to do the updates in the first place.
1 Like
why you just not add thrid button that will update even all un-compatible? I under that it is your choice to scroll and aim on each one
After thinking about your suggestion some more I decided I like it. The main auto-upgade button will remain compatible-only, but I will make the auto-upgrade button have a drop-down attachment where you can specify to also upgrade all devices with significant changes, or breaking changes.
3 Likes
This topic was automatically closed 90 days after the last reply. New replies are no longer allowed.