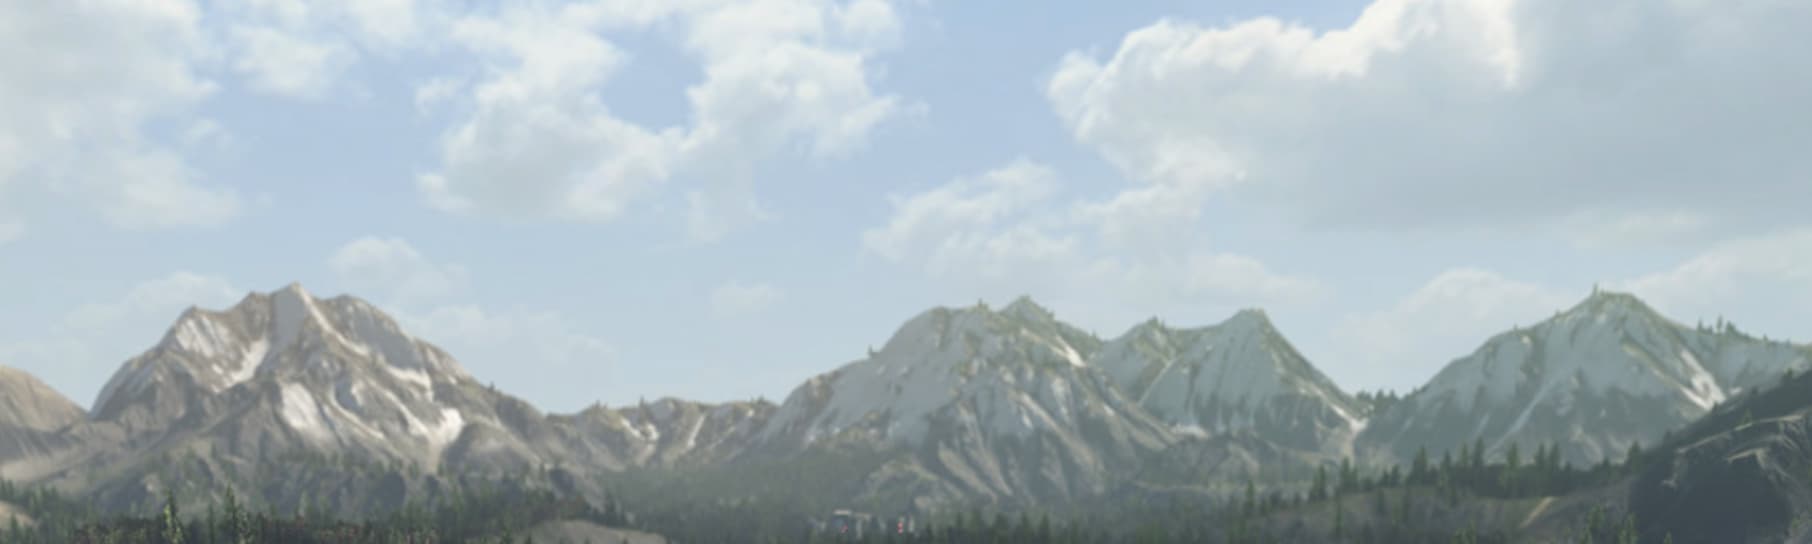
i am here yet again asking about mountains, i am close to this result but i cant get it quite yet, here is my progress.
if anyone has any tips on what noises to use or anything really, please tell me. i have been tweaking for hours.
i am here yet again asking about mountains, i am close to this result but i cant get it quite yet, here is my progress.
You seem to be well on your way to creating the look you’re going for! I think your biggest hurdle right now may just be expectations. I noticed in another thread that you said you had expected to learn World Machine in about 5 days, and then here you’ve mentioned “tweaking for hours”. I would say that hours of tweaking is pretty on-par with your results. Depending on the complexity of the project, it can take anywhere from hours up to months of work to get something that is exactly how you want it. And for some sort of reference on how long it can take to learn the software, I’ve been using World Machine pretty regularly for almost (if not over) a decade, and I’m still learning new techniques and workflows nearly every other time I open the software. Much like most other creative software, you get to pick no more than 2 out of “Quick”, “Easy”, and “Good”.
That all being said, if you want some foundational knowledge to be able to work a bit quicker and more intentionally, @HYLK has a great YouTube channel with some deep dives into the devices as well as some timelapse videos that can give really good insight on workflows. I think his videos will be some of the most helpful ones with modern versions of World Machine.
@geekatplay also has some videos that have been really helpful in figuring out specific workflows, though I don’t know if their videos have necessarily kept up with the software itself, I don’t believe I’ve seen a video on World Machine since before the first LTE version came out. That being said, a lot of the methods used in the videos are still relevant.
While I can’t really see the specifics of the graph, it looks like you’ve got a general handle on the process: shape, erode, repeat if needed. If you have any questions on specific issues you’re running into or features you’re having difficulty recreating, we can probably help more!
All that being said, if your main issue is just that, at a quick glance, your mountains look a little more convex whereas the reference image is a little more concave, try gently shaping it with a Curves device.
thanks! these are helpful tips i hope you can keep helping as you seem to be the one who understands what i am going for the most, i guess i am having trouble making the mountains look kinda chunky and stylized, my mountains dont really have that they look un natural.
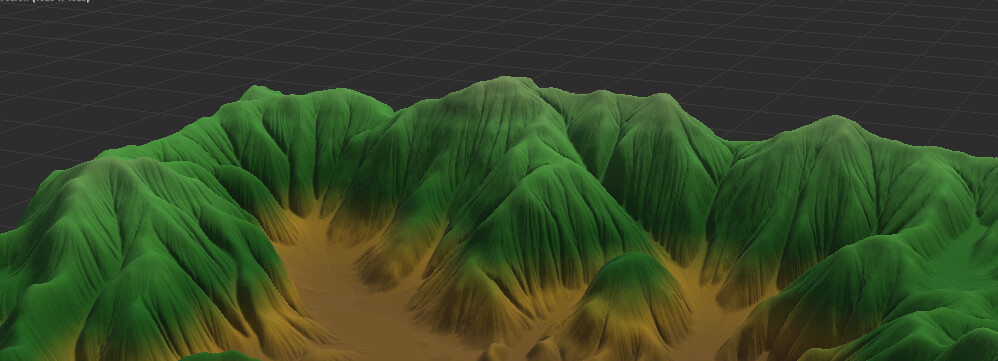
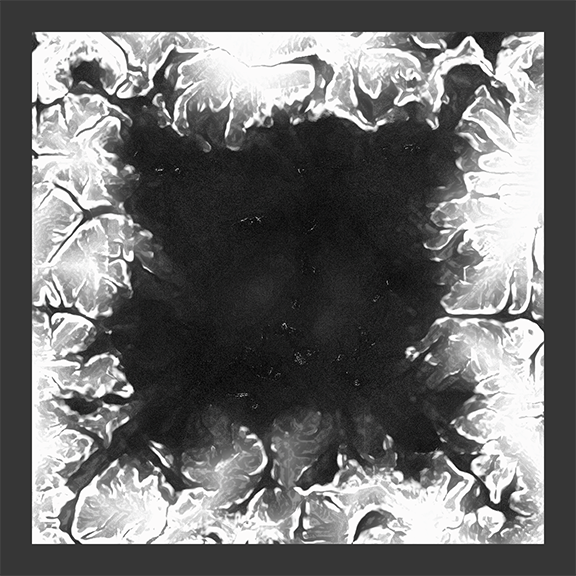
i got the heightmap for these mountains in the refrence image, this is what it looks like, can you tell me how i would make these shaped mountains?
Thanks for replying!
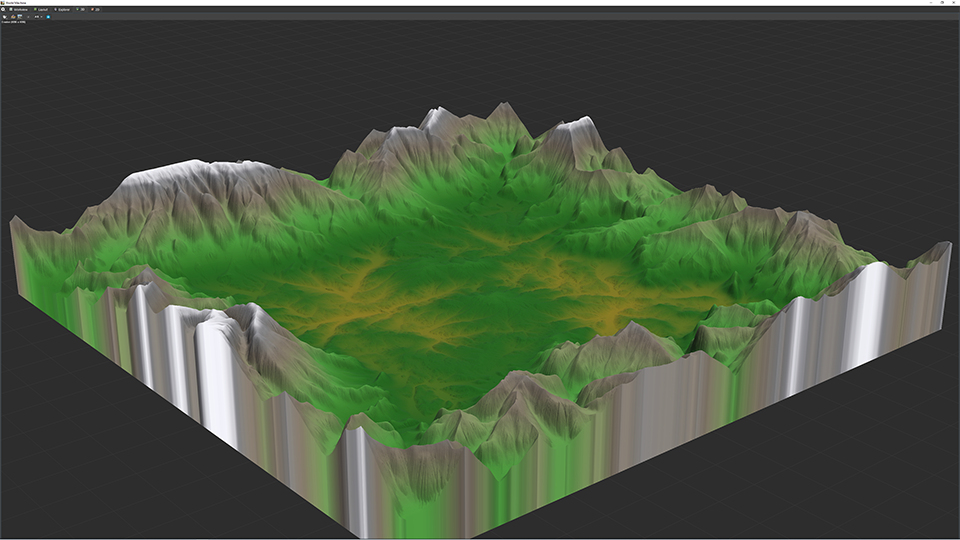
So the reason I referred you to the videos by HYLK and GeekAtPlay is because a lot of the techniques I’d use to create such a landscape I either learned directly from them or are featured in their videos (even though I may have learned it on my own or from elsewhere). That being said, I can run you through how I’d build a project like this. As reference, here’s a shot of what my results were. Keep in mind this is a very basic project, and would be a sort of jumping off point for further refinement.
Here’s my step by step:
Radial Grad with a width value just under half the world size and the type set to “Square”.Radial Grad device gets fed into an Expander device with the action set to “Shrink (Min)”, the filter type set to “Gaussian” and the distance adjusted until there was a nice maximum in the center area, and a slope to the edges I was happy with (in this case, 2.5km)Expander device is fed into an Inverter device to finish out the mountain mask. This set of three devices will be used to mask out the generator that create the large scale mountains on the borders.Voronoi devices masked by the mountain mask. I find for mountain shapes, the combination styles work best. I’ll usually stack an F4-F3 and an F2-F1 on top of each other for the large shapes, then add a standard F1 for some of the more “hollow” slopes. Play around with the distance functions to get different shapes
Voronoi with a Levels or two also masked by the mountain mask we created to really bring the peaks upVoronoi devices with a Combiner set to Smooth Max, or, alternatively, a Layers device for a different style of combining.Add Noise device followed immediately by a Flow Restructure device set to a very low resolution (in this case 256px). The noise device helps to bring some natural looking variation into the ridges carved by the Flow Restructure device, so you don’t have straight lines as often.Flow Restructure device is fed into an Erosion device with some pretty aggressive settings.
Thermal Erosion device for better results, but I don’t do that hereErosion device (which has inherited the low resolution from the previous device) has its Flow Mask output fed into the mask input of a Levels device which has been explicitly set to 1x project resolution and set up with the reconstruction type set to “Bicubic Tunable” so the mask isn’t pixelated. The input of the Levels device is the output of the original mountain forming chain (the same output that is fed into the Add Noise device), and the output levels parameter is lowered to carve the initial flow lines.Levels output and a slightly less aggressive Erosion to get some of the branching valleys you see in real life.Advanced Perlin device with a Basic Noise device fed into its distortion guide input.Advanced Perlin device fed into an Inverter with the first Advanced Perlin device acting as a mask for the Inverter and the Inverter acting as a mask for a Ramp device that has the first Advanced Perlin noise as its input, and then the Ramp and second Advanced Perlin devices are fed into a Combiner set to average. The Combiner is then fed into a Curves``` device for final shaping.Layers device with the mountains acting as layer 1 and the center as layer 2. Layer 2 Operation is set to “Heightblend Merge”, and the opacity and smoothness are adjusted until a pleasing result is reached.Layers device is fed into:
Erosion deviceSelect Convexity, Select Slope, and Select HeightLayers device with differing opacity and smoothness values to create a mask where the peaks, sharp slopes, and exposed areas are all bright white, and everything else fades gently to blackErosion device.That’s pretty much it. I tried to steer away from giving exact values to copy down to encourage you to experiment and find what works best for you, especially considering that this is, again, a very basic setup, and I don’t want to painstakingly record values especially if it’s not even what you’re looking for in the first place.
hey thanks alot for replying, the top image looks alot like what i am going for but i am having quite a bit of trouble figuring out what values to use for everything, i know you wanted to encourage experimentation so i spent awhile tweaking and still didnt do much. if you could help me out or send the TMD file so i can see better how you did this it would be great. thanks again for replying!
If you can provide some screenshots of your work so far, or provide your tmd file, I can provide more focused guidance. It may be annoying, but you’ll learn the software faster if you’re figuring out how things interact than if you’re just recreating something by copying values. Also, on a more base level, unless you’re also copying the seed values for every noise generator device, the settings required will be different for your scene than they would be for mine.
Here is my WM file
Mountains1.tmd (285.7 KB)
Alright, you’ve got a pretty good start here, there’s just a few mistakes I’m noticing that are probably causing some frustrations, I’ll go over them here:
In your “Mountains” section, I see you’re feeding the output of the first Voronoi and Levels run into the input of the second. What you’ll actually want to do here is disconnect that, and use a Combiner to merge the two. You can use any of the additive modes (Smooth Max, Add, Screen, etc), whichever looks best to you, and then send that Combiner as the first input to the Smooth Max Combiner you currently have. For a bit of added structure, you can also try changing the Distance Function for the second Voronoi device to Manhattan, it gives it a little bit of mountainous bulk, in my opinion.
I also noticed you left the first two Voronoi devices at their default scale. You may want to make the scale a little larger. Since you’re cutting valleys and such later down the line, don’t be scared to have massive blocks of mountain to carve a range out of.
Because you fed the results of the mountains section into a Basic Noise device, I would add another Levels device after (or Curves, Bias/Gain, or Clamp) device after it to bring back some of the lost height.
I’m just now realizing that the Basic Noise device mentioned above may stem from a misunderstanding. The Add Noise device I was talking about in my walkthrough refers to the furthest left device on the “Filters” tab. However, that Basic Noise device is a good method to bring in some additional detail. I will, however, be continuing with replacing the Basic Noise with an Add Noise device (and removing the Levels device mentioned above).
The Flow Restructure into Erosion device is good. I noticed, however, that you left the Erosion parameters at their default. You’ll want a pretty aggressive erosion here to get strong flow lines. High duration, low hardness, high sediment carry amounts, larger time intensifiers, etc. You want aggressive erosion here to get the branching effect to really stand out later on down the line.
I noticed you plugged the Priimary Output of the Erosion device as the input to the following Levels device. You’ll actually want the output of your Expand device as the input here, and then keep the Flow Mask output as the mask.
You’ve also left the Reconstruction Type of the Levels device at the (World Default) value, which seems to be Bilinear. Bicubic Soft will give a smoother result.
While your method of raising the low handle of the input values on the Levels device will work, you’ll get more mesa-like structures than alpine. Instead, try lowering the high handle of the Output levels.
Moving on to the central terrain creation, there’s a couple missed steps at the front, you’ll want to increase the Distortion Guide Level on the Advanced Perlin with the distortion input, on both, I would lower the Steepness and Middle elevation values, the Ramp device should be maxed out on the Frequency parameter, and I would adjust the final Combiner to have more of a mix of the two different looking terrains. Maybe try a random noise mask for more variety.
On the Layers device where you are combining the mountains with the center terrain, you have the center terrain plugged into the Mask 1 input instead of the Layer 2 input. The order of the inputs on a layers device will always be Layer # followed by Mask #. You’ll want to disconnect the Curves device from the Mask input and plug it into the Layer 2 input instead.
This masking section I probably could have been a little more verbose on before, so I’ll do so now. The Select Convexity device, in my example, I had set to Exposed Areas and Along Contours (Plan) and then adjusted the Strength until it was to my liking. The Select Slope I selected 70°-90°, around a 15° falloff, and the Smoothstep falloff type. Finally, for the height, I did a little trick that essentially uses the heightmap itself as a height selector, I put both sliders all the way to the right, then maxed out the falloff with the Smoothstep type. This basically just remakes the whole heightmap, but now you can adjust the handles to make the peaks brighter if you want.
The masks are then piped into the Layers device incorrectly again. You’ll want to first set the number of inputs inside the Layers device to 3, then make sure that each selection device is going into a Layer input and not a Mask input.
From there, you should be good to plug the results into the Hardness Mask input of the Erosion device, and adjust that until you have a result you like. I recommend unchecking the “Preserve map borders” and “Hardness doesn’t affect channel depth (WM2.3.7)” options you currently have checked.
As a bonus tip: To get sharper mountains for a more dramatic look, try adding an Expander device set to “Shrink (Min)” and “Linear Slope” masked by a Select Height device selecting only the mountainous bits right before the final Erosion.
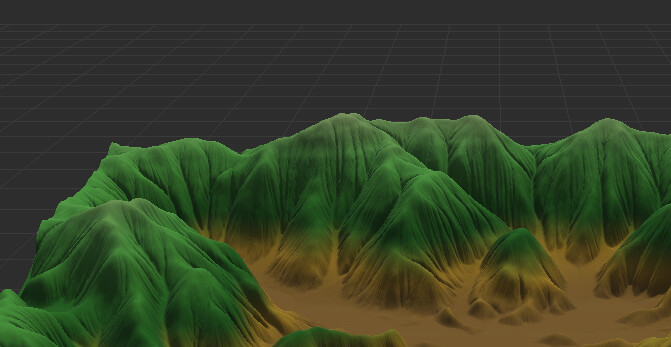
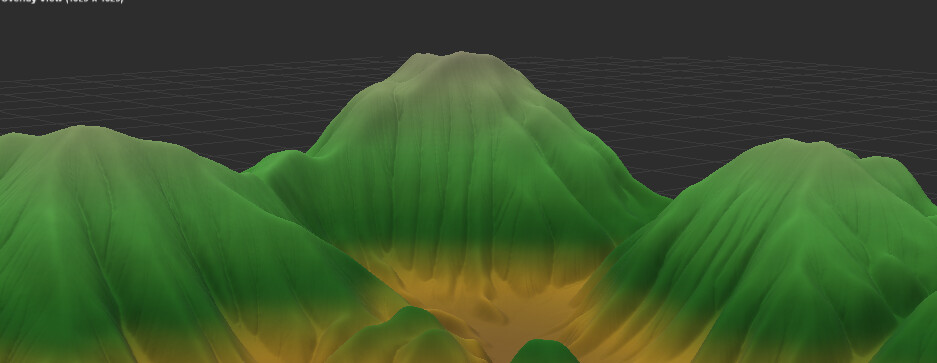
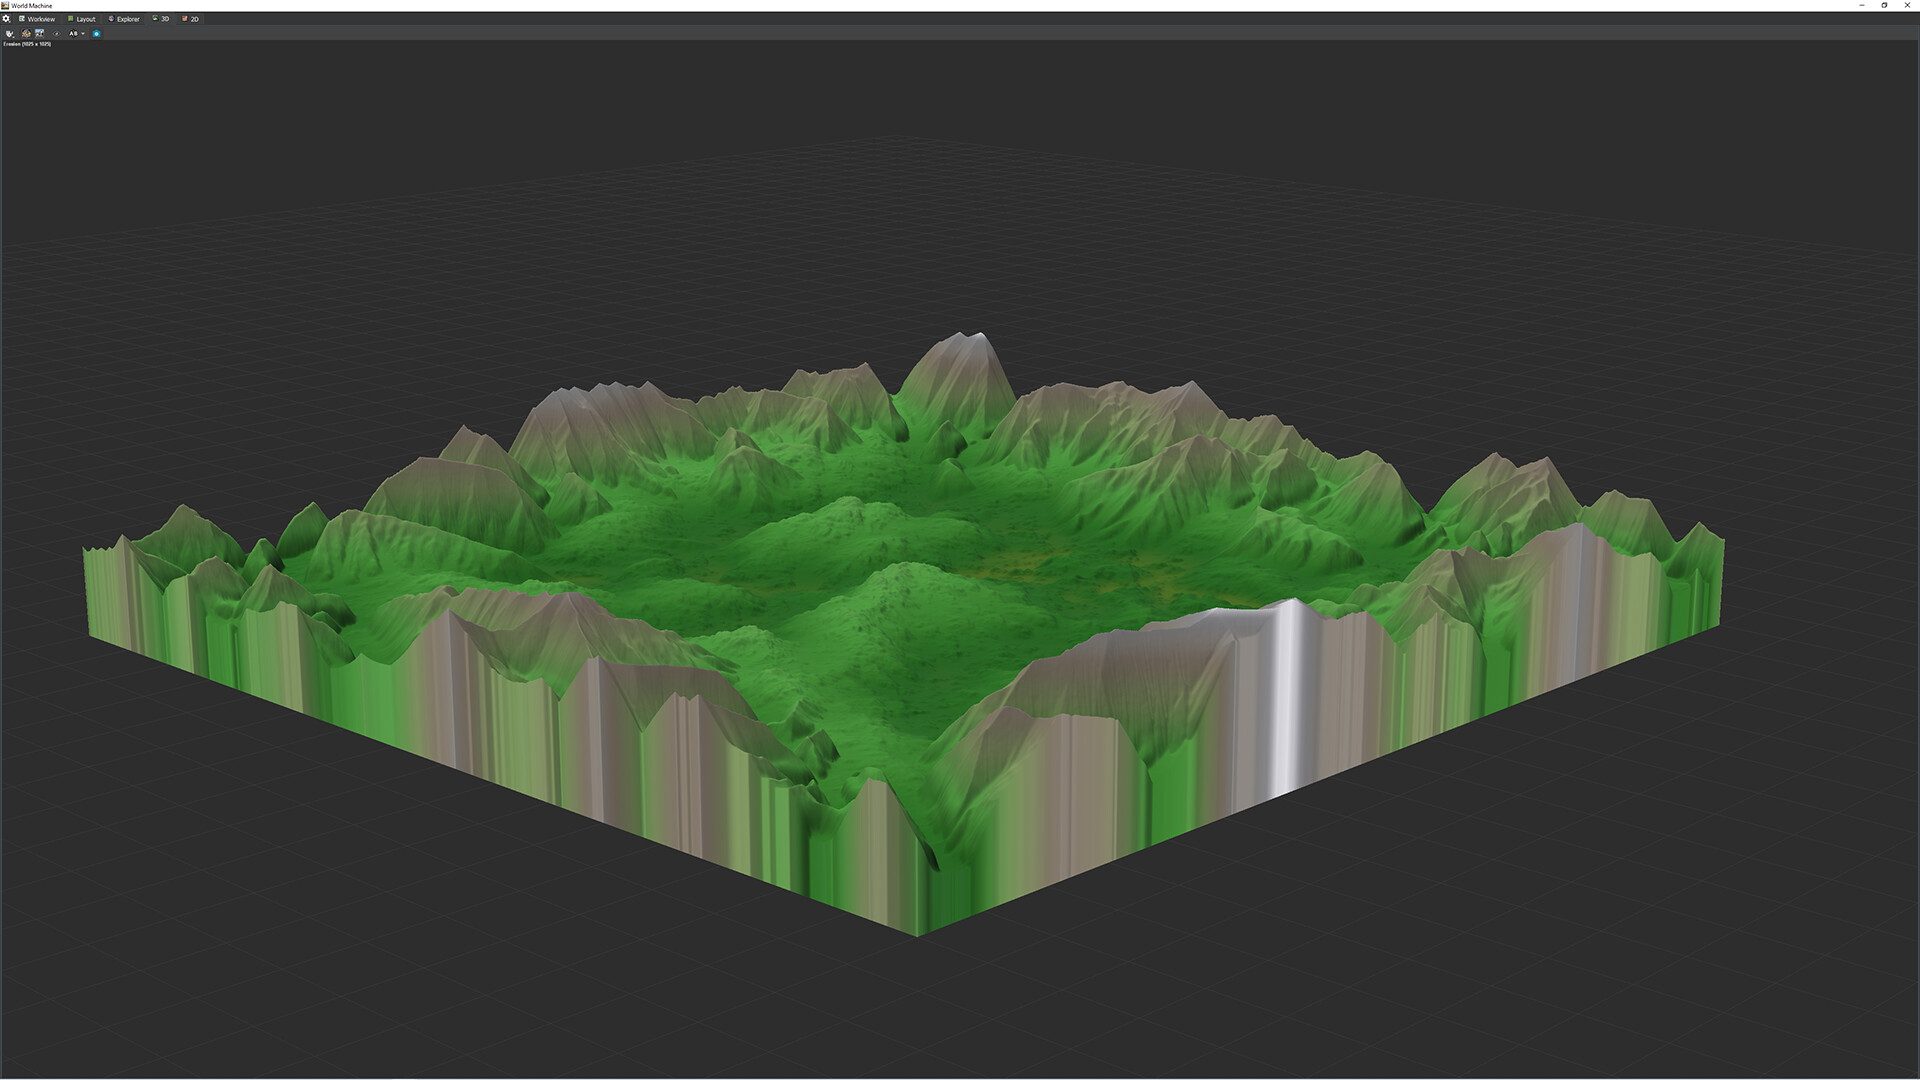
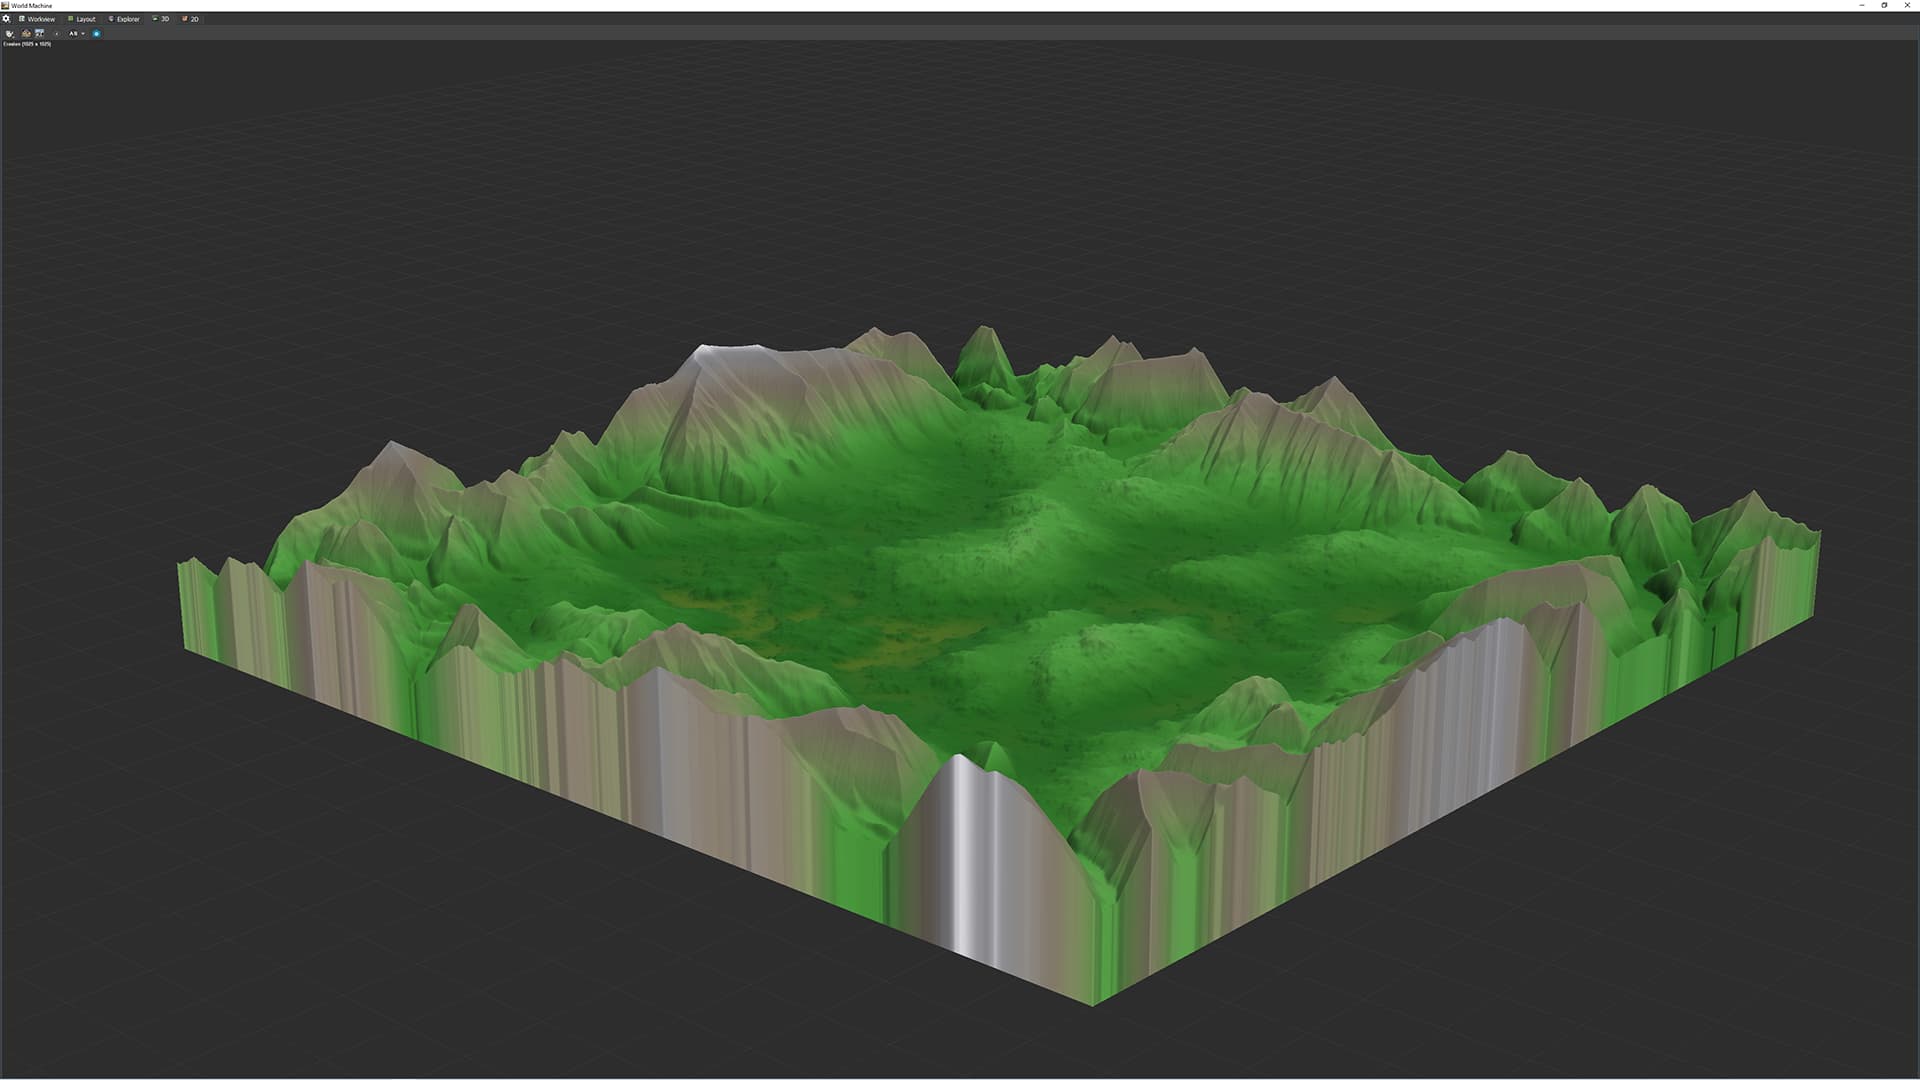
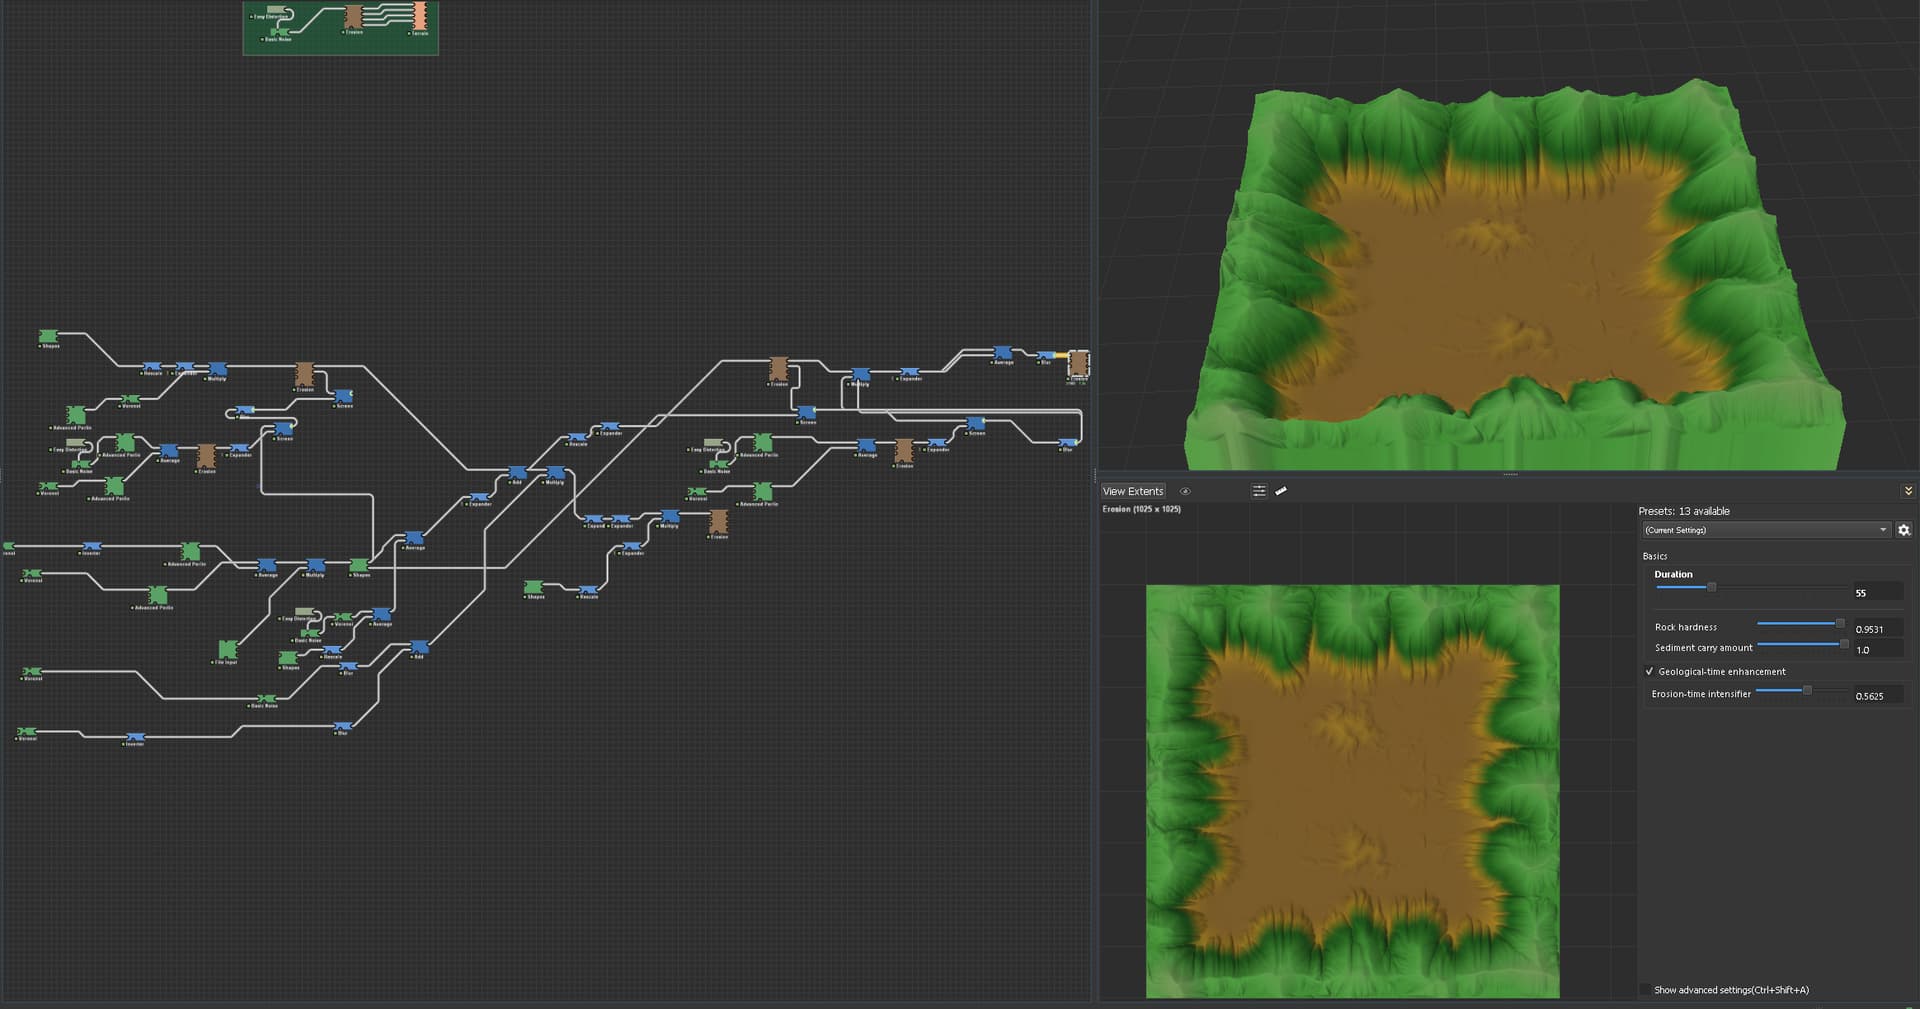
Working through your provided file to get the above tips, this is what I ended up with (with two angles since there’s different types of mountains throughout):
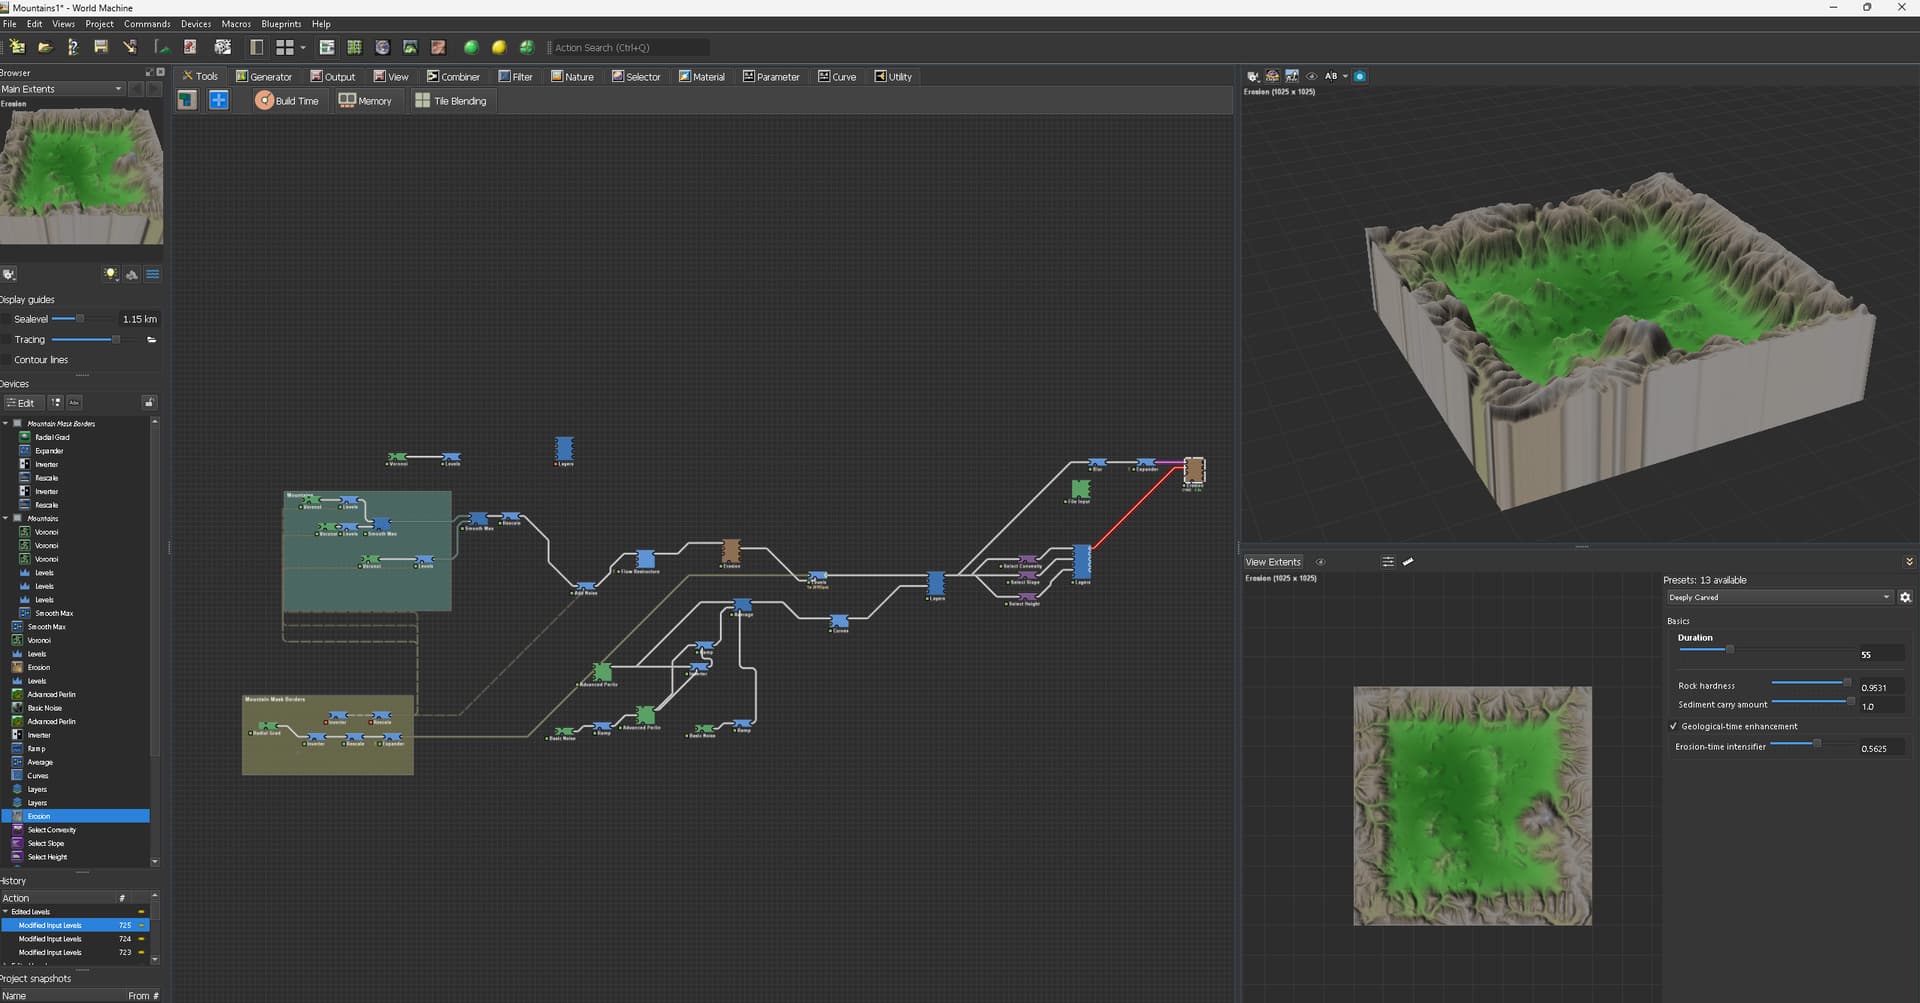
alright i followed your steps, i completely misunderstood a few things haha, thats why i wanted to look at your WM file. my result still doesnt look good here it is, can you tell me what i am doing wrong?
and here is the world machine file
Mountains1.tmd (329.2 KB)
i also switched to 8km map because thats what i want my game world to be.