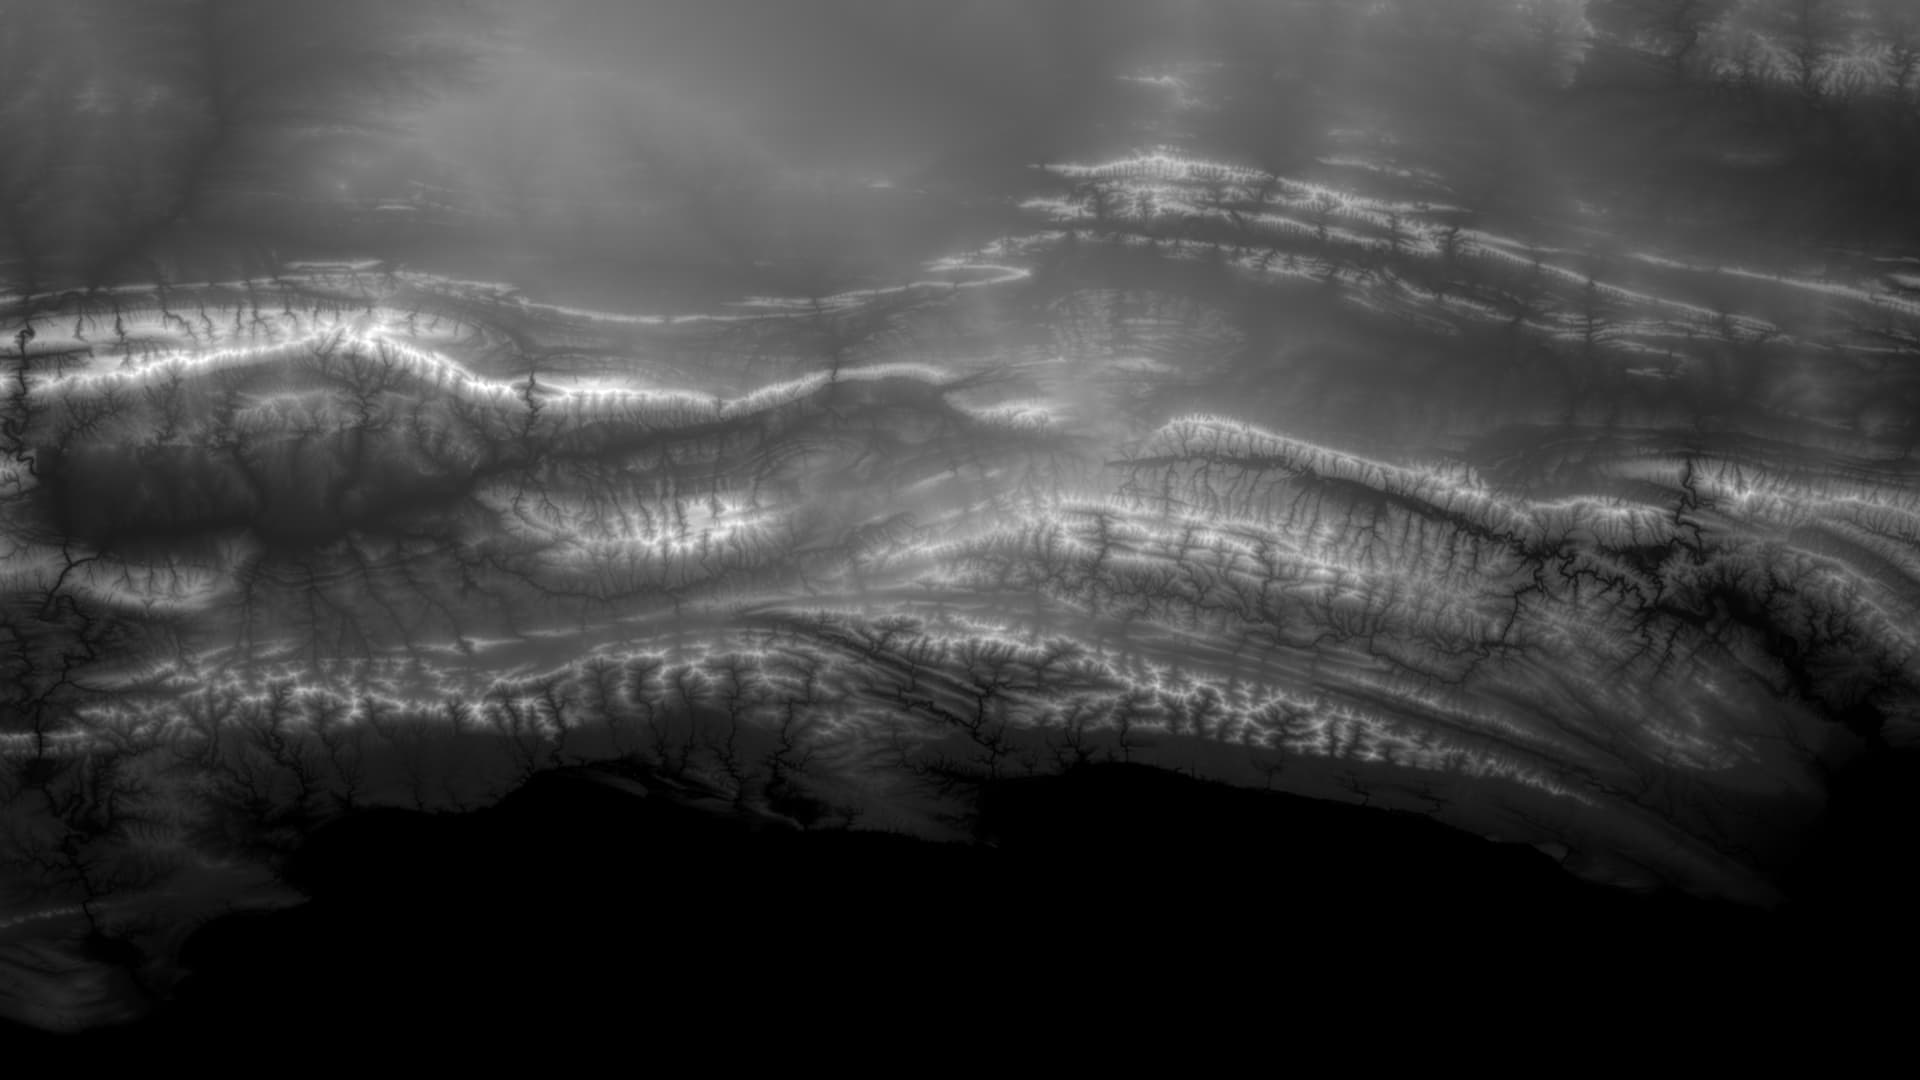
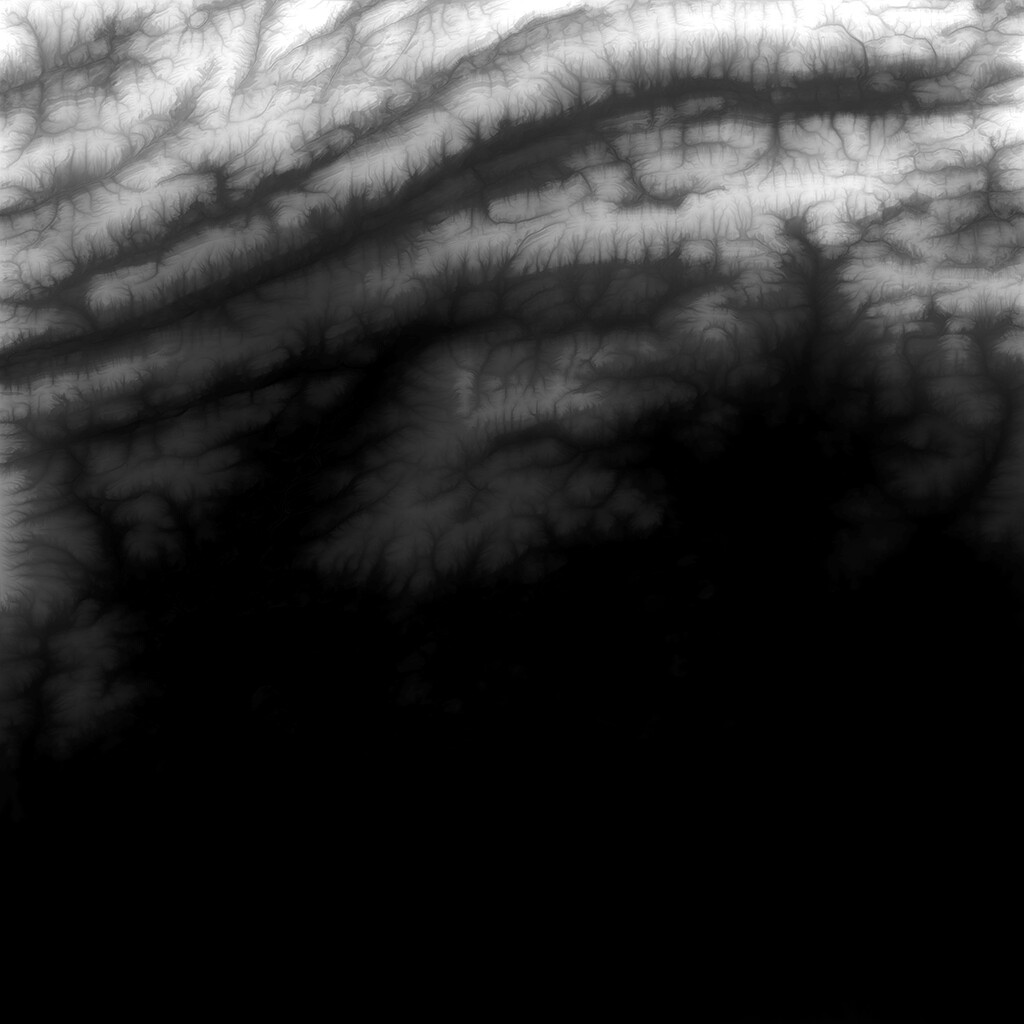
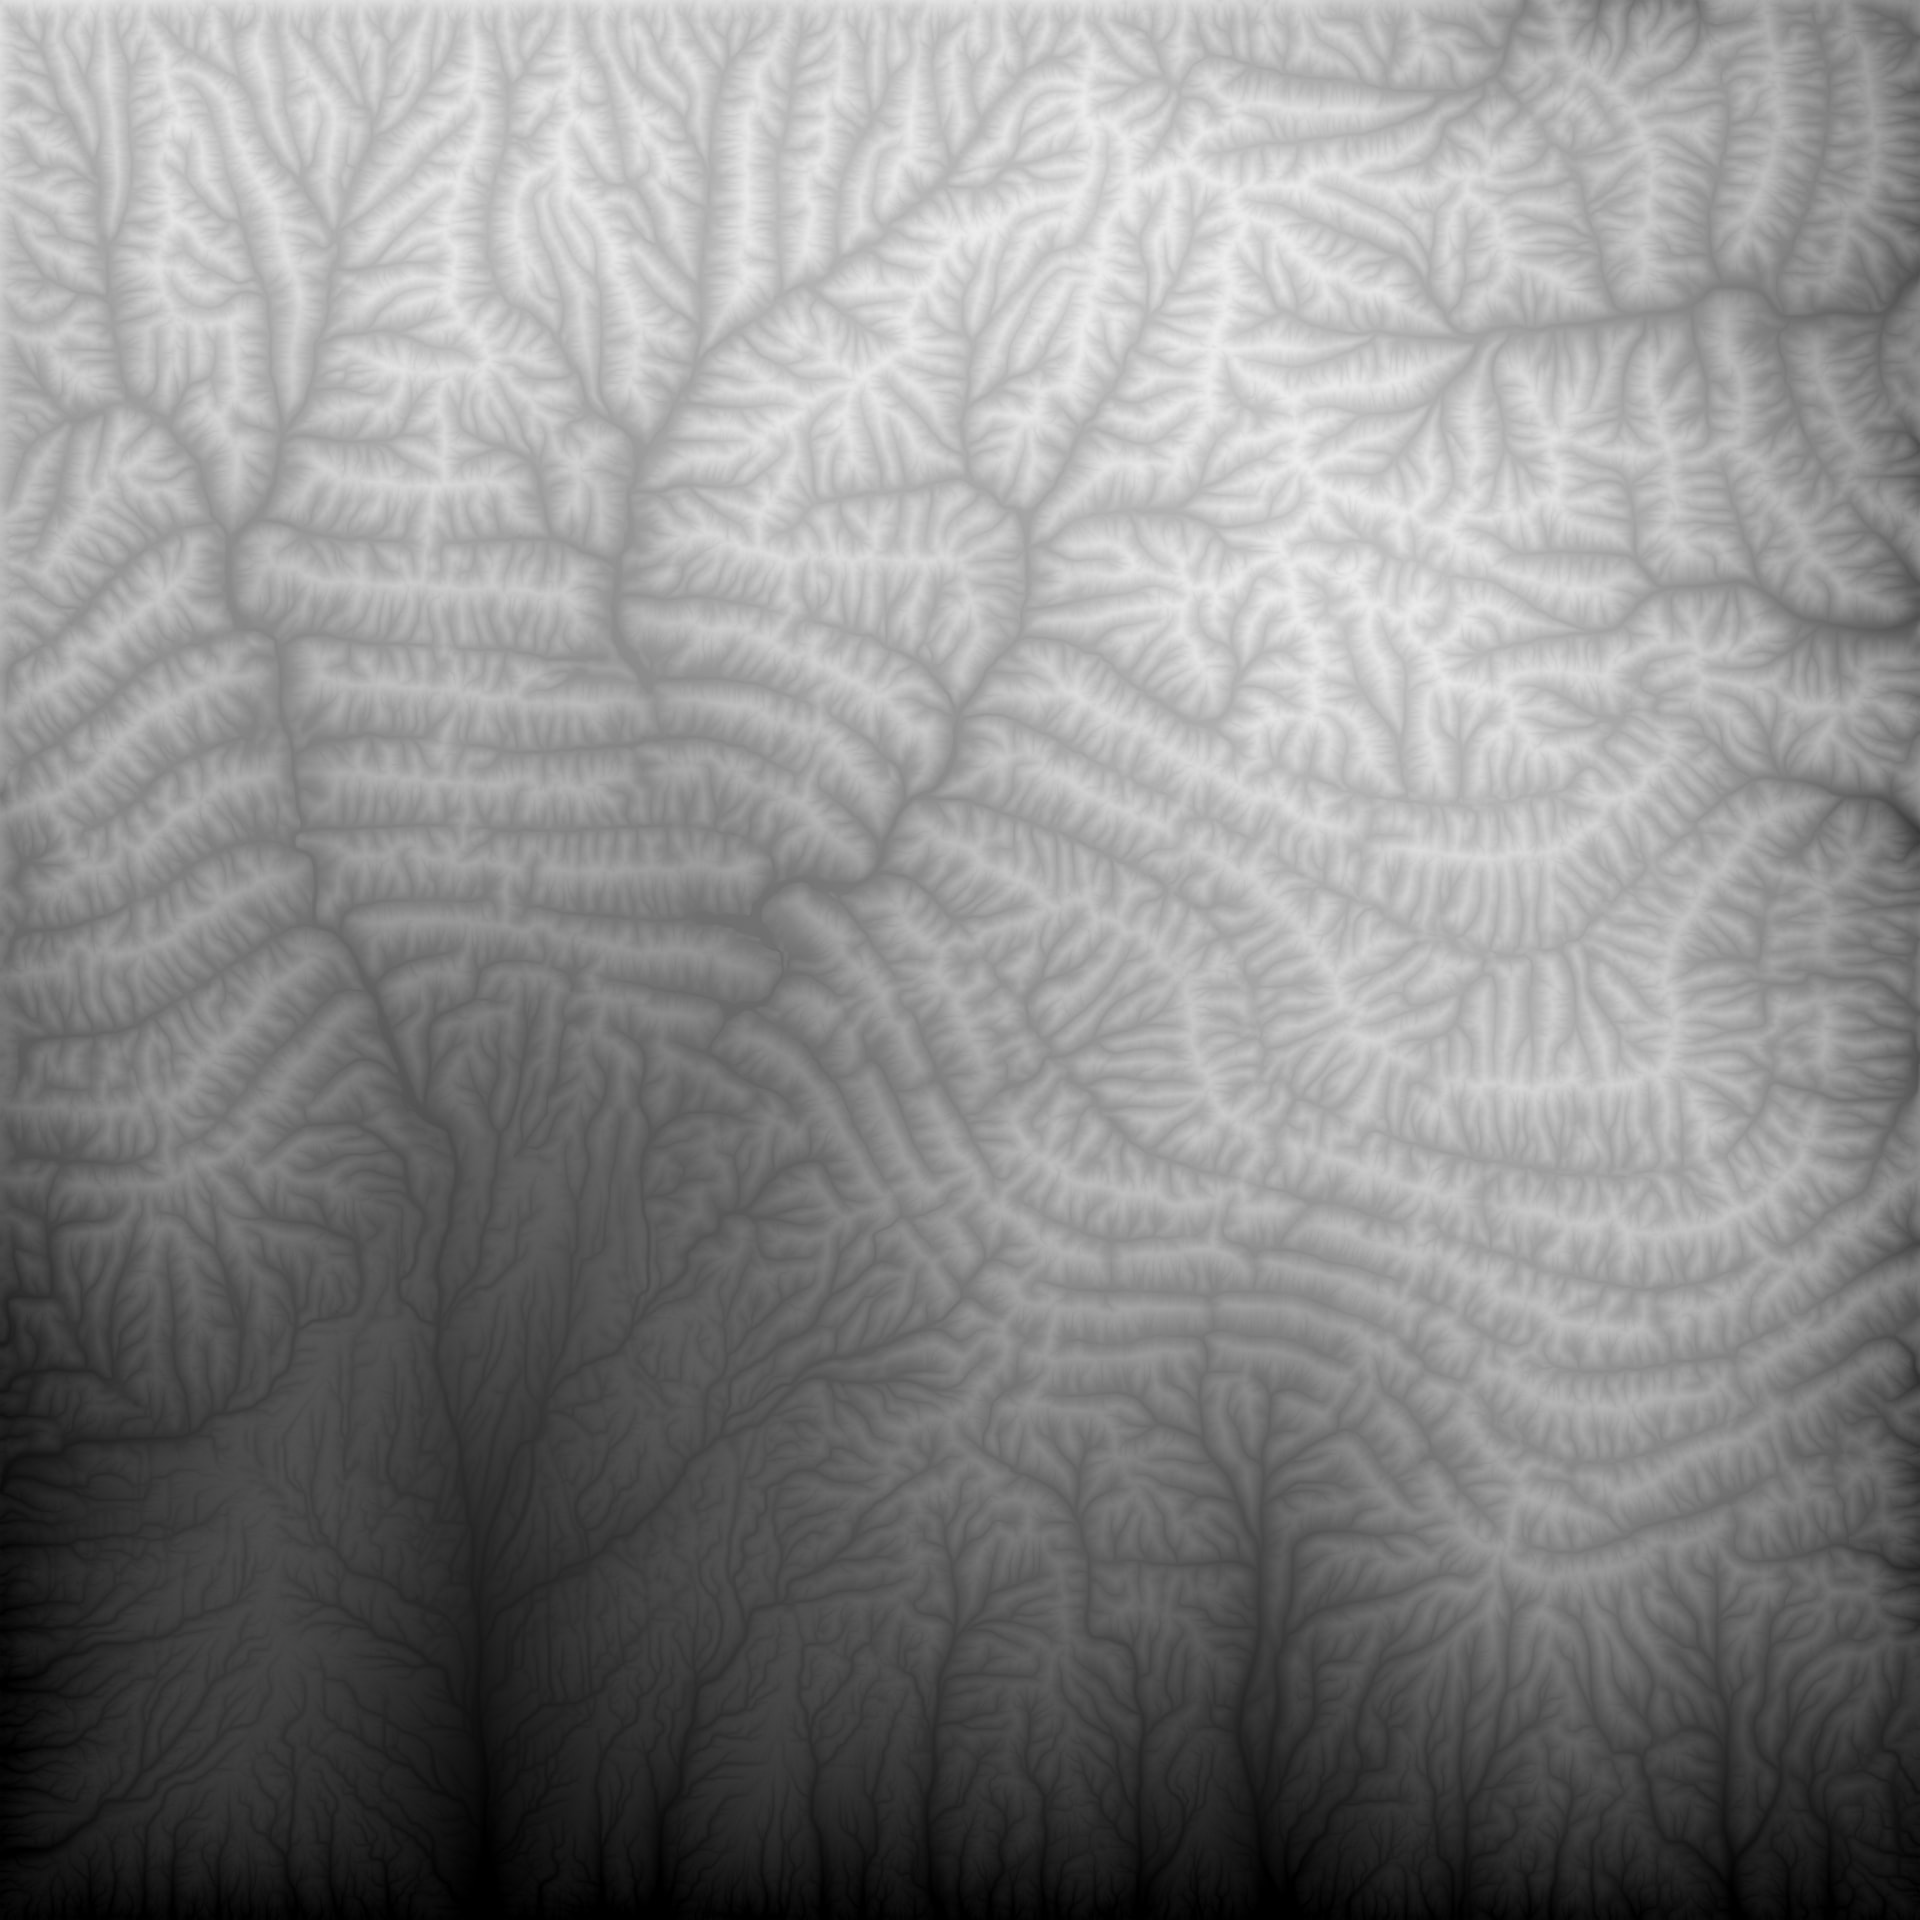
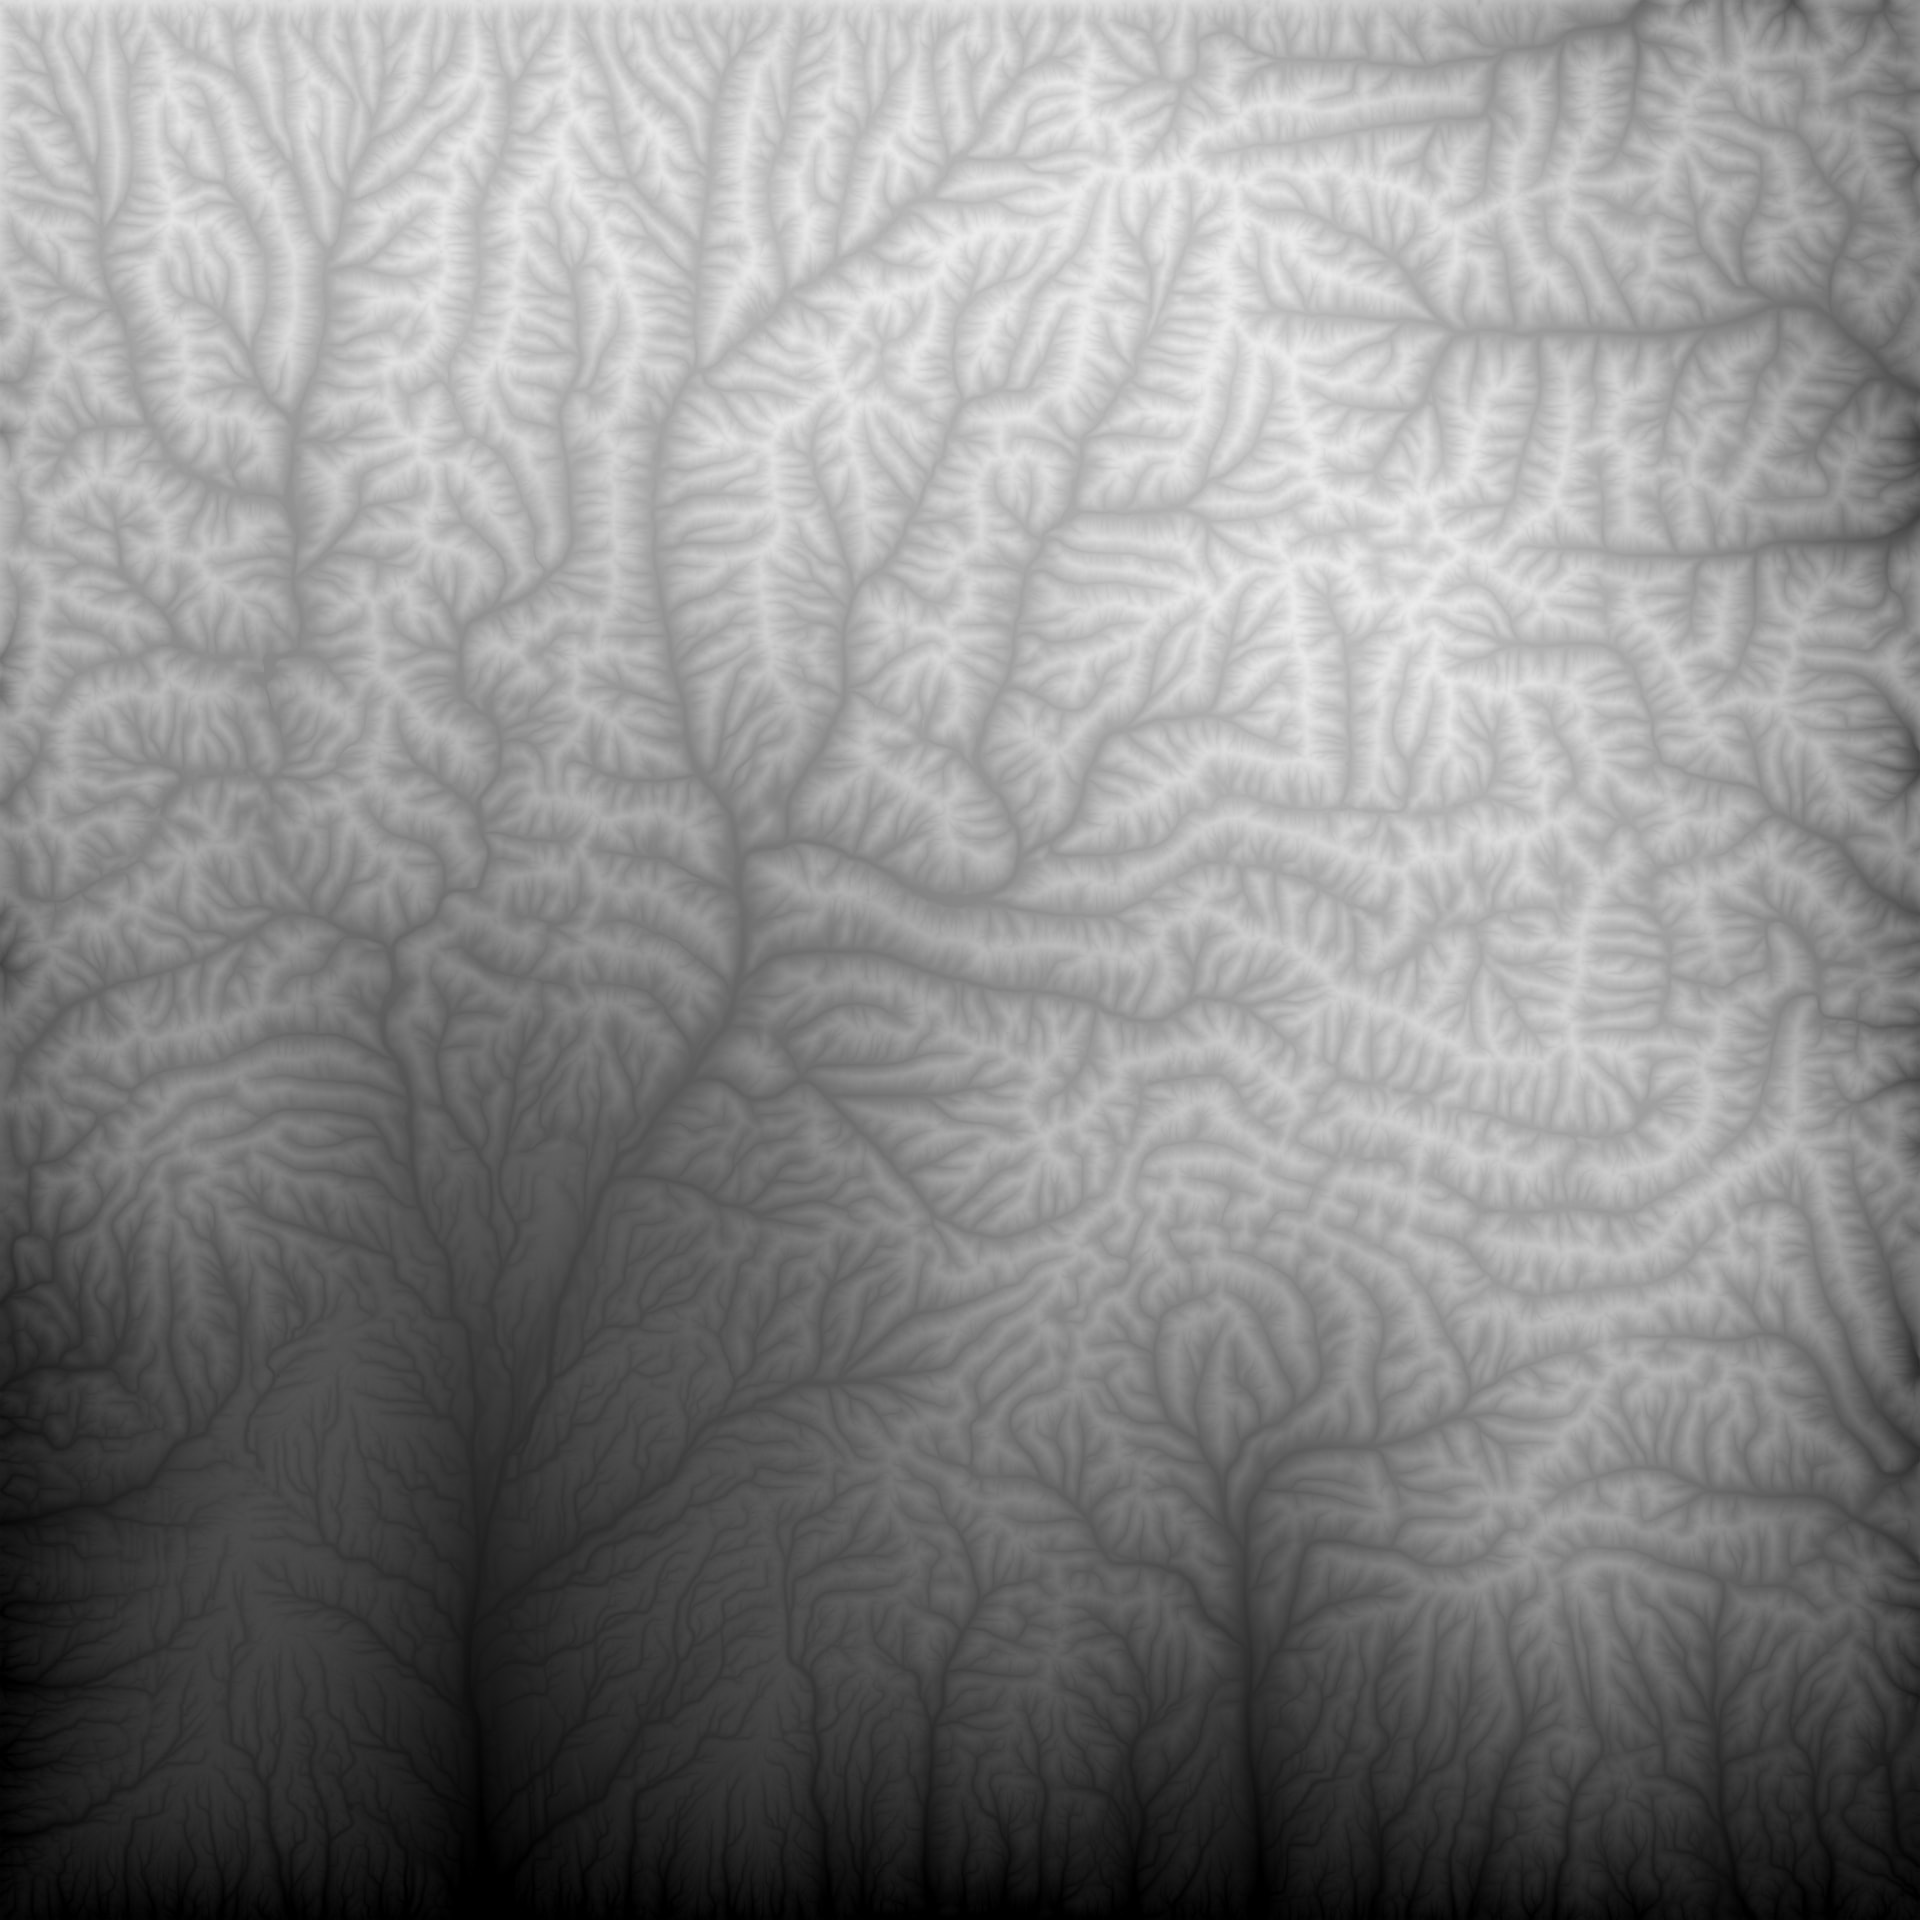
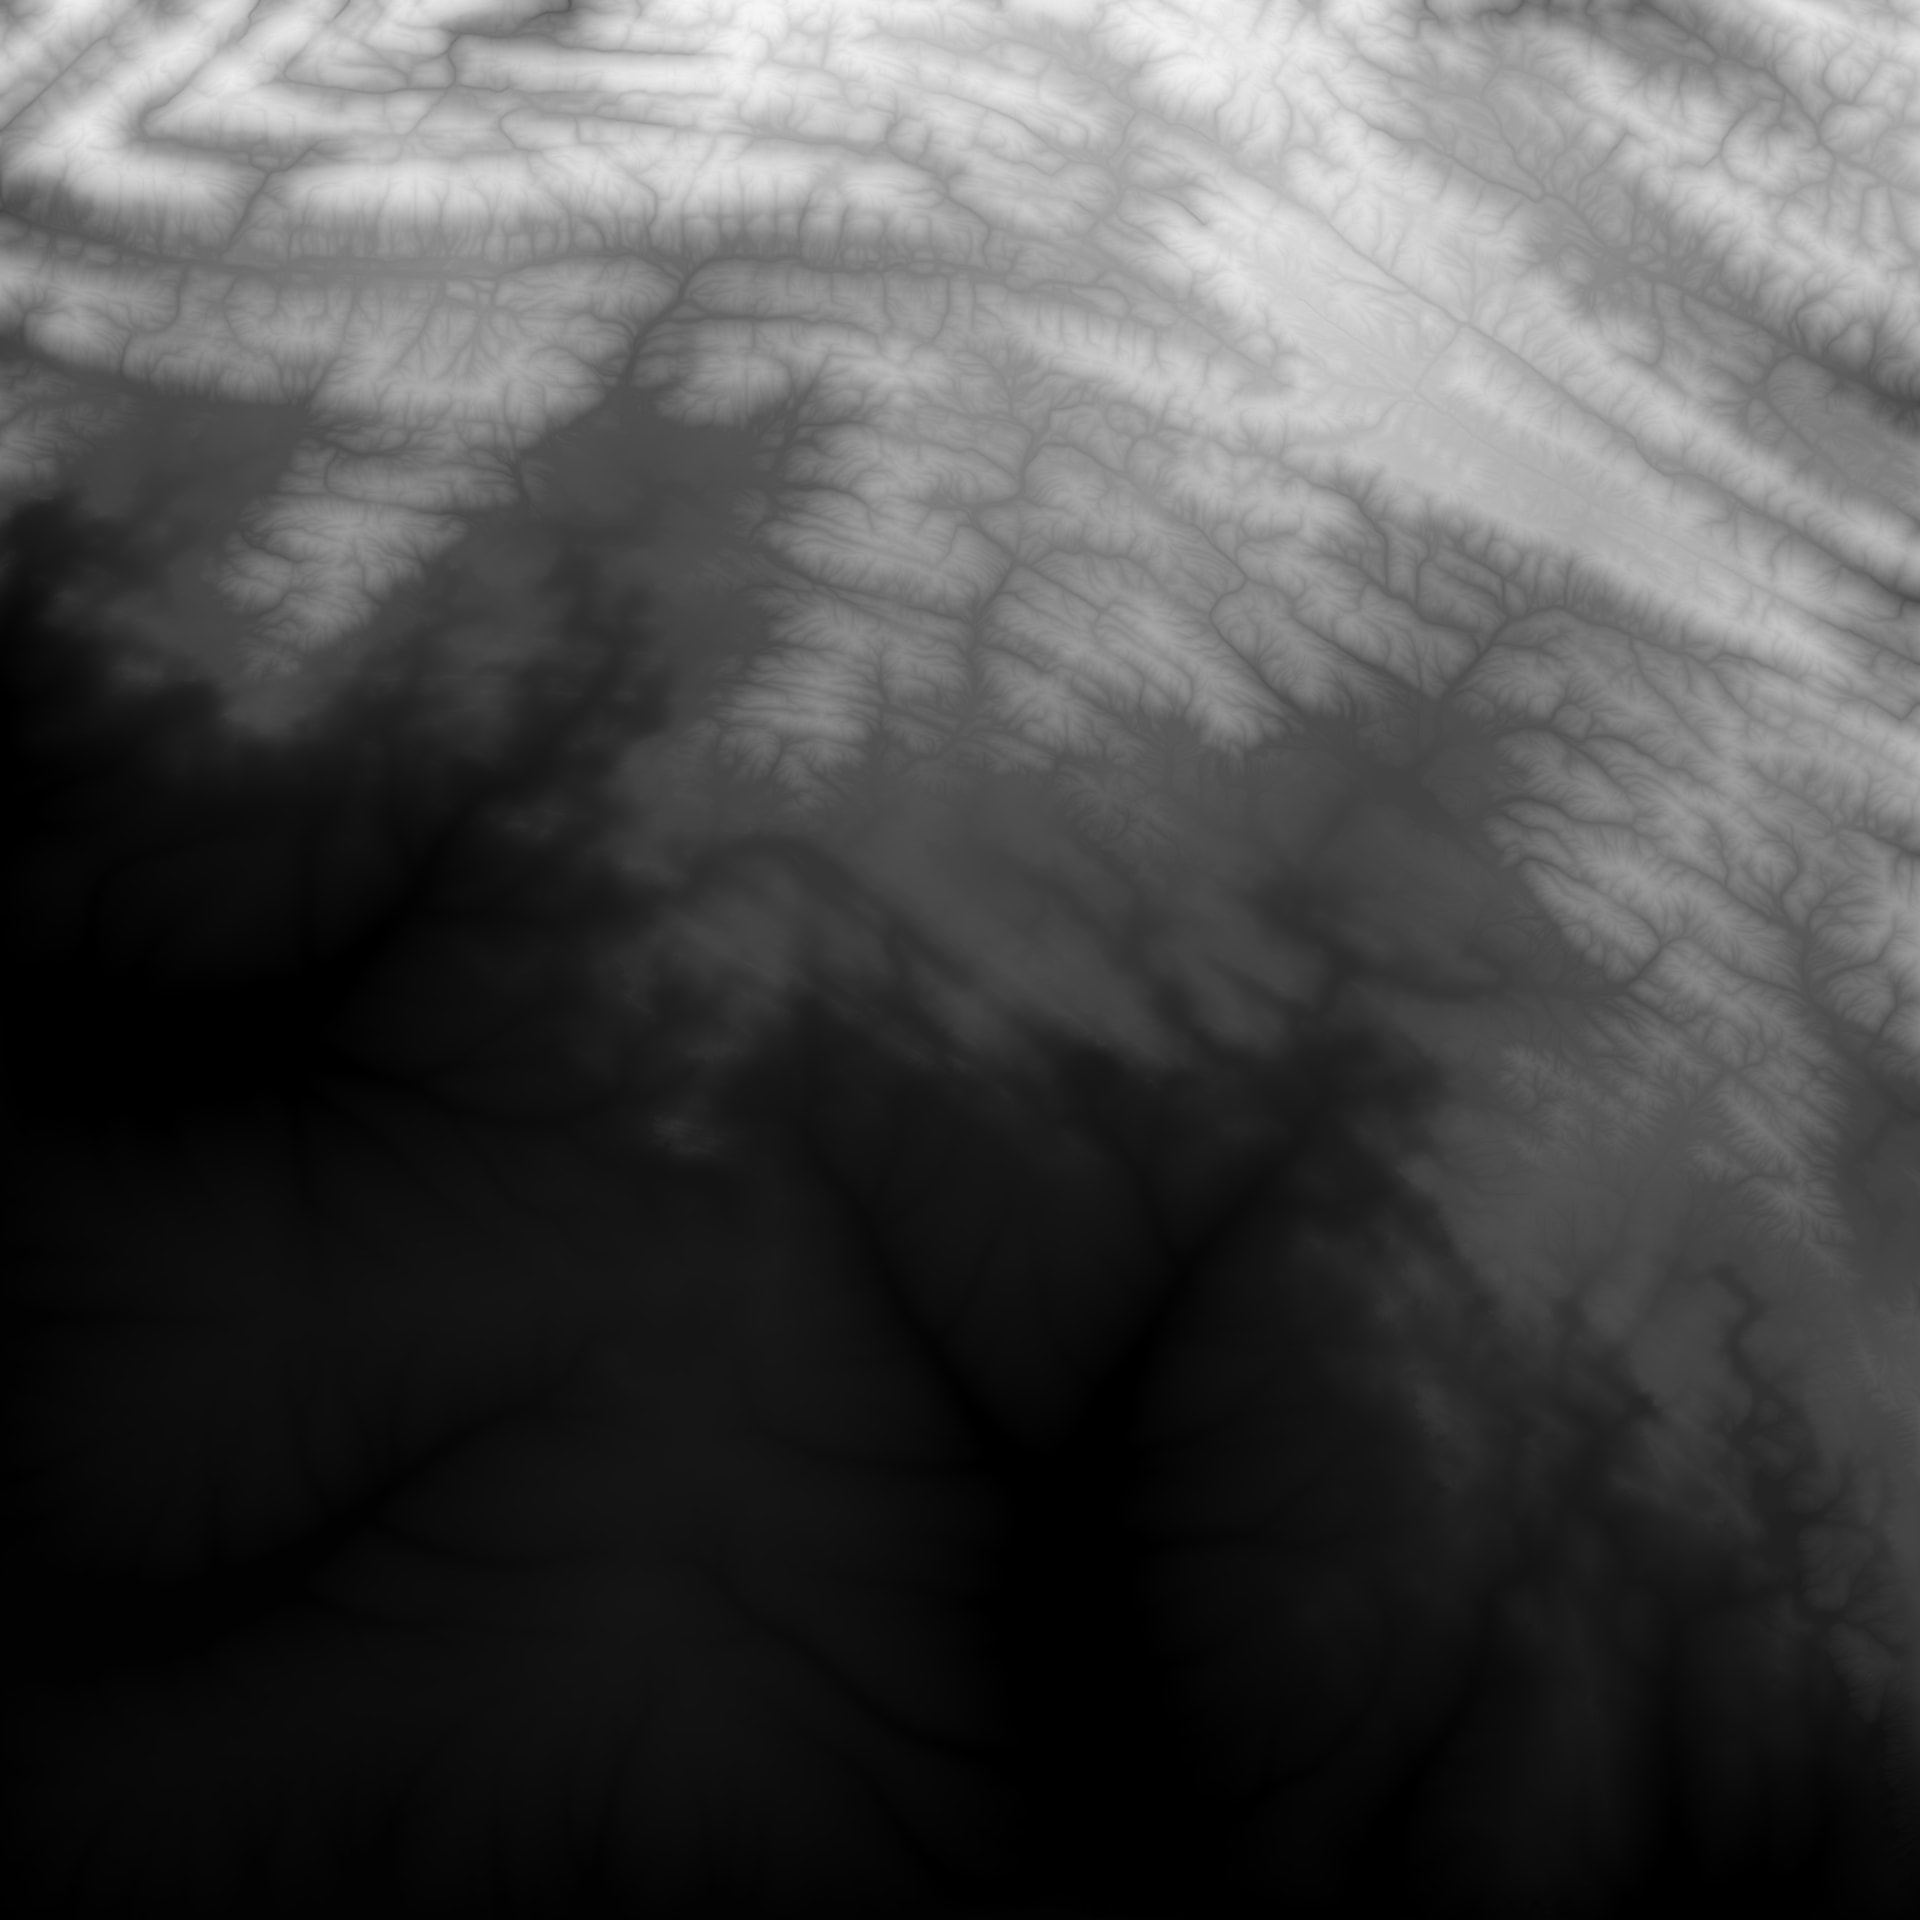
I will preface this by saying I’m still fairly new to Worldmachine, so I’m not entirely familiar with all the tools (but know the basics). I am currently experimenting with creating terrain inspired by the Cape Fold Belt in South Africa, a landscape notable for its numerous parallel mountain ridges, sporadically cut through by small gorges that connect the coastal plain to the desert plateau. Shown above is one of such ridges (measuring about 30 km east to west for scale), as well as a grayscale heightmap of the general area (~400 km) showing the various ranges separated by valleys.
I think I’m knowledgeable enough to make a single mountain ridge, and my current plan is to use a layout generator to create a line shape and work from there. However, I was wondering if there is a way to generate numerous parallel ranges without drawing every single ridge. Is there an easy way to create several parallel lines without having to place every ridge and gorge manually? None of the existing generators seem to offer the required shapes. Any adjacent feedback or advice will be appreciated too!
For now I’ve used my macro to quickly generate those parallel ridges, but this is more to illustrate you do not have to draw each individual ridge! Even better, everything here is procedural. When I have time, I can create a bit of an example world for how to procedurally create those ridges. The answer to that is posted multiple times here on the forum, so you can also go dig for it, but that may be too much of an hassle.
As an additional reply to @HYLK’s: If the issue you’re facing is more related to getting the sort of repeating pattern/initial setup, there’s a couple ways you could go about it. The Ramp device is a solid method if you have a general starting noise already, otherwise a Gradient device set to “Repeat Mirrored” and then a width smaller than the current extents (the smaller the width, the more lines you’ll get) will set up the basic form, and then you can use a Displacement device to get more natural shapes out of it. From there, as HYLK mentioned, plenty of discussions about creating the ridges and valleys.
I’m on a break at work now, so they’re not the most advanced examples, but here’s what I was able to come up with in a little under 15 minutes:
The first one uses a Distortion macro (I believe it’s a factory default one) with an Advanced Perlin device, and the second is done with a combination of mirrored Gradient devices, Displacement, and Ramp, along with some pretty basic processing. When I get home, I can try to make something that looks a little more realistic.
Updating with a process I was able to spend a bit more time on that I think looks much closer to your original prompt:
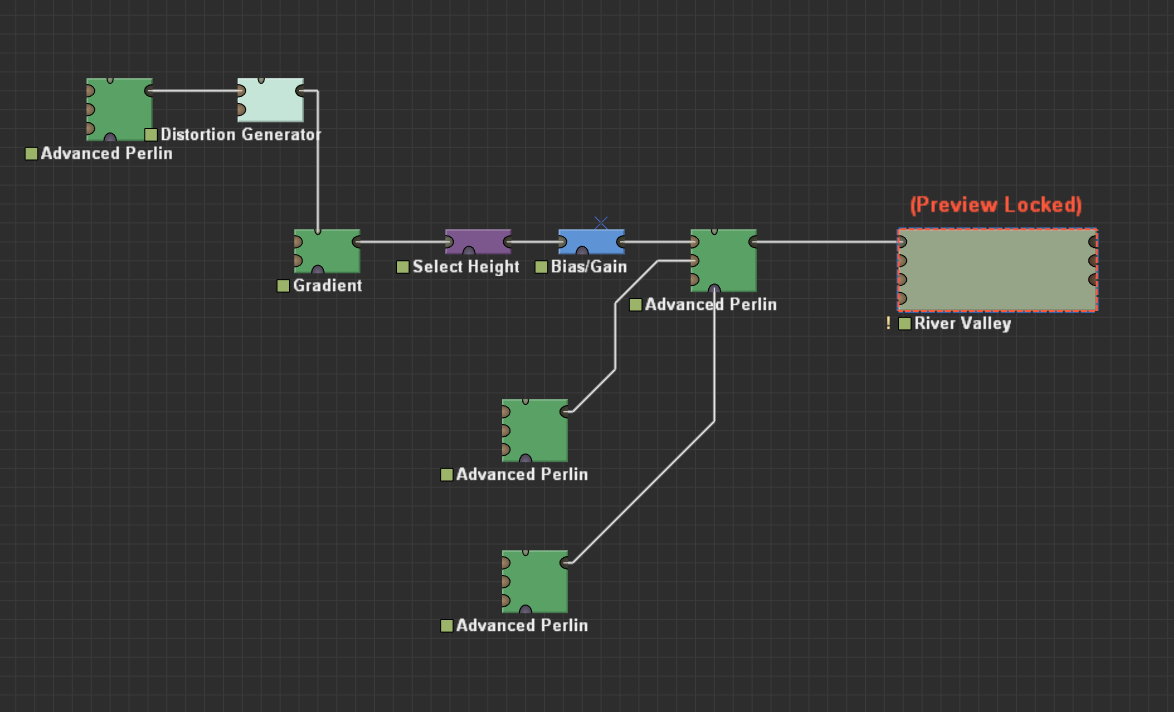
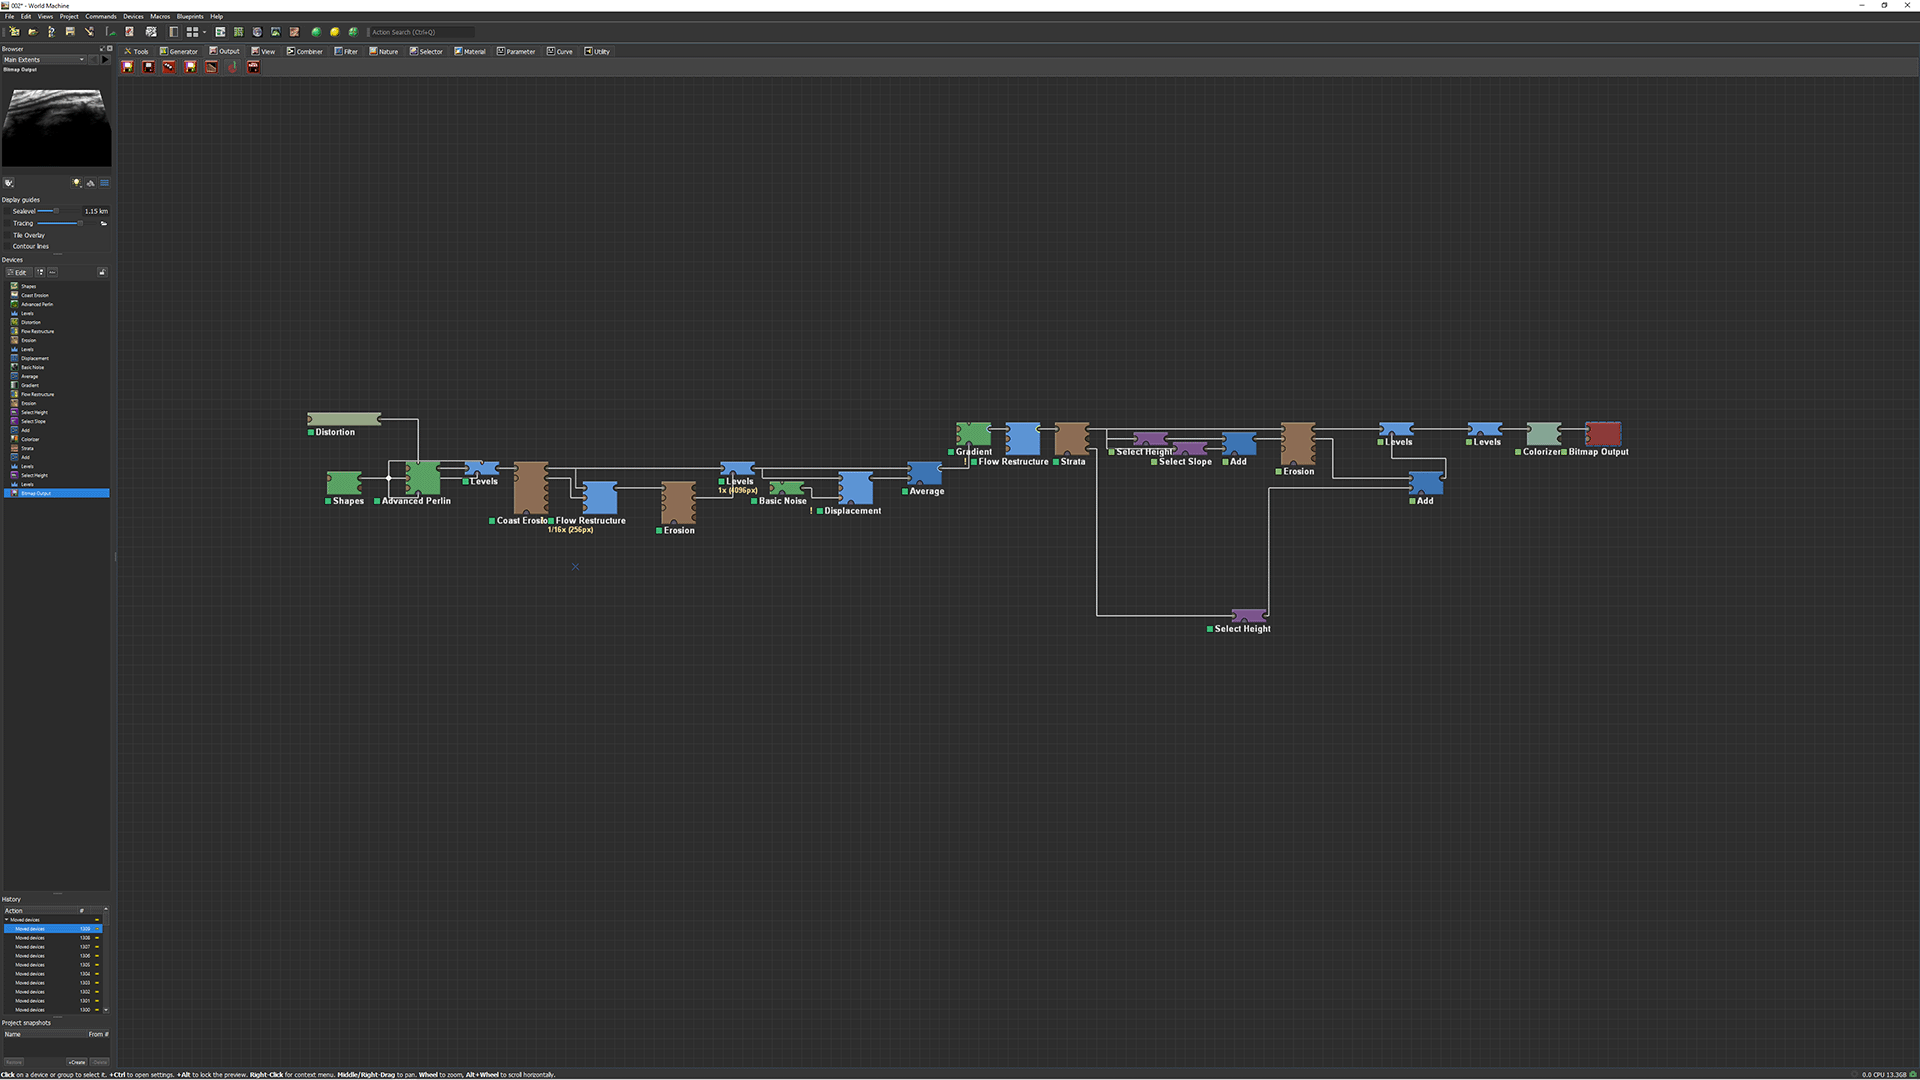
The process I went with this time is a lot more straightforward, just a really aggressive Distortion macro fed into the placement input of an Advanced Perlin that is being masked by a Shapes (or Layout Generator if you’re using an older version of WM) to get a sort of continental coastline. That’s fed into a Coastal Erosion to crisp up the water line a bit. Then I use the method of low resolution Erosion to define large valleys that has been mentioned across this forum before, some basic Displacement to further refine the striations, a Gradient to give a more gentle rise, Strata for different geologic layers (and for a mask that will be useful later to make the details more obvious in the heightmap), and then a fairly bog standard Erosion to finish things out.
Here’s the graph:
Wow, that’s an impressive result! I might try that out a bit. Question though, how did you get the folded effect to such a degree? Every time I use the distortion or displacement maps they’re moved in random directions, which ruin the creased mountain effect.
With Displacement devices, where things are moved depend heavily on the input noises. Try increasing the scale and lowering the persistence values of the input noise. Also, if you notice in the graph shown, for the one use of a Displacement device, I’m only plugging an input into the distortion amount, and leaving the distortion angle empty.
With the Distortion macro, most of the work was done in the “Add Structure” section, which is, by default, hidden behind the advanced settings checkbox. The “Folding” parameter is obviously very helpful, but the “X Structure” and “Y Structure” parameters can be very useful in making the distortion from the folding follow the general contours of your terrain.
Finally, as an alternative to the default Distortion macro, since it’s a built-in/unlocked macro, you’re able to enter the device and edit the noises that define it, so if you’re having issues with it, you can try either recreating it in a new macro with noise generators purpose-tuned for your terrain, or you can just tune the existing generators in the default macro to more suit your terrain.
Oh, and one more final note, if you’re having troubles getting Displacement devices to do what you want, it may be worth it to take some time with a Basic Noise device as the input and various gradient generators, play around with settings, and really get a feel for what’s actually happening in the device. Knowing what to expect from a Displacement device and any given input goes a long way towards being more intentional with procedurally generated terrains.
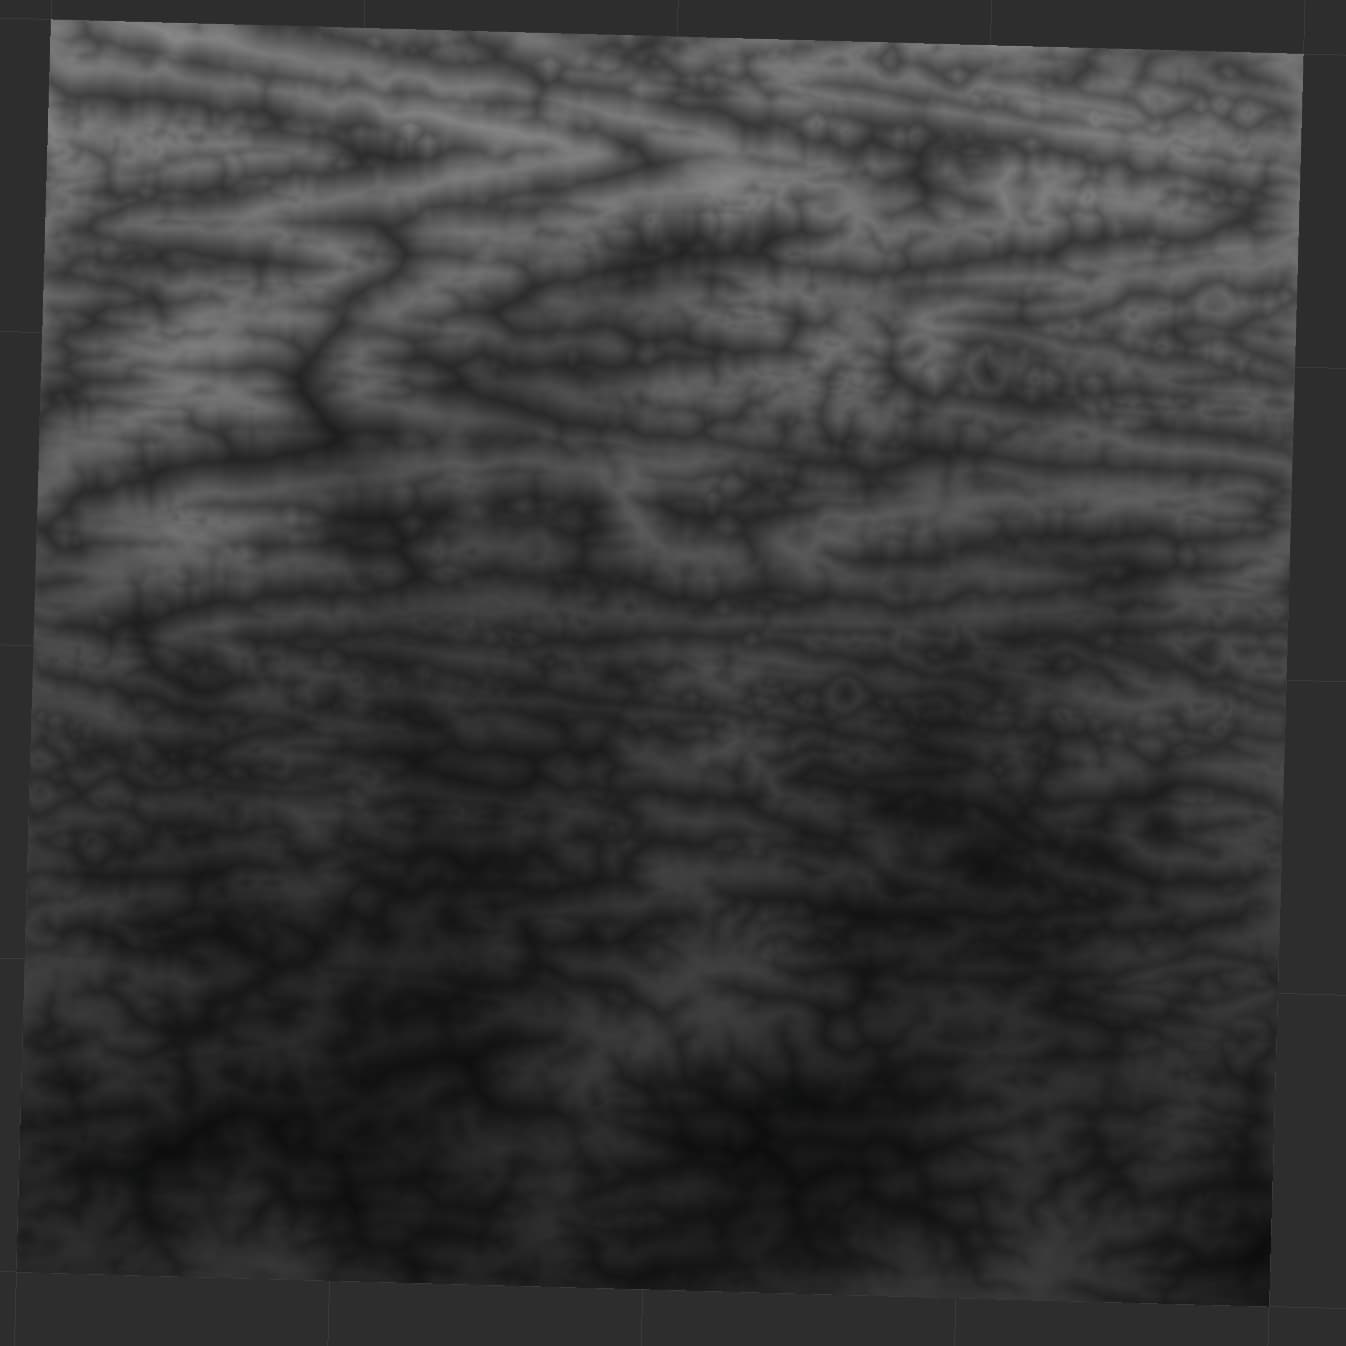
Do you think you could share the TMD? I’d like to pick apart the parameters you’re using, since all I’m getting is (honestly terrifying looking) weird terrain from the erosion flow mask:
Can you post the TMD? As shown above I didn’t get a good (actually very very bad and not-good-looking) result from trying to replicate your results with the shown nodes, with no other settings defined. I need those settings defined, which is why I want the original TMD to investigate myself.
EDIT: I did some more experimentation and found the result I got above is due to the 2nd-to-last Levels block having a gamma set too high; bringing it down carves in deeper and deeper grooves, with deeper grooves at gamma set to 0.
The issue with posting a TMD file is that for quick things like this, I generally don’t actually save out a TMD file. When I get home from work, I can spend some time recreating it, but in the meantime, it looks like you may be using a full resolution Erosion device. For this process, you’ll want to set the resolution for the erosion device lower than the rest of the terrain. It’s a process mentioned in several other threads, so I didn’t go into detail here.
I ended up coming up with a slightly different process that doesn’t use Displacement or Distortion but, instead, a Ramp device on a blurred version of the terrain. The amount in the Blur device will control how closely the ridges follow the terrain (the “scale” of the folding, as it were). The rest of the process remains largely the same. foldedRange.tmd (173.9 KB)
Edit:
For posterity, I also recreated to the best of my ability the original process. Here’s that for you: foldedDistortion.tmd (278.3 KB)
This one, imo, looks better and also has the benefit of building at 4K in under a minute on my machine.
I kinda went a little wild building off of @blattacker’s foldedRange.tmd example,seeing if I could do a nice branched-and-folded hybrid range. I’ll keep playing with it, maybe adding a bit of distortion closer to the ramp so the folds are a bit rougher.
So, the process I used is pretty destructive. The general character remains the same, but the folding is affected enough to make playing around a bit to find a sweet spot between these two examples worthwhile.
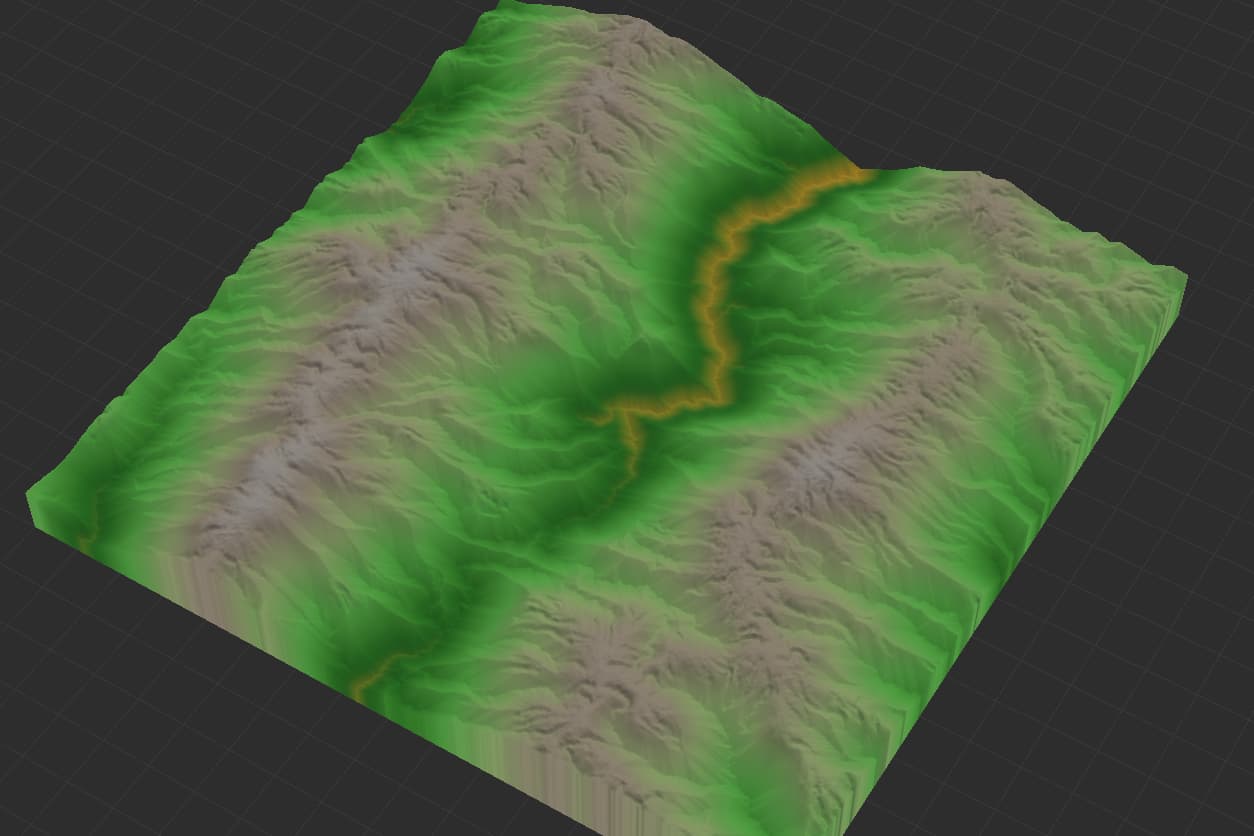
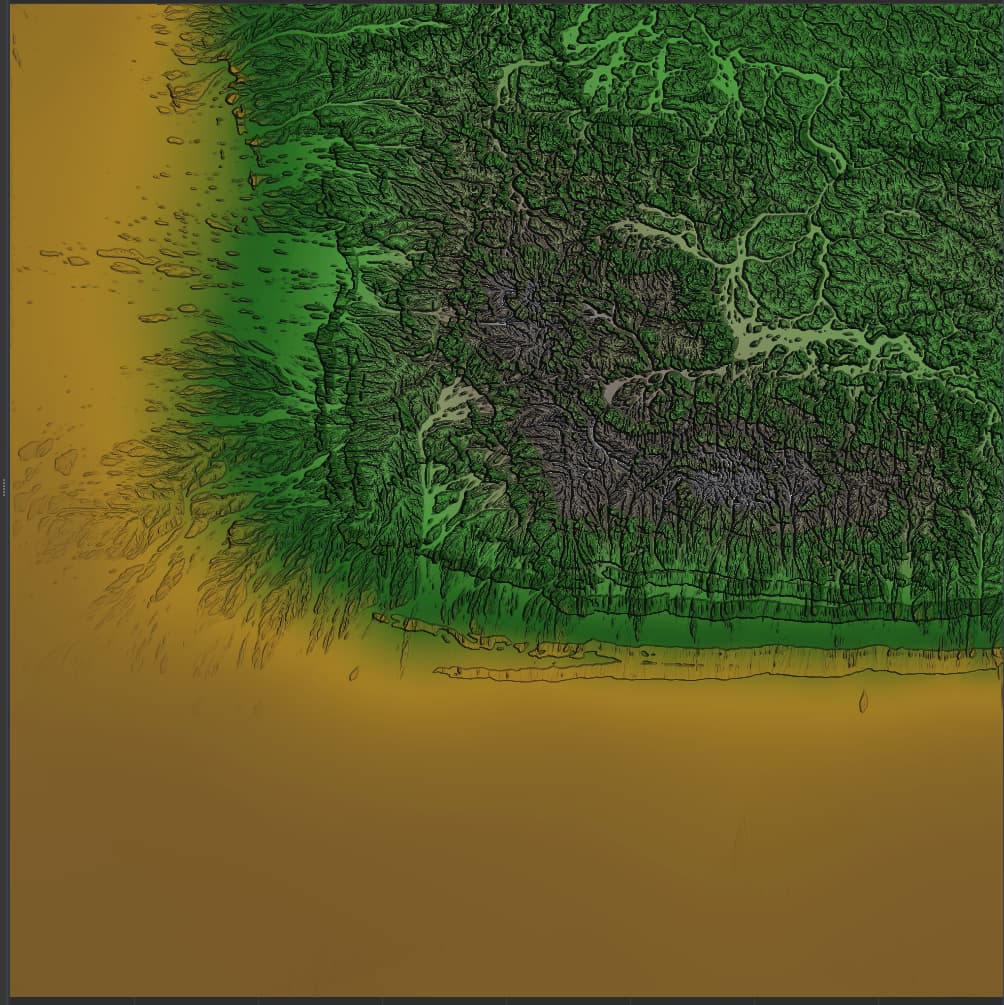
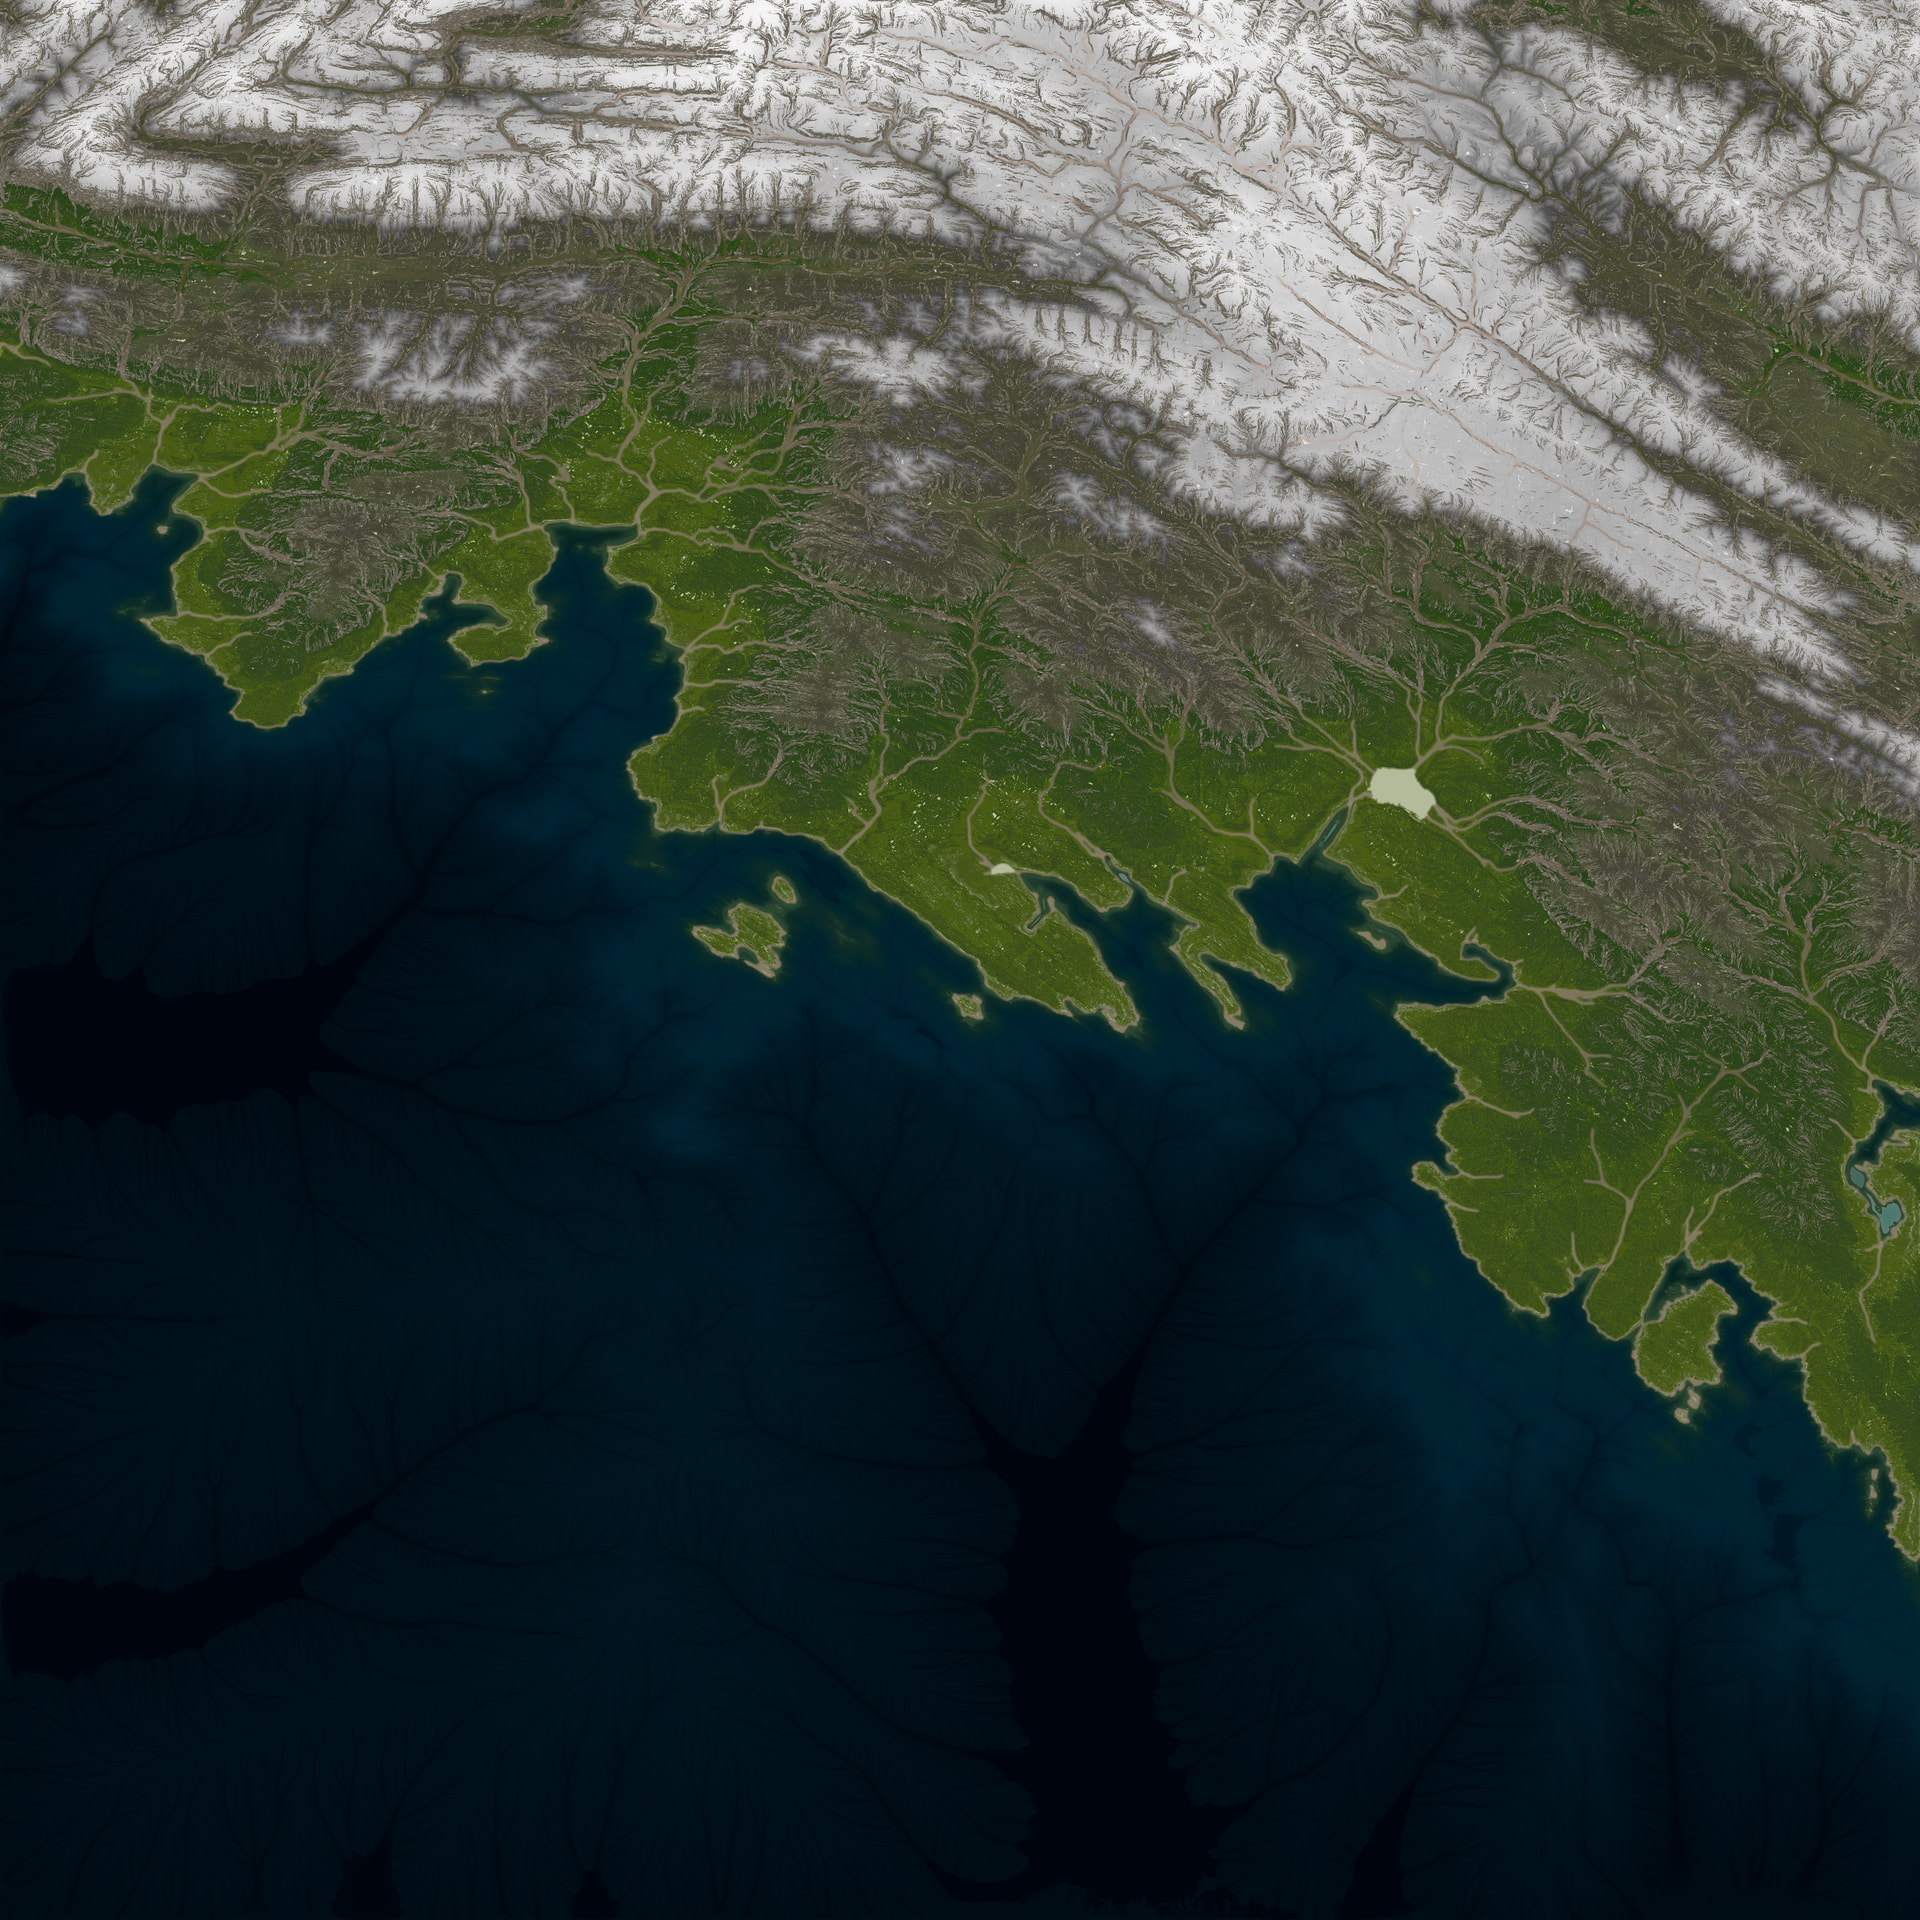
Today, I branched off of @blattacker’s foldedDistortion.tmd – cutting the max elevation in half near the end to deal with the overall steepness. It has the effect of doubling the apparent scale without changing the extents. I also did an albedo layer for visualization. There are things I really liked in each of the examples, so I may do one more experiment to see how they work together.
You’re welcome! I seem to perpetually be in trial-and-error learning mode and sharing my experiments is sometimes rewarded with new tips and tricks from our more experienced forum members.