I actually wondered is there a better way to quickly overlay the mask/color node I am currently selecting over the terrain? I always use overlay view nodes but I think it is kinda clunky. I wish that we had some kind of toggle to display it similar to how height/slope selectors do it natively. I just reread the release notes for Artist point and they say:
New global toggle to display color/material.
Is this actually what I am looking for? And if yes, how do I use it?
This is not what you’re looking for. It’s just a toggle to display material in the 3D viewport, similar to “Water” display toggle. Only reason it exists, is so that you can quickly use that toggle to see your terrain “without” your material, and then enable it again so that you can proceed normally.
It’s probably going to get easier down the line, but so far the “clunky way” is functional enough.
That said:
While clunky, adding a “Scene view” device is your best bet. Here’s my workflow.
I import my library containing all heightmap and mask data. Add a scene view device, and lock preview on the scene view. Open split view to see my terrain.
If you have water packed in your library, add it into scene view as well.
Next, add a “Layers” device. Plug it into “World Material” port of the “Scene view” device. Your whole material will be built behind this layers node.
Now save a copy of this project in a convenient location as a “material building preset”, or save this graph as a blueprint for quicker setup in the future.
Now you are ready to start building your material. Open a split view, and set final build resolutions from the get go. Next follow this method to avoid another headache down the line.
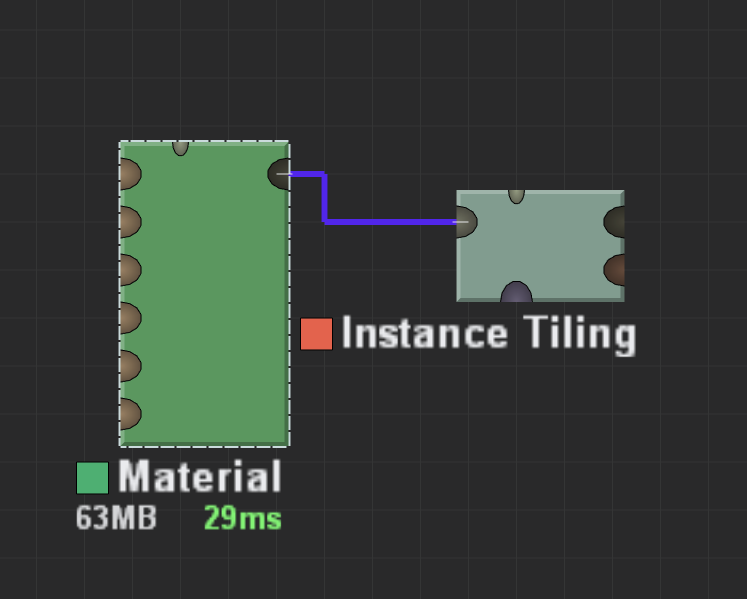
Add a “Material” node, and an “Instance tiling” node. As soon as you set it to “import” mode, the output is automatically set to “local space”. Set up your base material and random tiling (Usually base rock). Instance tiling scatters your local space material “asset” onto your world, converting it into world space in the process.
Now copy paste this set of material+instance tiling to set up your other layers. Editing options from a preset material node is far quicker than setting the set of two nodes from scratch over and over.
Once you get used to this process, it gets easier. Hope this helps!