What's your typical workflow?

I’ve been creating terrains in world machine, and other landscape tools, for a long time now. I have a very specific workflow involving multiple tools, that seems to be very different from most works posted in this forum. World machine has changed a lot these last few years, so I was wondering about these few things:

  1. What do you do with the terrains you build in world machine? Where does it end up?
  2. What kind of work do you do outside world machine, to make your terrain into a full landscape? Both pre processing, and post work.
  3. When starting with an idea, how do you approach designing your terrain in world machine? Start with the first node on a blank graph.
2 Likes

I usually start with a real DEM file or model in Maya the shape with kit bashing scanned landscapes and extract a new Tif file for WM, the work ends up in the movie currently working on . After WM it goes into Maya with Vray Arnold or renderman depending on the production.
The idea generally starts from the script description of the landscape then research and Art Direction, some additional Lidar helicopter scans of the location might be necessary and then back to WM
I’m
Interested in hearing your own answers as well.

2 Likes

@damaggio I used to do contract work for film, and my workflow mostly mirrored yours. I got a LIDAR scan, somewhat remeshed. I started with a simple extract of a heightmap, and then working from there similar to your workflow, maya and mental ray/renderman. Did that for, close to 14 years. Since 2020, I’ve stopped taking uncredited contracts (basically all film contracts lol).

Nowadays I’m working on some reusable terrain assets, yet to be finished. Friendly contracts keep coming in, but grunt work is nothing to write home about. Going to outline the asset workflow below.

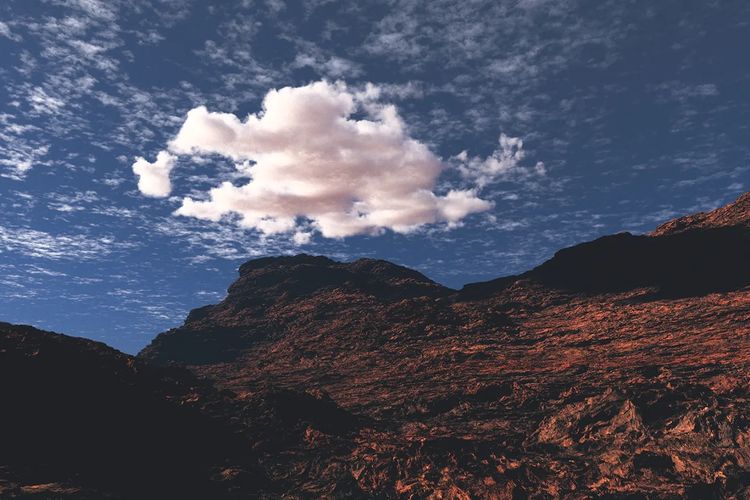
  1. I’m building reusable terrain assets. The final product is a very lightweight data set, complete with an optimized mesh, PBR material, and masks for the megamaterial components. Here’s an example, still a work in progress (I have very little personal time nowadays, got four other businesses, that I inherited recently).
    Island project continuation
    Snowy mountains redux - #7 by WFab

  2. The project starts with an idea. Sometimes I’d look for a reference, but mostly I’ll start doodling away directly. I start most of my projects in Quadspinner Gaea (great for prototyping, and fast). Once I have a reasonably decent profile, I’ll bring it into World Machine for further additional work.
    Once I’ve brought the terrain into WM, I’ll spend a lot of time on the terrain and other data. Gaea phase is maybe an hour max, World Machine phase is multiple months on and off. I’ll expand on wm bit in detail in the 3rd answer. After World machine part is done, I use Blender, Xnormal (dropping it in favor of wm with the next project). The goal of any postwork, is to clean data, correct normals, fix masks, make everything aligned and scaled, and named properly. This post work again takes a lot of time on and off, since this part is the most boring and repetitive, and I have other businesses and household stuff to attend to that’s interesting lol! The final asset should be usable in a flexible manner, independent of render engines.

  3. As I’ve mentioned above, 8 times out of 10 I’ll start a project in Gaea. I’d usually take the data I got from gaea, then turn it on it’s head using world machine noises. Advanced perlin can work wonders, combined with Gaea’s brilliant terrain profiles. If I have coastal erosion planned, that goes first after the shape is done. Along with any “world breaking/moving” terrain effect or transform. Then I’ll do a “Flow restructure” and “Create water”, since I need rivers and other water bodies fleshed out before I can do any other type of erosion. Once I have a basic terrain shape, with water bodies fleshed out, then I can go crazy with erosion filters. Water plugged into erosion nodes gives them a very natural sediment removal, you can do a lot of stuff naturally this way. Once I’ve got my final terrain figured out, then the fun part starts! I work in stages, outlined below:

Stage1: Terrain in full, erosion, snow pass, everything. I’d output all that into a library output, every wire named properly using a checkpoint. Terrain heightmap, water, and all the masks raw, go into this library. This is an intermediate library I’d use for material building (since materials appeared in wm, earliar I did it in Blender using corrected masks).

Stage2: Materials, and dataset cleanup is done during this stage. This is the most complex and memory heavy part, so separating it helps keeping things optimized. Sometimes, I split this part into multiple stages to keep it responsive. Earlier, masks needed a cleanup as well, but now the “layers” device does that automatically (mostly, first mask still needs to be cleaned or corrected, along with partially transparent masks). Again, terrain, material, water, and all of those new masks are exported into a new library, this time all data is cleaned and marked as “final”, and this is the library I’ll keep for the future. Usually, it’s a big memory dump. The Island I linked above had 26 assets embedded into a library, about 22 GB worth of data.

Stage3: Meshing, and exports are either done during this stage, or exports are separated into it’s own stage. The terrain and water is meshed, multiple LODs are created (sometimes in Blender). Normal maps are created, combined, high frequency details are separated and combined with the megamaterial detail map (normal combiner is something I specifically requested during Alpha, saved me a roundabout trip to xnormal or Blender). Then all this data is re-embedded into the final library, ready for exports.

Stage4: Exports are done in a separate graph, in case things need to be exported into different formats. This way, my whole project is baked into a cleaned memory dump that can be used for any kind of custom exports without rebuilding the whole terrain and material graphs again and again. I can go back and forth from this last tmd file to my heart’s content, naming and renaming stuff to make more sense.

Since I’ve started working at my own pace, building assets has been a lot of fun. Now getting them ready for release, again is tedious job like film contracts lol, but working on them at a snail’s pace.

3 Likes

Interesting step by step view of your daily work, thank you for writing that, What is about Gaea that makes you start there first, what feature is superior to WM? I know Dax Pandhi is really good and I loved when he contributed to WM quad spinner.
I usually stick to one software …is hard enough to learn one. Are you on Artstation?

@damaggio Kinda hard to compare these two tools in text. In general, Gaea is very memory optimized, and it’s algorithms are really fast. Imagine WM is made up of just its macro library, and those macros are all calculated at 2k within a second. Brilliant for prototyping, and trying random ideas. It kinda still breaks apart when you try to connect different type of erosion data into one another (Gaea has about 40 different types of erosion nodes). And very hard to “stick” to an idea in Gaea (like working off of a reference). I personally prefer world machine for it’s water tools, and sane erosion design. It’s more a matter of taste, and access to tools really.

It’s really not hard to learn, both World Machine and Gaea are very similar node based tools. Experience is transferable between these two.

I have an Artstation account, though none of my work is posted there yet. I made an account for marketplace access earlier this year.

Last time I checked Gaea it couldn’t output 16k maps, 40 erosion nodes, it’s hard enough to settle for one when building in WM but I think it can be useful if that’s what someone does all day long.Cool I’ll see what you have in Marketplace.Cheers.

@damaggio I have nothing on marketplace yet, I meant access for “buying” stuff. And maybe uploading some works later on. It’s a blank profile just yet.

Oh , okay, I was just on marketplace looking for you, no worries.

Most of my work in World Machine is done for artwork (though with the hopes of one day doing work in a movie) and is mostly for personal projects, though I have done one professional/paid piece years ago on Fiverr. My main goal is going for photorealism in the final render, which I usually use Terragen for. I’m in the process of learning Houdini, since, from what I can tell, Houdini will work better with water systems than Terragen as far as rivers go. I do landscape/nature photography as a hobby, and my goal is to one day upload a render to my Instagram that is indistinguishable from my photos.

My general workflow starts with less of a solid idea and more of a vibe. I’ll go into World Machine with an idea of the type of terrain I want to do (desert, forest, mountain, canyon, etc) and start from there. The rest of the workflow will be listed in easier to digest “steps” ahaha!

  1. Once I’ve settled on a vibe, I’ll load up an appropriate noise pattern, usually just an advanced perlin, but for craggier terrains I’ll start with a Voronoi noise (if we want to talk favorites, I default to the F3-F2 pattern for most things) and then use distortion input or displacement nodes to sort of coax it into a general shape befitting the style of terrain.

  2. Once the base noise is kinda settled on, I’ll usually hit a terrain with a quick, aggressive erosion, inverse filter to sharpen up the flowlines since I’m trying more to simulate primarily wind erosion from the eons before liquid water existed on the surface of the planet (most of my process is starting with a base noise and trying to simulate the actual physical processes that would lead to that layer of the crust forming into the shape I’m going for).

  3. After the first erosion, I’ll lay in with curves nodes, additional noise nodes to bring back some fine detail in the terrain, slight displacement to account for tectonic movement, and then end the whole filter section with a flow restructure to prepare for water (if needed) or the next round of erosion.

  4. Immediately after the flow restructure node, if the terrain needs rivers/water, I’ll hit it with a create water device (if the idea I have needs lakes, I’ll generally use a distorted shapes device to create a semi-realistic shape, though I’m not nearly as good with that, and feed that into the flow restructure’s “drainage basin” input to preserve the lake for the create water node, though this can get real finicky), then the whole thing gets piped into another erosion node, still fairly aggressive, but a lot more “structured”, if that makes sense. This is where I’ll generally do my channeled erosion as well.

  5. If the terrain has any kind of large elevation changes, mountains, canyons, anything with a gradient steeper than rolling hills, I’ll hit it with a thermal erosion, with water plugged into Talus Removal when applicable. If not, I’m experimenting with using the snow device to lay down a layer of soil with more buildup in the appropriate places. This is sort of a newer step, but one that I’m having a lot of success with. It’s also been working great for putting down sand in desert-y terrains, or on beaches, in a way that feels like sand sitting on top of the bedrock, rather than just smooth bedrock transitioning into rougher rock.

Once all that is done, I move into the texturing phase. Lately I’ve been going really hard on the texturing phase in World Machine despite the fact that I almost never use the textures I create in the final render. Having a solid texture before I leave WM has really helped me out when trying to plan/execute the texturing phase in Terragen, and also has the benefit of being able to export any masks I create in the process, and using those in the final render, even if I don’t use the texture itself.

  1. My current texturing process involves taking several new perlin noises, using a maxed out ramp device, then distorting the hell out of it, then using another maxed out ramp device, and repeating that process a couple times (honestly, this is why I love the idea of a “Loop” device for macros) to create what looks almost like a generic noise like you might get from the add noise device, but it also has kind of distinct bands, that I can colorize and kinda turn into different layers in the underlying rock structure. When layered on top of each other (especially when paired with the strata layers output of a strata device) this can create these really intricate (and beautiful, in my opinion) color layers that mimic real life, and also don’t have their “layers” limited by the elevation of the destination terrain. Especially when I use the same process to generate the mask for the chooser when layering these, it can make patterns and colors that I just feel I could never do on purpose, and brings a good deal of really great organic randomness to it.

  2. Once the texturing phase is done, I’ll export the terrain (usually as a .ter file, as I’m working in Terragen right now), and any masks that I used in the texturing process. I load it all into Terragen, and go through a very basic “baby’s first Terragen render” process on that, as I’m nowhere near as skilled or experienced with Terragen. I’m trying to get better with using their population system for adding in things like grass, trees, etc. I’m also trying to learn their cloud system better to get more dramatic skies, but that’s slow going cause my computer isn’t the greatest. The only real “workflow” things I do regularly is set the output resolution to the same as my camera that I use in real life, and also set up the Terragen camera’s sensor size and focal length to the sensor size of my camera (Sony a6300) and focal length of my lens (usually a 35mm or 50mm).

  3. Once the render in Terragen is where I’d like it, I’ll do a final export in OpenEXR format, then take that render into Photoshop and use the Camera Raw filter on it to do the same style of editing on it that I do with my actual photos. If I’m just not getting the dynamic range I need from a single render, I’ll do like I would in real life (albeit much slower) and render out at a few different exposure values, bring them all together, and use an HDR photography editing process on it.

As you can probably tell, most of my workflow, at every stage, is kind of obsessed with trying to mimic real life as much as possible. Most of it is due to having a fascination with the natural world, and almost using this as a way to understand it better, but some of it is also due to having a brain that really wants to do creative things, but has zero ability to actually do, so I just rely on the concept of “well, the world happened like this, and the world is beautiful, so I just have to copy the world, and I can probably make something beautiful.”

4 Likes

@blattacker May I take a look at your finished works?

@WFab For sure! I don’t really think I have anything to write home about, so to say, but I have an ArtStation with some of my older works (I’ll also work on uploading some of the newer stuff today, I always forget to update it). I’m also adding one in here that I don’t think ever made it online cause I wasn’t super proud of the end result (though I was happy with how I got there, which is why I continued with it).

Initial idea is explained after image

So, living in Michigan, I’ve got all the Great Lakes around me, so this idea sort of started out as like “what if Lake Superior dried up completely?” And I started taking inspiration from the Pictured Rocks area, but then went for more of a generic canyon style texturing because I just could not figure out how to get the look I was going for.

A lot of my other finished works have made it into this forum (Like this one), and then here is the latest one that made it to Instagram:

Still just trying for a good canyon scene

2 Likes

I’ll post some of the work on LOTR at my Artstation when is released, some stuff I did with the tower in the lake is in the trailer 2.

3 Likes

The island you did turned out very nicely, I would love to see that in a path tracing render with the final textures done and ocean also. Your facebook page has a great collection of terrains as well .Congrats Pratyaksh,

1 Like

@damaggio Thanks man! Much appreciated!

I’m still working on a good enough blender scene, I’ll link it here once Ive got my first render sorted. Apparently I suck at “lighting” stuff lol!

Yes , please do so when it’s ready for prime time. :+1:

1 Like

I will keep it a little shorter but thanks for all your detailed explanations here so far :slight_smile:
So I am using World Machine for game terrains (proprietary engine) that works mostly with heightmaps and texture masks. Since the game’s design (Anno 1800 - My Artstation profile) requires mostly islands, specific rules for the game to work and specific biomes I love to work with shapes. I think I have mentioned time and time again that shapes are my favorite node ^^ I guess it is because of their non-destructive nature which allows me to create art directed, flexible graphs that can be shared among artists and designers and they can design islands with it and they just have to know how the shapes work instead of how the whole graph works. Of course they are welcome to change stuff but when in doubt, they just use the shapes with rules that have been discussed before. I don’t have a specific approach for terrains but I guess I always tend to go something like Shapes → Displacement/Distortion → Combining → Erosion → Texture masking. The output data is used within our in house editor.

2 Likes

Nice team effort in this game Bjorn, your series of images are very nice, must be fun to design those worlds . Well done.

1 Like

Yes it’s fun to design those worlds. It would be even more fun if there weren’t those pesky game design rules that dictate stuff like terrain slope for the buildable areas, beach angle, beach height etc :smiley:

1 Like

Haha, very true, it’s funny you said that, we all have guidelines or sometimes just bad art direction, I also have to deal with this specially in these big blockbuster movies, that’s why once it’s done I go back and try to do my own version for the Artstation page. Also in film we have to conform to the budget and the shot, but in your world you get to extend and walk around and that’s the cool part I don’t get to do.

1 Like

What is a typical resolution of a WM build for that kind of game, I know it must depend on the extend of the world, also you must use tiling feature but let’s say a single island build, what’s the needed resolution?